2022 Session Service Manual
5
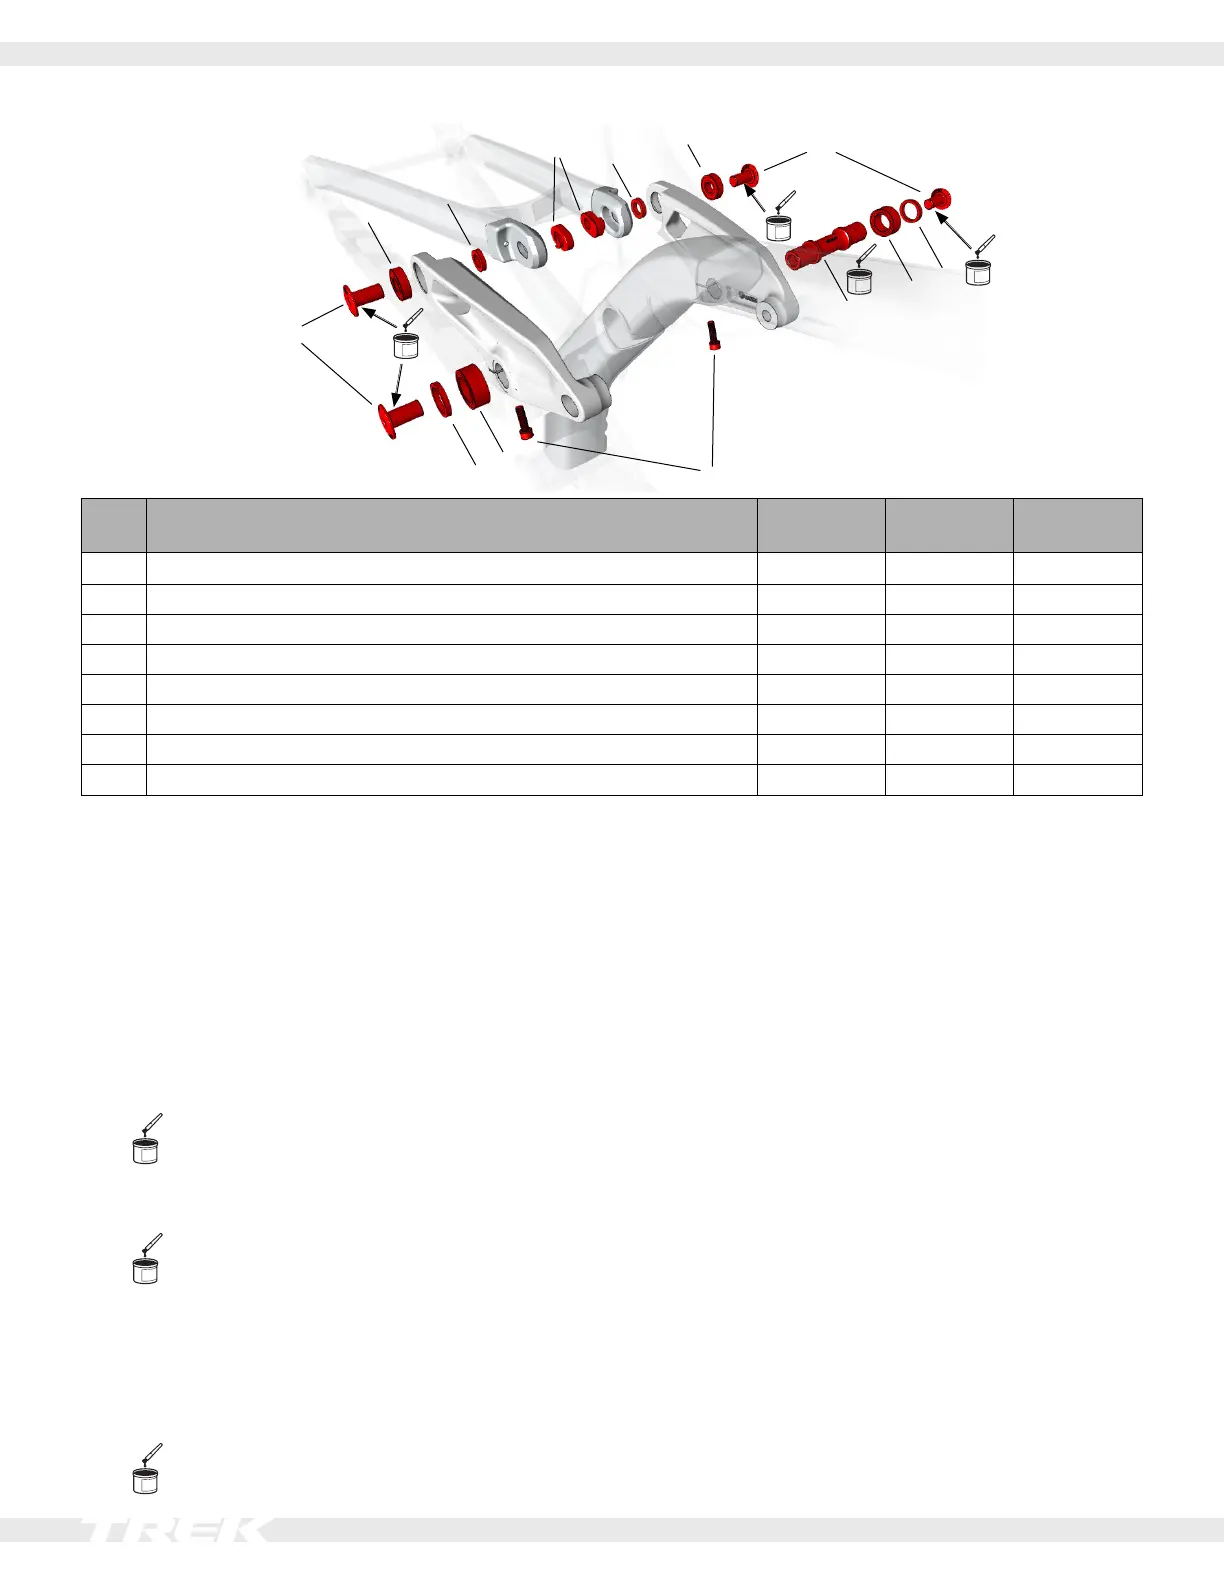
Rocker pivot
5
6
7
6
4
3
2
1
2
3
4
Item Description Quantity in
Assembly
Part Number Torque (Nm)
1
Rocker axle
1 W1042544 —
2 Bearing 2 W302025" —
3 Spacer 2 W440921 —
4 Bolt 4 W1051959 17
5 Mino link bearing 2 W275322 —
6 Spacer 2 W529969 —
7 Mino Link bearing 2 W529223 —
8 Pinch bolt 2 W5256244 5
Tools
• Bearing press
• 4mmand5mmhexwrenches
• Torquewrenchwith4mmand5mmhexbits
IMPORTANT: For proper alignment of the rocker plates,
the shock must be installed and torqued, and the Mino
Link bolts installed and torqued, before the pinch bolts are
torqued.
Rocker pivot
1. Pressinthedrivesidebearing(2).
2. Apply grease to the shoulder of the drive side of
therockeraxle(1).
3. Inserttherockeraxle(1)intotheframefromthenon-
drive side.
4. Apply grease to the shoulder of the non-drive
sideoftherockeraxle(1).
5. Installthenon-drivesidebearing(2)overtheaxle.
Press the bearing in from the non-drive side.
6. Installaspacer(3)overthebearing.
7. Position the rocker plate so it aligns with the shoul-
ders of the axle.
8. Applygreasetotheshoulderofthebolt(4).
9. Install the bolt into the rocker plate. Tighten, but do
not torque the bolt.
10. Repeat steps 1–9 on the other side.
Mino Link chip
1. PresstheMinoLinkbearings(5)intotherocker
plates.
2. Position the seatstay between the rocker plates.
3. Positionaspacer(6)betweentheseatstaytaband
the rocker plate. Repeat this step with the other spac-
er on the other side.
Tip: Balancethespacer(6)againstthebearingby
partiallyinsertingthebolt(4).
4. InserttheMinoLinkchips(7)intothenotchesonthe
seatstays.
5. Insertthebolts(4)intotheMinoLinkbearings(5)on
the rocker plates.
6. Tighten,butdonottorquethebolts(4).
Pinch bolts
1. Install,butdonottightenthepinchbolts(8).
Torque all bolts
1. Torquethebolts(4)to17Nm.
2. Torquethepinchbolts(8)to5Nm.