23
2. Web Configuration Interface
Clicking on the Factory Restore icon will restore the KVM’s default settings, resetting all information that had been
changed. The affected settings include network information, servers, switches, users, and passwords. You will be given
the option of preserving the network settings when performing a Factory Restore.
Clicking on the Backup/Restore icon allows an administrator to backup or restore the KVM’s settings (See section 2.4.2
Backup/Restore for details).
Clicking on the SSL Certificate icon allows an administrator to install an SSL certificate (See section 2.4.3 SSL Certificate
for details).
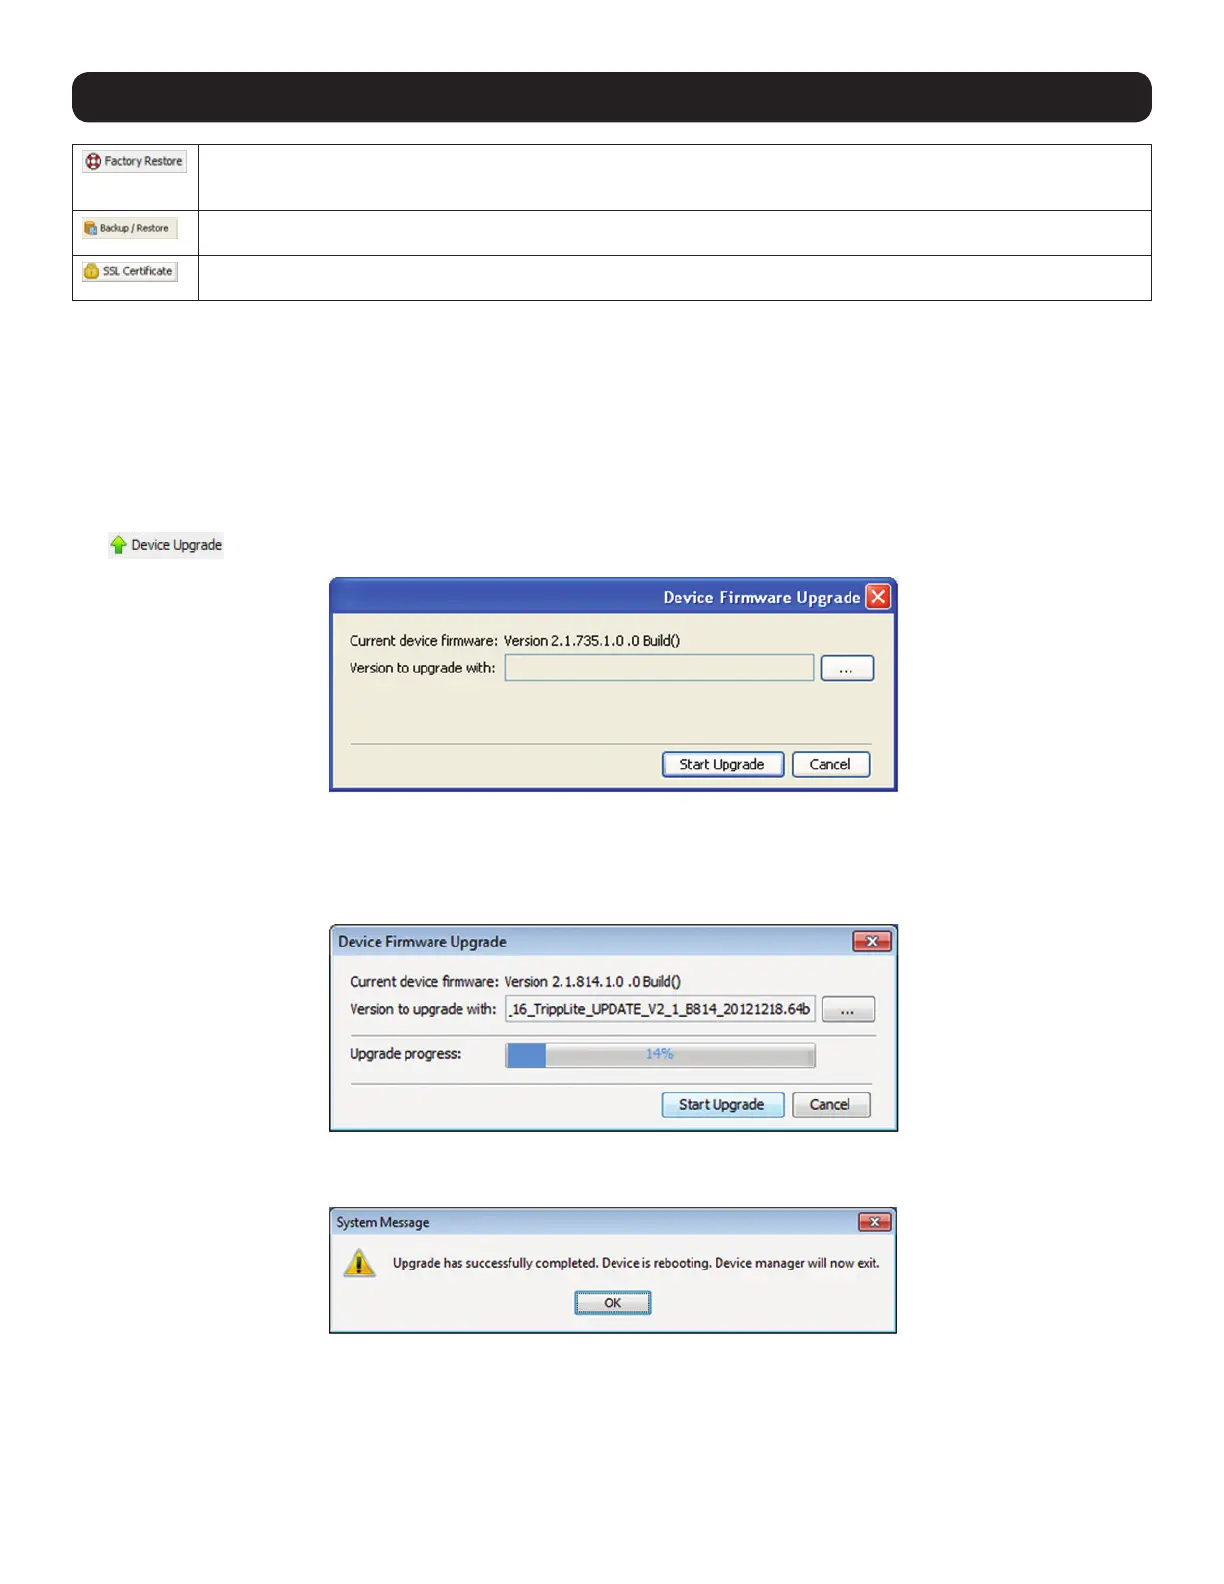
2.4.1 Firmware Upgrade
To perform a firmware upgrade, follow these steps:
Note: Depending on the type of firmware upgrade, the following settings may be erased: User settings, KVM switch settings, mouse and video adjustments,
and RS232 settings. The network settings remain intact. For more information, refer to the firmware release notes.
1. Download the firmware upgrade file from www.tripplite.com/support.
2. Save the firmware upgrade file on the Client Computer.
3. Login to the Web Configuration Interface and navigate to the Configuration section. In the Configuration section’s toolbar, click on the
icon. The Device Firmware Upgrade page appears, displaying the current firmware version installed on the KVM.
4. In the Version to upgrade with field, browse to and select the firmware upgrade file that you just downloaded from the Tripp Lite website.
5. Verify that the firmware upgrade file is a newer version than what is currently installed on the KVM.
6. Click the Start Upgrade button to begin the firmware upgrade. A progress bar will display the progress of the upgrade. An upgrade can
take several minutes.
7. When the upgrade completes, click the OK button on the prompt that appears to close out of the Web Configuration Interface and
reboot the KVM. You will be taken back to the login page.
8. Click the Log On button to log back into the Web Configuration Interface.

 Loading...