8
1. Product Overview
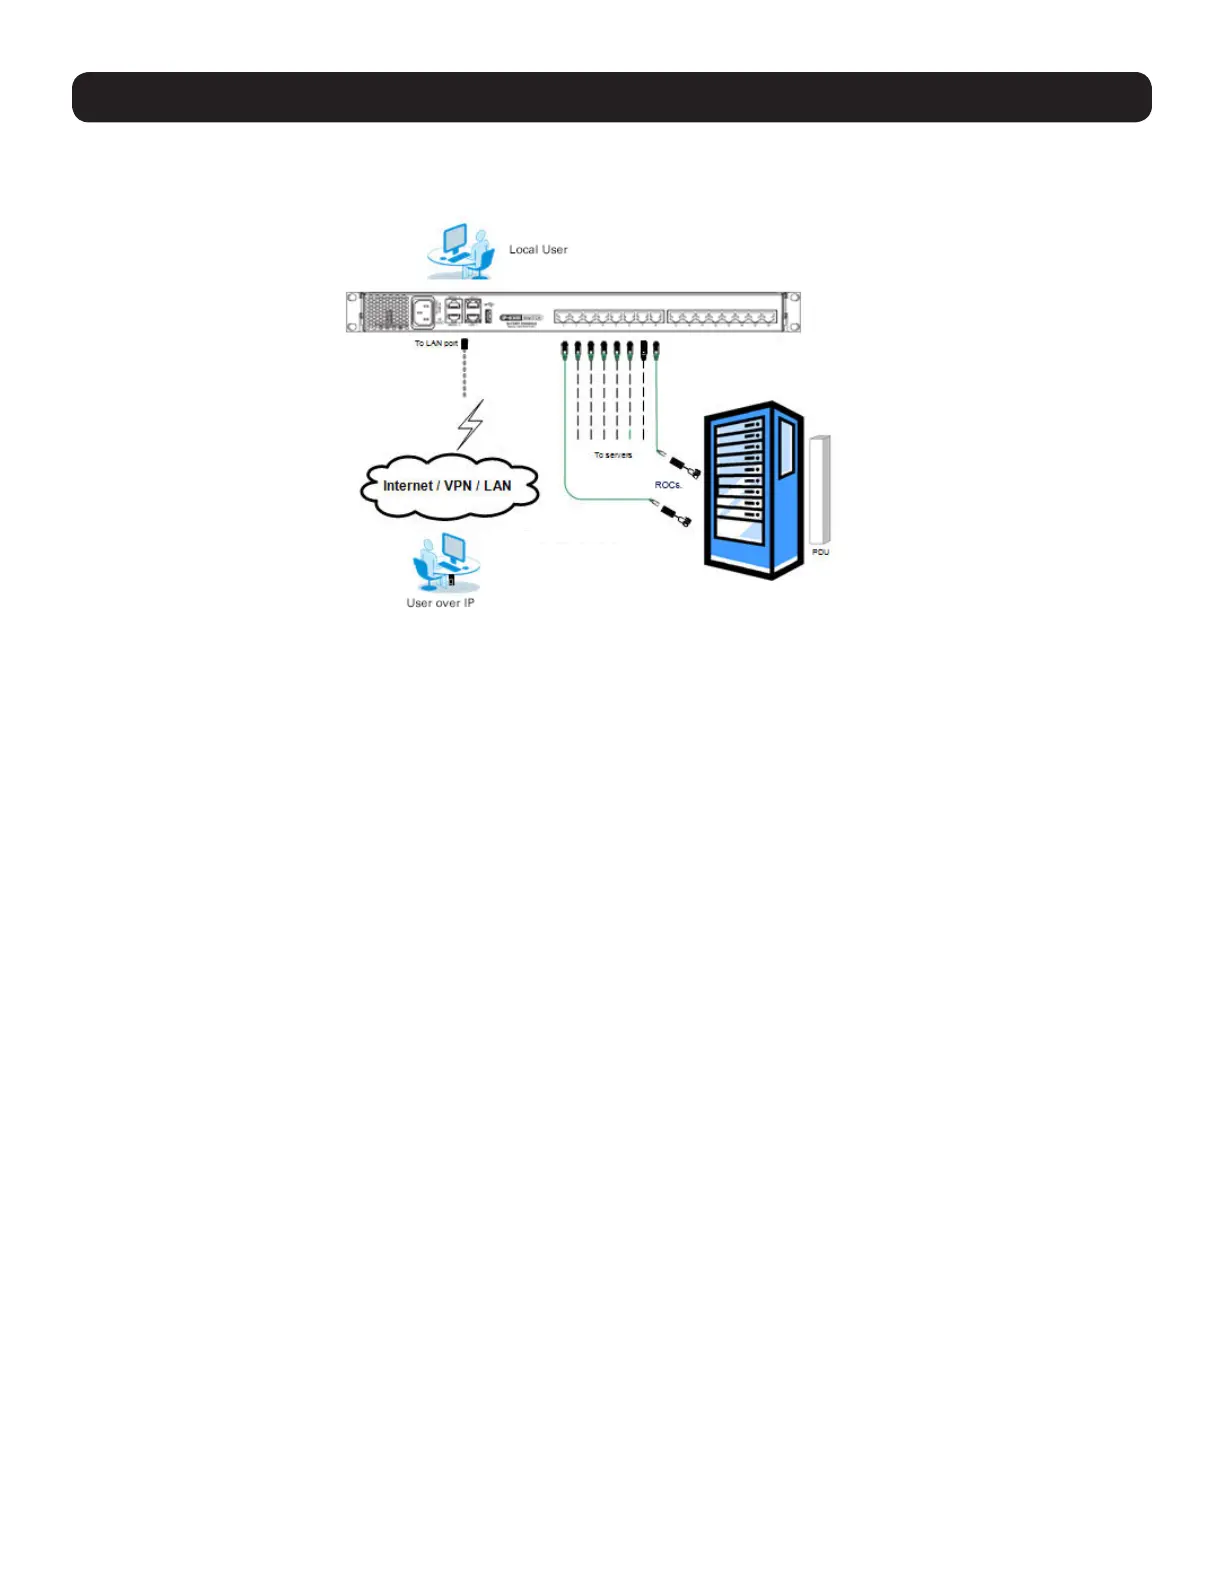
1.9 Connecting the System
The figure below illustrates the NetCommander IP system overview.
1. Make sure that power to all the devices you will be connecting has been turned off.
2. Connect a Cat5e/6* cable from an available server port on the back of the KVM to an SIU (B078-101-PS2, B078-101-USB-1 or B078-
101-USB2) appropriate for the computer you are adding.
3. Connect the SIU’s connectors to the corresponding ports on the computer/server.
4. Repeat steps 2 and 3 for each computer/server you are adding.
5. Connect a Cat5e/6 cable from your network to the LAN 1 port on the back of the KVM.
6. Connect a second Cat5e/6 cable from your network into the KVM’s LAN 2 port.
7. Optional: Connect up to two serial devices to the RJ45 Serial Ports 1 and 2 on the back of the KVM switch (See the Configuring Serial
Port Settings section of this manual for details on configuration. See the Serial Pinout section in this manual for the pinout information).
8. Connect the included power cord between the C14 outlet on the back of the unit and a Tripp Lite Surge Protector, Power Distribution Unit
(PDU), or Uninterruptible Power Supply (UPS). There is no Power On/Off switch, so plugging in the power cord will power on the KVM.
9. Turn on the power to all of the connected devices.
* To ensure proper functionality, shielded Cat5e/6 cable must be used with the B078-101-USB2, and is recommended for all other SIUs for best performance.
1.10 Initial Settings (Default IP Address)
By default, the NetCommander IP is set to have the network’s DHCP server pull an IPv4 address. Referencing the unit’s MAC address (found
on the bottom panel of the KVM), have your network administrator provide you with the IP address assigned by the DHCP server. You can
also obtain the IP address by logging into the KVM’s OSD via the local console and navigating to the F2 Settings menu.
On networks that do not have a DHCP server, the KVM boots with the default static IPv4 address of 192.168.0.254.
Note: There is no default IPv6 address for the KVM switch. An IPv6 address can be automatically assigned via DHCP server, a Stateless address can be
assigned, or a static address can be manually entered.
To configure an IP address for the KVM, you can use the local console OSD or the Web Configuration Interface. Both methods are described
in the following sections.

 Loading...