12 13
ASSEMBLY STEPS
ASSEMBLY STEPS
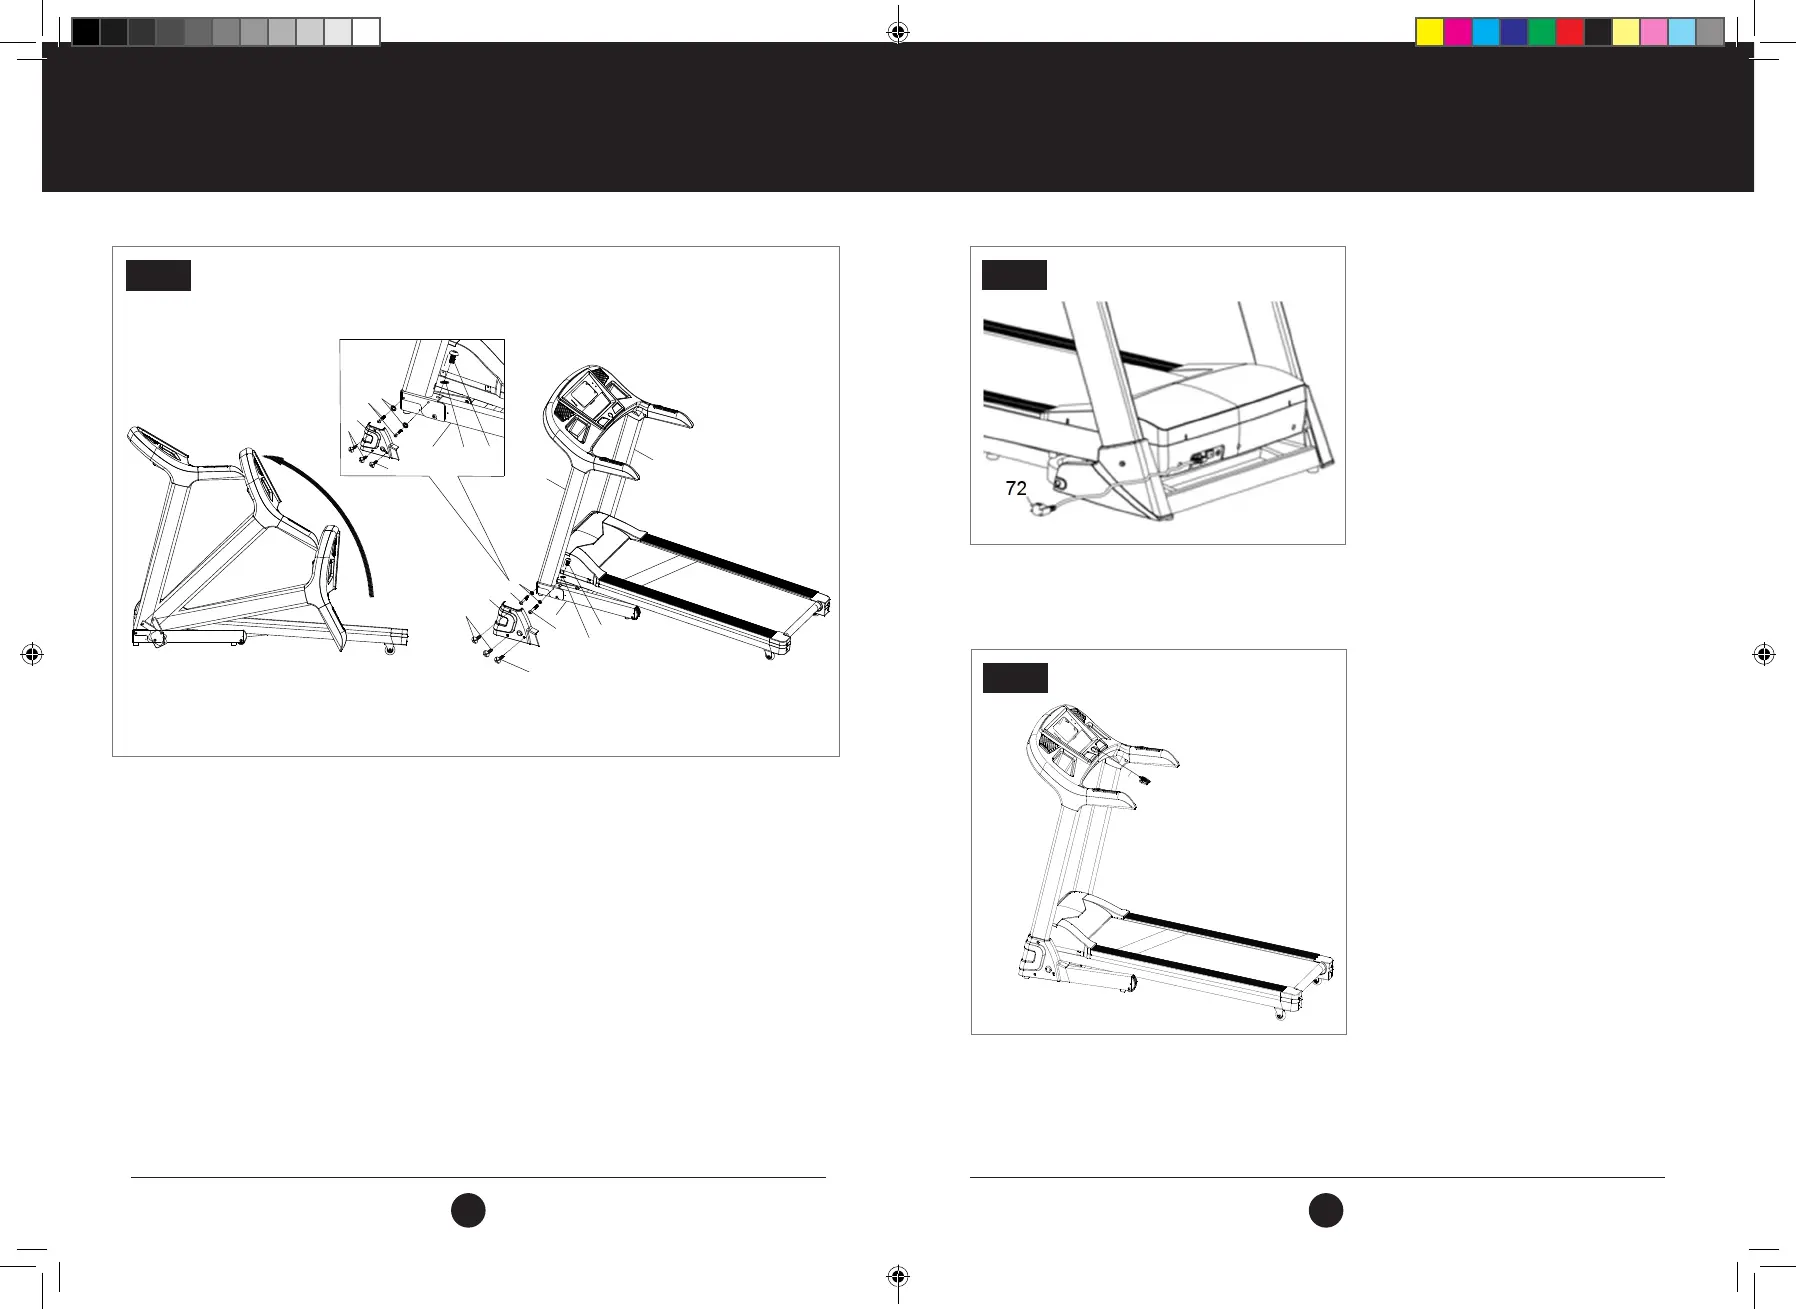
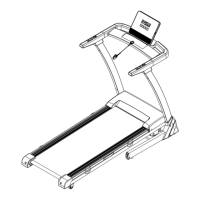
STEP 3:
Push up the Console Frame (5), Left Upright Post (4L) and Right Upright Post (4R) as per the arrow illustration in the
image above.
Lock and secure the Left Upright Post to the Base Frame (1) using 1 Bolt (M8 x 20) (18) and 1 Lock Washer (D8) (34).
Then using 2 Bolts (M8 x 60) (13) and 2 Lock Washers (D8) (34).
Lock and secure the Right Upright Post to the Base Frame (1) using 1 Bolt (M8 x 20) (18) and 1 Lock Washer (D8) (34).
Then using 2 Bolts (M8 x 60) (13) and 2 Lock Washers (D8) (34).
Note: Support the upright with your hand to avoid falling down and possible injury.
Use the Multi Tool (45) to afx the Left Upright Cover (69L) to the Base Frame (1) using 3 Screws (ST4.2 x 15) (41).
Use the Multi Tool (45) to afx the Right Upright Cover (69R) to the Base Frame (1) using 3 Screws (ST4.2 x 15) (41).
STEP 4:
Insert the Power Cable (72) into the inlet as
illustrated.
STEP 5:
Attach the Safety Key (81) to the Console and
begin to exercise.
STEP 3
STEP 4
STEP 5
18
34
69
34
13
41
1
41
41
18
34
69
34
13
13
41
4L
4R
1
#22M03T013.1 TR1200 Treadmill UM - Amendment.indd 12-13 2022/06/01 09:22