CHAPTER 2: ASSEMBLY INSTRUCTIONS
Truefitness.com / 800.426.6570 / 636.272.7100 17
ELLIPTICAL ASSEMBLY STEPS (continued):
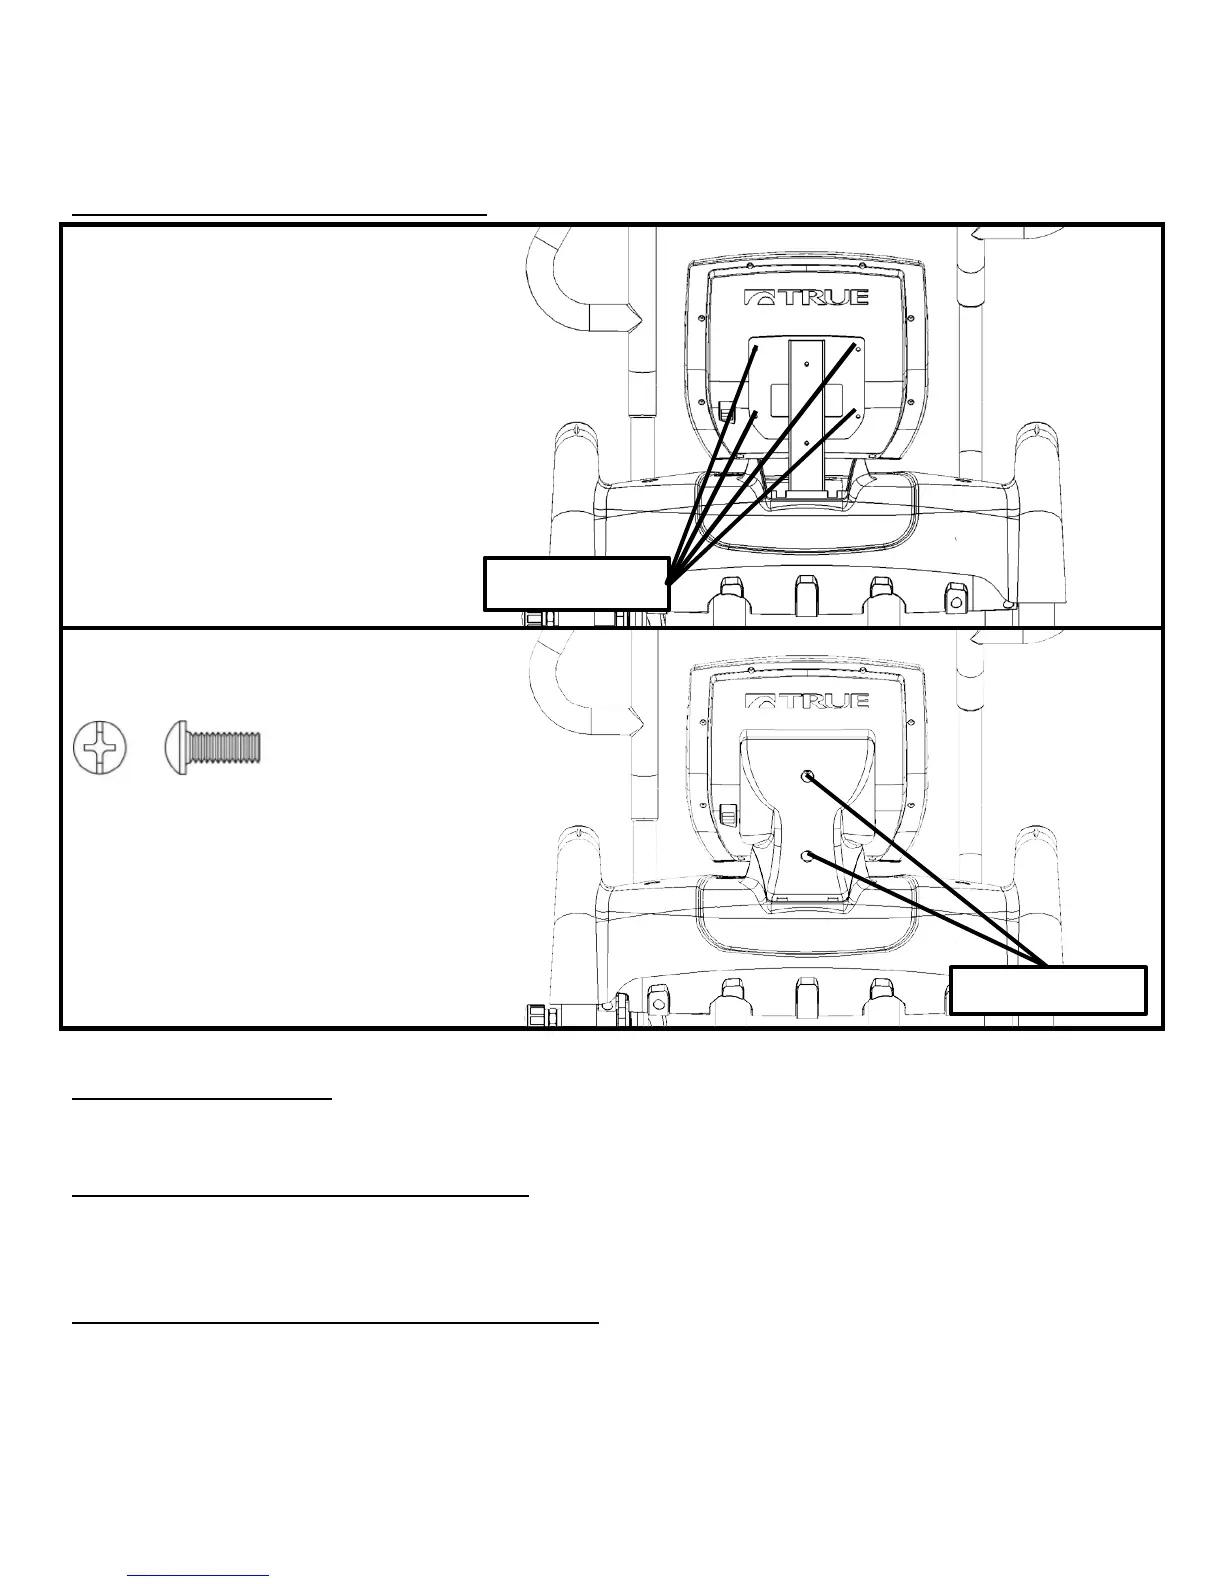
STEP 7: Attach Console (continued):
b) Tuck access wires into the neck and
attach the console to the neck using
the 4 bolts included with the console.
Required Hardware:
Included with console
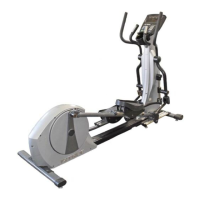
c) Attach the Rear Console Cover
using 2 M5x12mm screws.
Required Hardware (Bag 7):
2 M5x12mm Screws
STEP 8: Floor Levelers:
a) If necessary, adjust four levelers on bottom of machine to accommodate uneven flooring.
STEP 9: Remove Transport Handle Bars:
a) Once Elliptical is moved into its final location, remove the two Handle Bars on the back of the machine and store
with owner’s manual for future use.
STEP 10: Remove Protective Film from Decals:
a) Once Elliptical is moved into its final location, remove the protective film from the decals and from the “True” on
the lower shroud.