3.9.2 Using RS-232 interface to setup Ethernet interface
1. Connect the computer and the printer with a RS-232 cable.
2. Turn on the printer power.
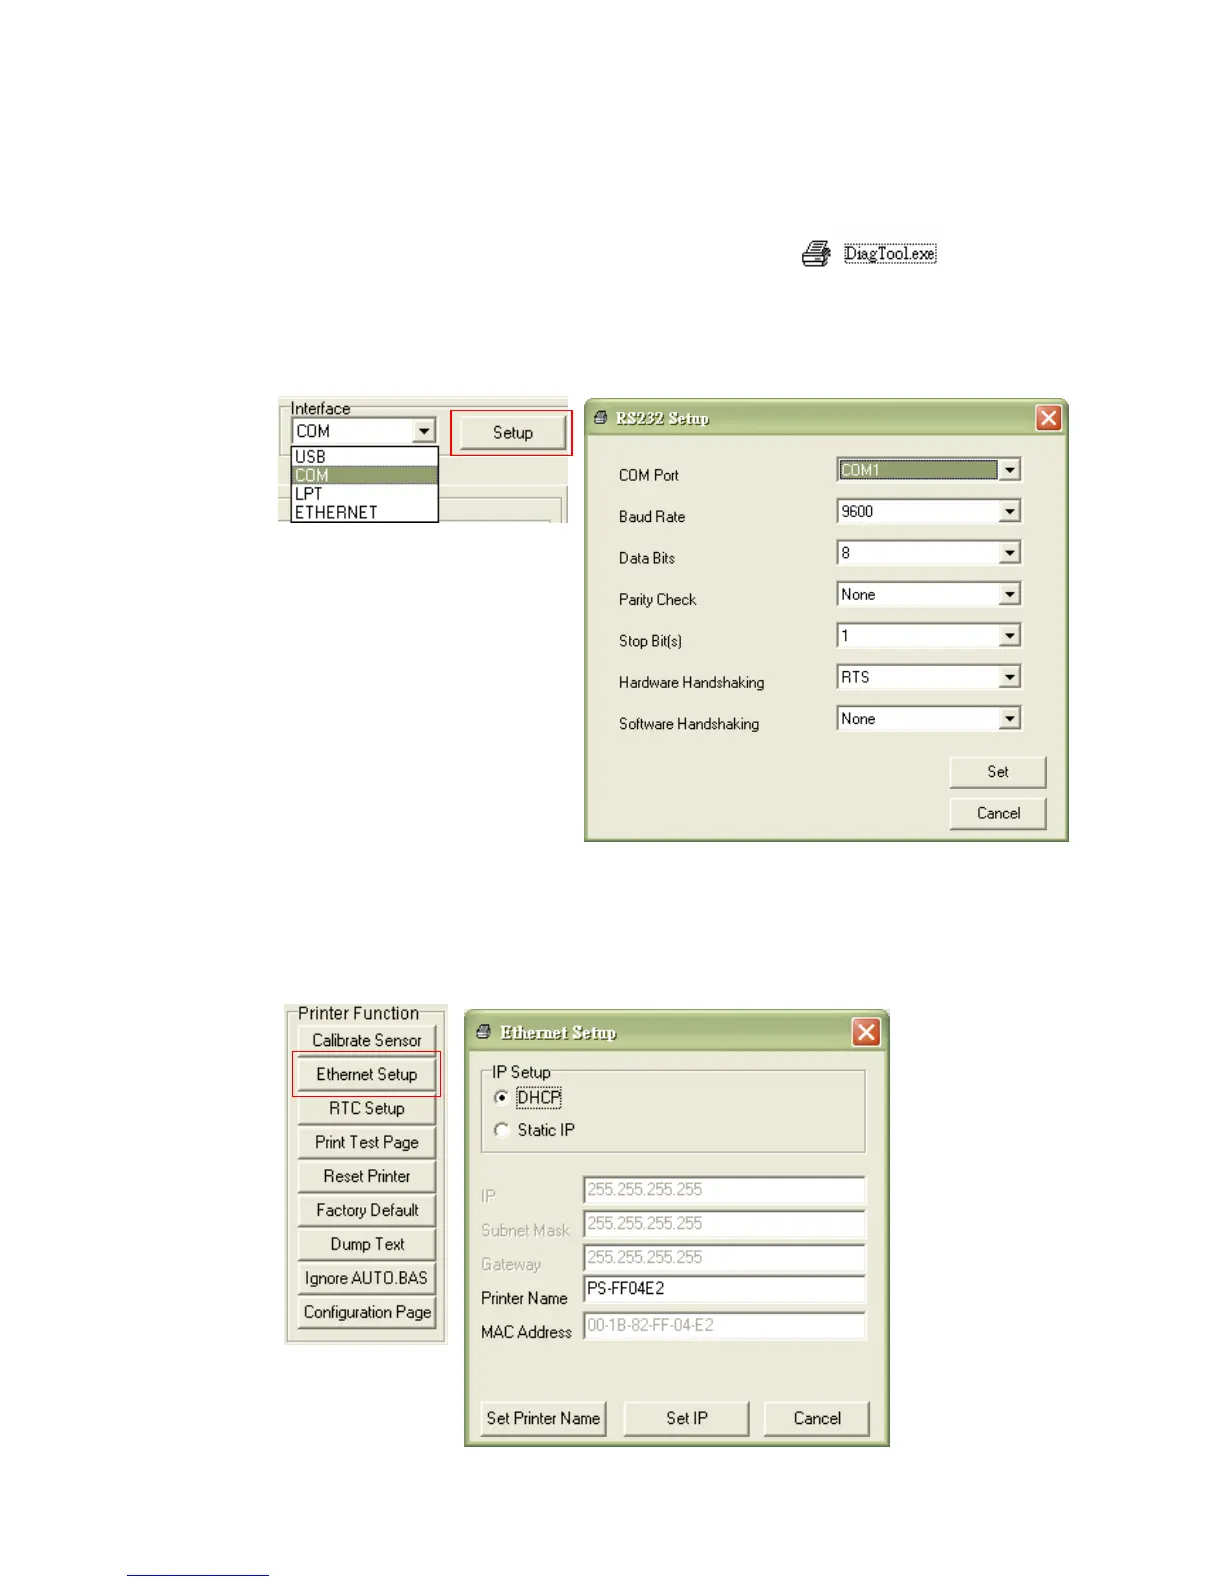
3. Start the Diagnostic Utility by double clicks on the icon.
Note: This utility works with printer firmware V6.00 and later versions.
4. Select “COM” as interface then click on the “Setup” button to setup the serial
port baud rate, parity check, data bits, stop bit and flow control parameters.
5. Click on the “Ethernet Setup” button from printer function of Printer
Configuration tab to setup the IP address, subnet mask and the gateway for the
on board Ethernet.

 Loading...