24
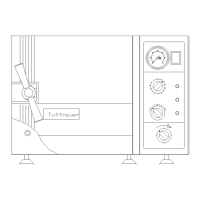
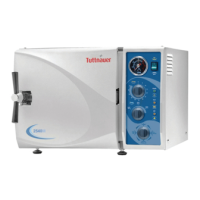
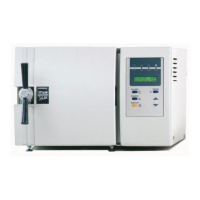
7.9. Set the Timer to the desired sterilization cycle time according to the
Sterilization Time Table.
7.9.1. The Heat Light will come on, indicating that power is being
supplied to the Heating Elements and remain on until the
correct sterilization pressure is achieved.
7.9.2. Once the correct pressure is reached the Heat Light will cycle
on and off, indicating that the Heating Elements are turning
on and off to maintain the correct sterilization pressure.
7.9.3. When the Timer reaches 0 min, the Heating Elements are
turned off and a buzzer will sound indicating that the
sterilization cycle is complete.
7.10. If unwrapped instruments were sterilized and no drying is required
then follow these steps.
7.10.1. Once the Timer has reached 0 min turn the Multi-purpose
valve knob, promptly, to the Exhaust / Dry position. This
will allow the steam and leftover water to return to the
reservoir
7.10.2. When the white needle on the pressure gauge has reached
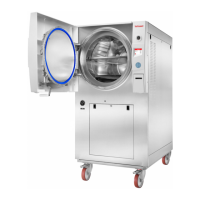
0 psi the door can be opened.
7.10.3. Unscrew the Door Closing Devise, move it to the side and
open the door to remove the instruments.
7.10.4. Now turn the Multi-purpose valve knob to the “0” or off
position.
Note: The sterility of instruments processed in unwrapped cycles
cannot be maintained if exposed to a non-sterile environment.
7.11. If wrapped instruments were sterilized and drying is required then
follow these steps.
7.11.1. Once the Timer has reached 0 min then turn the Multi-
purpose valve knob, promptly, to the Exhaust / Dry position.
This will allow the steam and leftover water to return to the
reservoir. Do not allow the pressure to drop below 10 psi.
This will cause water to remain in the bottom of the chamber
even after the Multi-purpose valve has been turned to Exh /
Dry. Resetting the Timer for drying will only be heating up
this water and not drying the instruments.
If the pressure has dropped below 10 psi then leave the unit
in the STE position, leave the door closed and locked. Now
reset the Timer for 10 minutes.
When the Timer reaches 0 min the pressure should be above
10 psi (if not add 5 more minutes to the Timer) now turn the
Muli-purpose valve to the Exh / Dry position. This will
insure that all the water has been returned to the reservoir.
Note: The sooner the Multi-purpose valve is turned to
Exh / Dry at the end of the sterilization cycle the
more effective and efficient will be the drying.
7.11.2. When the white needle on the pressure gauge has reached
0 psi the door can be opened.
7.11.3. Unscrew the Door Closing Devise as far as it will go, but do
not move it to the side, this will allow the door to open
about ¾ of an inch.