C099-F9P - User guide
UBX-18063024 - R16 C099-F9P quick start Page 7 of 43
C1-Public
2 C099-F9P quick start
This section provides some quick steps to enable ZED-F9P operation before exploring the more
complex configurations described later.
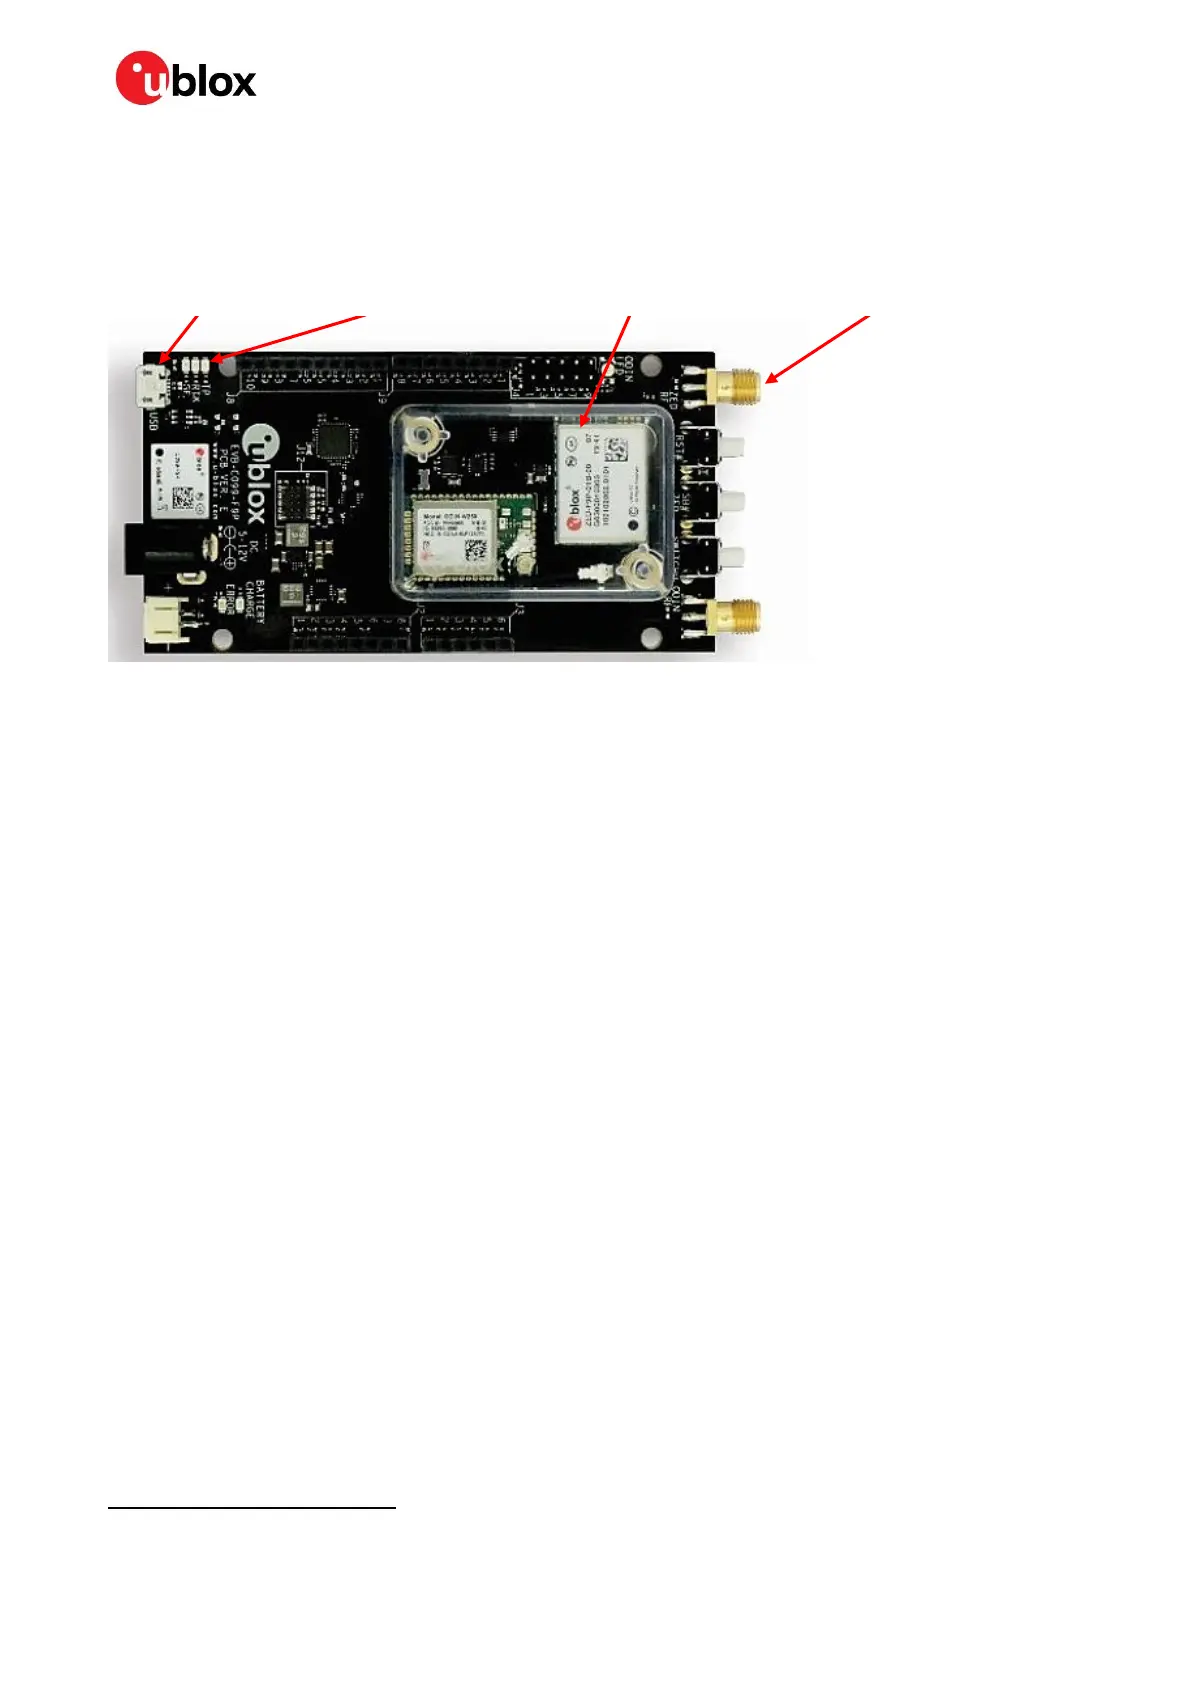
Figure 2: Basic C099-F9P overview with details needed for quick start
2.1 Starting up
• Connect the supplied multi-band GNSS antenna to the ZED-RF SMA connector. Ensure good
signal reception.
• To power the board, connect the USB to a Windows PC. The FTDI and USB drivers are installed
automatically
from Windows Update when the user connects the board for the first time. Note
that the board has current limitation functionality on USB. Thus, ZED-F9P and ODIN-W2 modules
power up after the drivers have been successfully installed and the USB enumeration is
completed.
• Start u-center and connect to the COM port identified as C099 application board, ZED-F9P using
Device Manager. Set the baud rate to 460800 baud. See section 4.3.1 for detailed instructions.
• The time pulse LED on the C099-F9P board blinks in blue once the ZED-F9P has obtained valid
time information. Figure 3 below shows a typical u-center view with active satellite signal levels.
To operate the ZED-F9P in RTK mode, the GNSS antenna must be placed in an open environment and
the unit must be connected to an RTK correction service. Where available, the evaluation kit comes
with a free trial of the SmartNet correction service. Consult the leaflet included with the kit for
information on how to register for the service and how to obtain mount point and user connection
details before moving to the next steps.
RTK corrections can be applied using a u-center built-in NTRIP client. To use the C099-F9P board with
a correction service follow these next steps:
• In u-center, click on the Receiver menu item.
• Select NTRIP Client…
• Fill in the settings for the NTRIP caster, username and password.
• Click Update source table and select the recommended NTRIP mount point.
• Click OK to close the dialog and connect to the service.
• In the Data View of u-center, the Fix Mode should change from 3D to 3D/DGNSS when RTCM
corrections are received. The RTK LED blinks in green.

 Loading...