26
After a longer time of using your Ultimaker 2 Go you might notice some signs of “under extrusion”. This means that your
Ultimaker 2 Go can’t extrude enough plastic and is usually shown by very thin or missing layers in a print. In most cases,
it is caused by some dirt or carbonized material in the nozzle or another hot end part through which a (partial) blockage
is created. When under extrusion appears it is recommended to use the Atomic Method in order to clean the nozzle and
other hot end parts. Below, the process of this simple though very eective method is described.
NOTE: It is also advised to use the Atomic Method when switching from a material that needs a higher printing
temperature to one that uses a lower printing temperature in order to make sure any residue from the previous
filament is removed.
REMOVE THE FILAMENT
• Go to MATERIAL > CHANGE in order to remove the filament and instead of inserting new material, select CANCEL
• Keep the print head in the corner
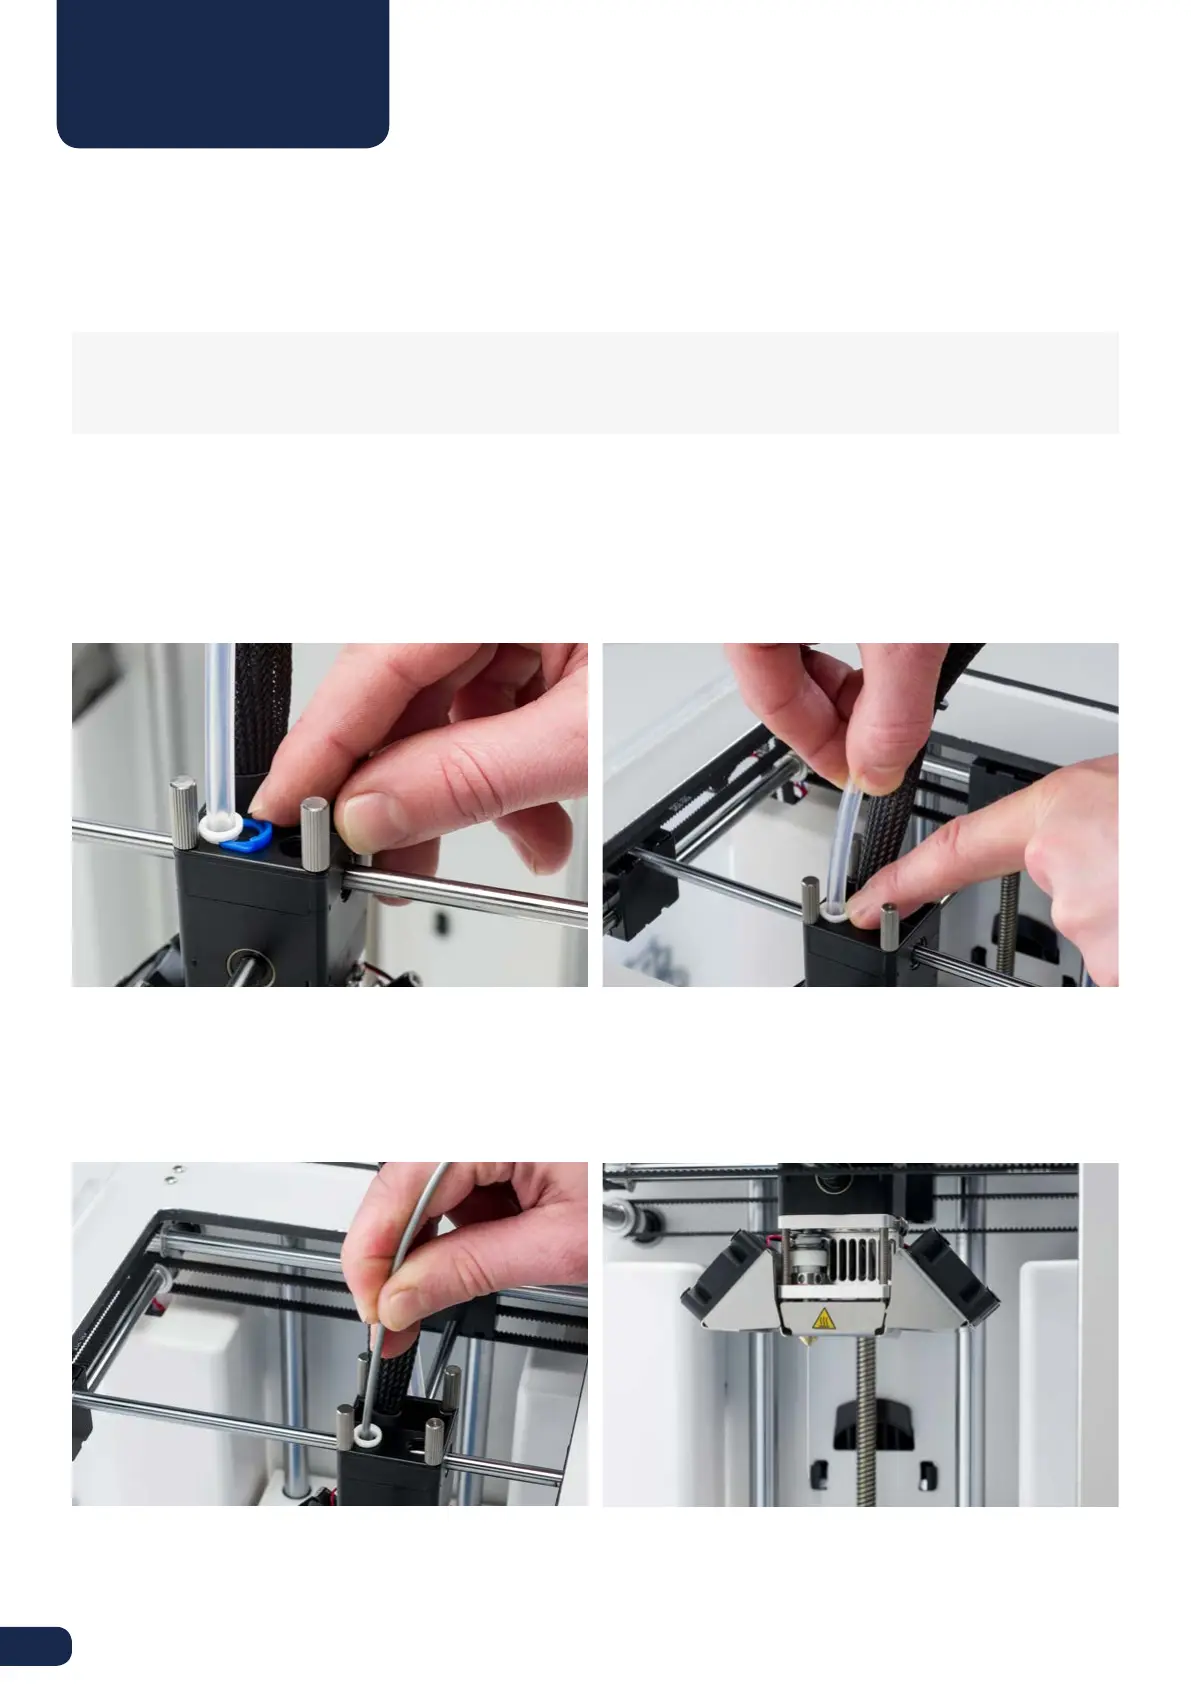
REMOVE THE BOWDEN TUBE
• Open the black plastic clip that is around the bowden tube and print head cable closest to the print head
• Remove the (blue or red) clamp clip
HEAT UP AND PREPARATION
• Go to MAINTENANCE > ADVANCED > Heatup nozzle and set the temperature to 260 degrees
• Cut o approximately 20 cm of filament with a straight cut and try to straighten the filament as much as possible
• When the temperature is reached, insert the straightened piece of filament manually all the way down to the nozzle
• Push it slightly until either the new filament comes out of the nozzle or until the filament can’t be pushed any further
ATOMIC METHOD