11
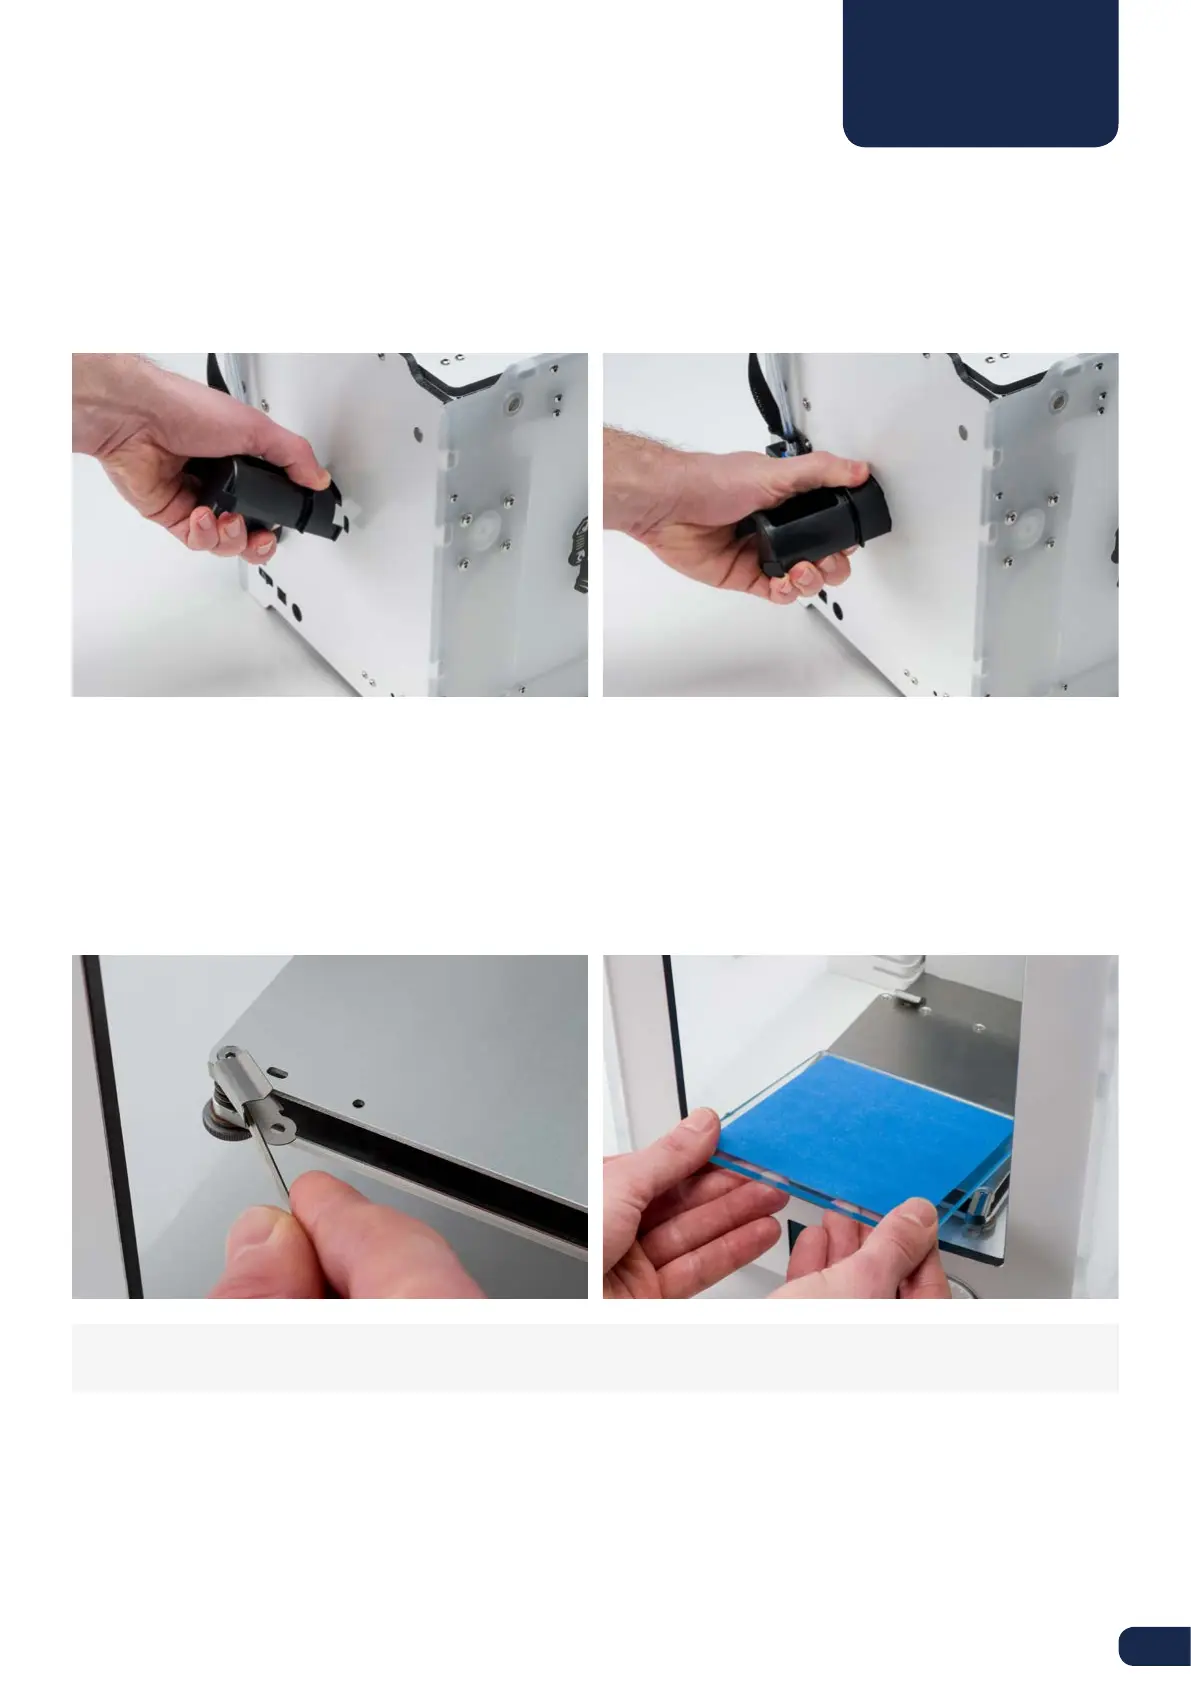
SPOOL HOLDER
The first step of setting up your Ultimaker 2 Go is attaching the spool holder at the back side of the Ultimaker 2 Go.
Make sure to install the spool holder as described below.
1. Take the spool holder and insert the top part in the corresponding hole at the back of the Ultimaker 2 Go.
2. Push the spool holder down until it snaps into place.
GLASS PLATE
The glass plate, with blue tape applied to it, is the print surface for prints on your Ultimaker 2 Go. It will be installed the
following way.
1. Place strokes of the blue tape next to each other on the glass plate and make sure they don’t overlap.
2. Open up the two build plate clamps at the front side of the build plate with a hex wrench.
3. Gently slide the glass plate on the build plate and make sure it snaps into the build plate clamps at the back.
4. Close the two build plate clamps at the front to secure the glass plate.
CAUTION: The build plate clamps can be sharp, therefore it is advised to use one of the hex wrenches for opening
the build plate clamps.
INSTALLATION