24
Interface
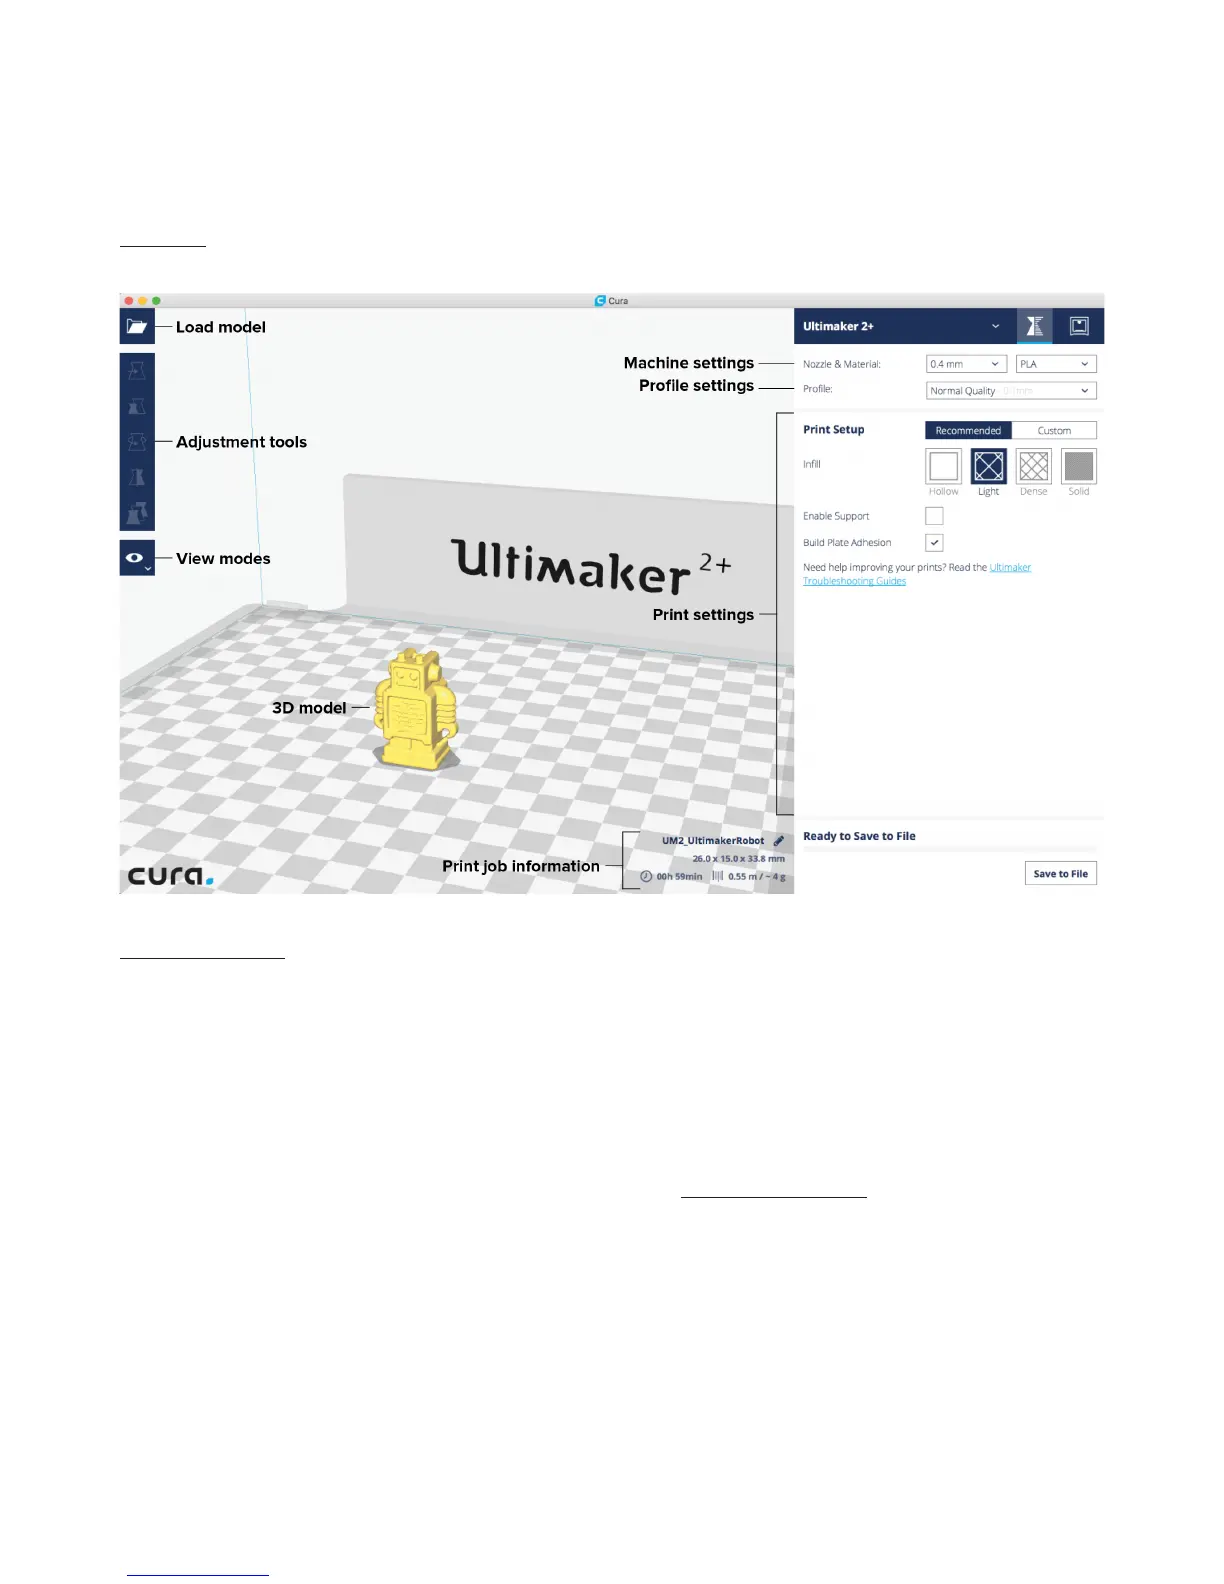
After you have added the Ultimaker 2+ in Ultimaker Cura, the main interface will become visible. Here is an overview of the
interface.
Slicing the model
To slice a model for the Ultimaker 2+, take the steps described below.
1. Load the model into Ultimaker Cura by clicking the “Open File” folder icon (top left corner).
2. Use the Adjustment Tools to position, scale and rotate the object if desired.
3. In the Sidebar, select the nozzle size and material you want to use. Make sure it matches the setup on the printer.
4. Select a profile on the Sidebar.
5. Select “Helper Parts” on the Sidebar. Set the desired strength and enable or disable support and build plate adhesion.
6. To view the result of the selected profile and support settings, go to the “View mode” and select “Layers”.
7. In the bottom right corner, select “Save file” or “Save to SD card” to save the print file.
For more instructions on how to use Ultimaker Cura take a look at the Ultimaker Cura manual on our website.
Preparing a print with Ultimaker Cura