21
Installing WiFi and rmware
The Ultimaker 3 allows for printing wireless over a network. Therefore the next step is to connect your Ultimaker 3 to a
network.
Setting up WiFi
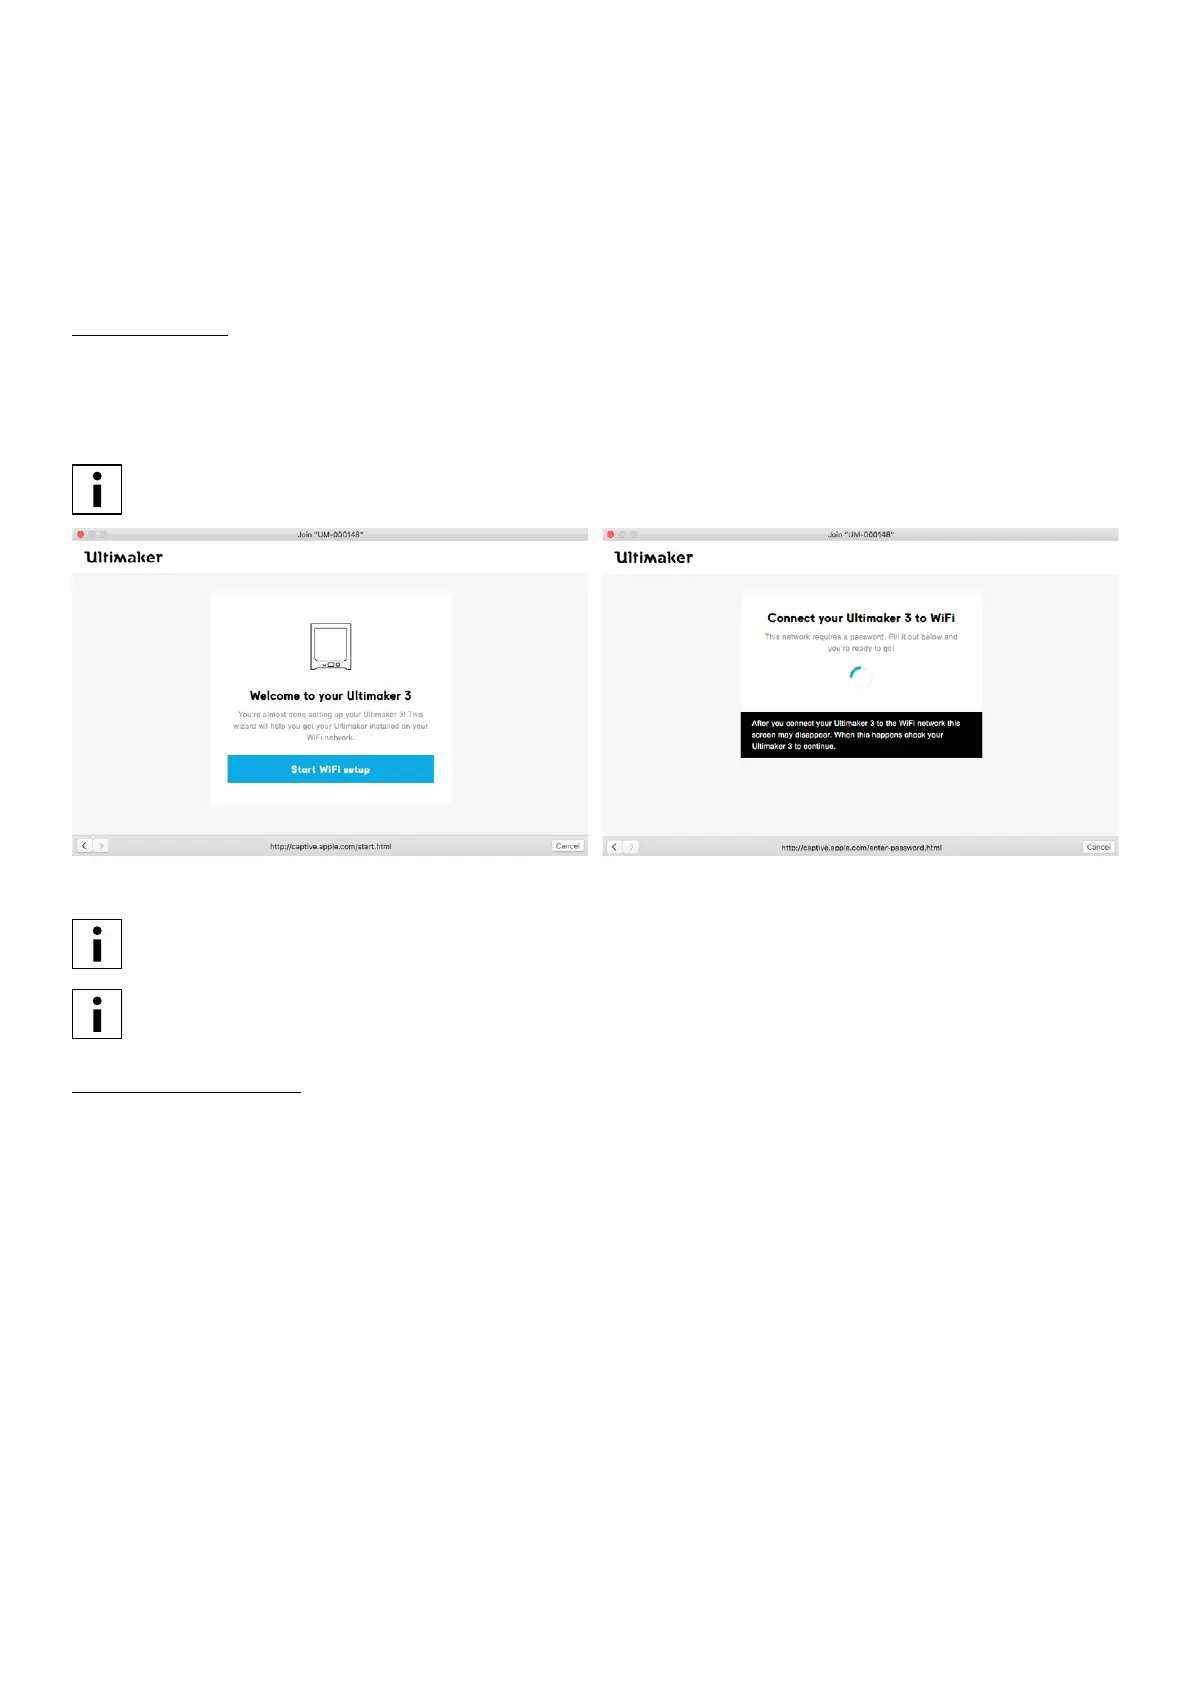
1. Wait until your Ultimaker 3 has created a WiFi hotspot. This can take a minute.
2. Move to your computer or smartphone and connect it to the wireless network of the printer. The name of the network
is shown on the display of the Ultimaker 3.
3. A pop-up will appear on the display of your computer. Follow the steps to connect the Ultimaker 3 to your local WiFi
network. The pop-up will disappear when you have completed these steps.
When the pop-up does not appear, open a browser and type “Ultimaker.com”.
4. Go back to the Ultimaker 3 to continue with the setup for first use.
Within some network environments the Ultimaker 3 may experience difficulties connecting wireless. When this
happens, re-run the WiFi setup from another computer or smartphone.
If you skip this process you can always re-do the WiFi setup after completing the welcome setup by going to
System g Network g Run WiFi setup.
Updating the rmware
As a last step the Ultimaker 3 will check if the latest firmware is installed. If not, it will get the latest firmware from the
network and install it. This will take several minutes.