26
Preparing a print with Cura
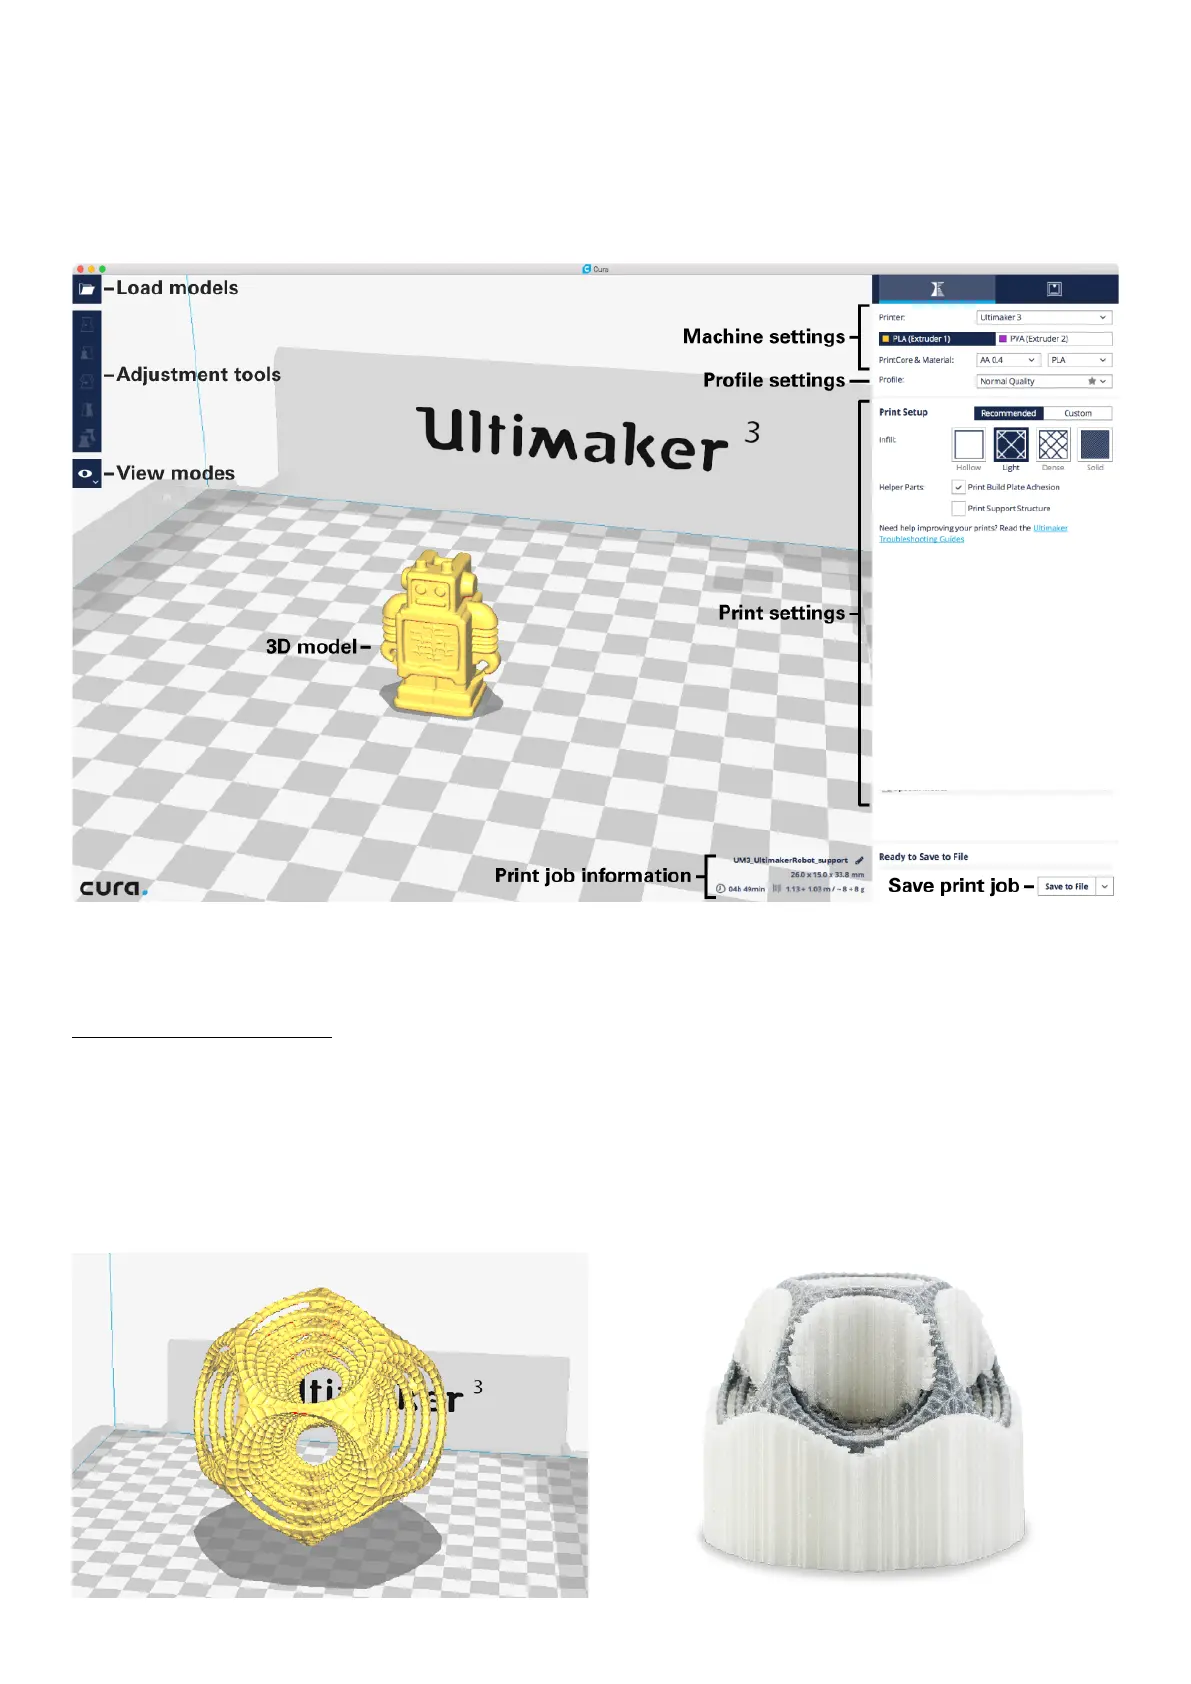
After you have added the Ultimaker 3 in Cura, the main interface will become visible. Here is an overview of the interface.
When preparing a model, you always need to make sure that the print core and material configuration match with
the configuration on your Ultimaker 3. If you are using the network you can allow Cura to automatically transfer the
configuration from your Ultimaker 3 to Cura.
Printing with PVA support
To slice a model with PVA support, take the steps described below.
1. Load the model into Cura by clicking the “Open File” folder icon (top left corner).
2. Use the Adjustment Tools to position, scale and rotate the object if desired.
3. In the Sidebar, check if the print cores and materials are correct. Print core 1 should be AA and print core 2 BB.
4. Select a profile quality (Draft Print, Fast Print, Normal Quality or High Quality) on the Sidebar.
5. Select “Helper Parts” on the Sidebar. Set the desired strength and choose the print core for support.
6. To view the result of the selected profile and support settings, go to the “View mode” and select “Layers”.
7. In the bottom right corner, select “Save file”, “Save to USB” or “Print over network” depending on the printing method.