47
4. Pull the material out with a quick, firm pull once the 2 seconds have passed.
5. Cut off the tip of the filament that you have just pulled out.
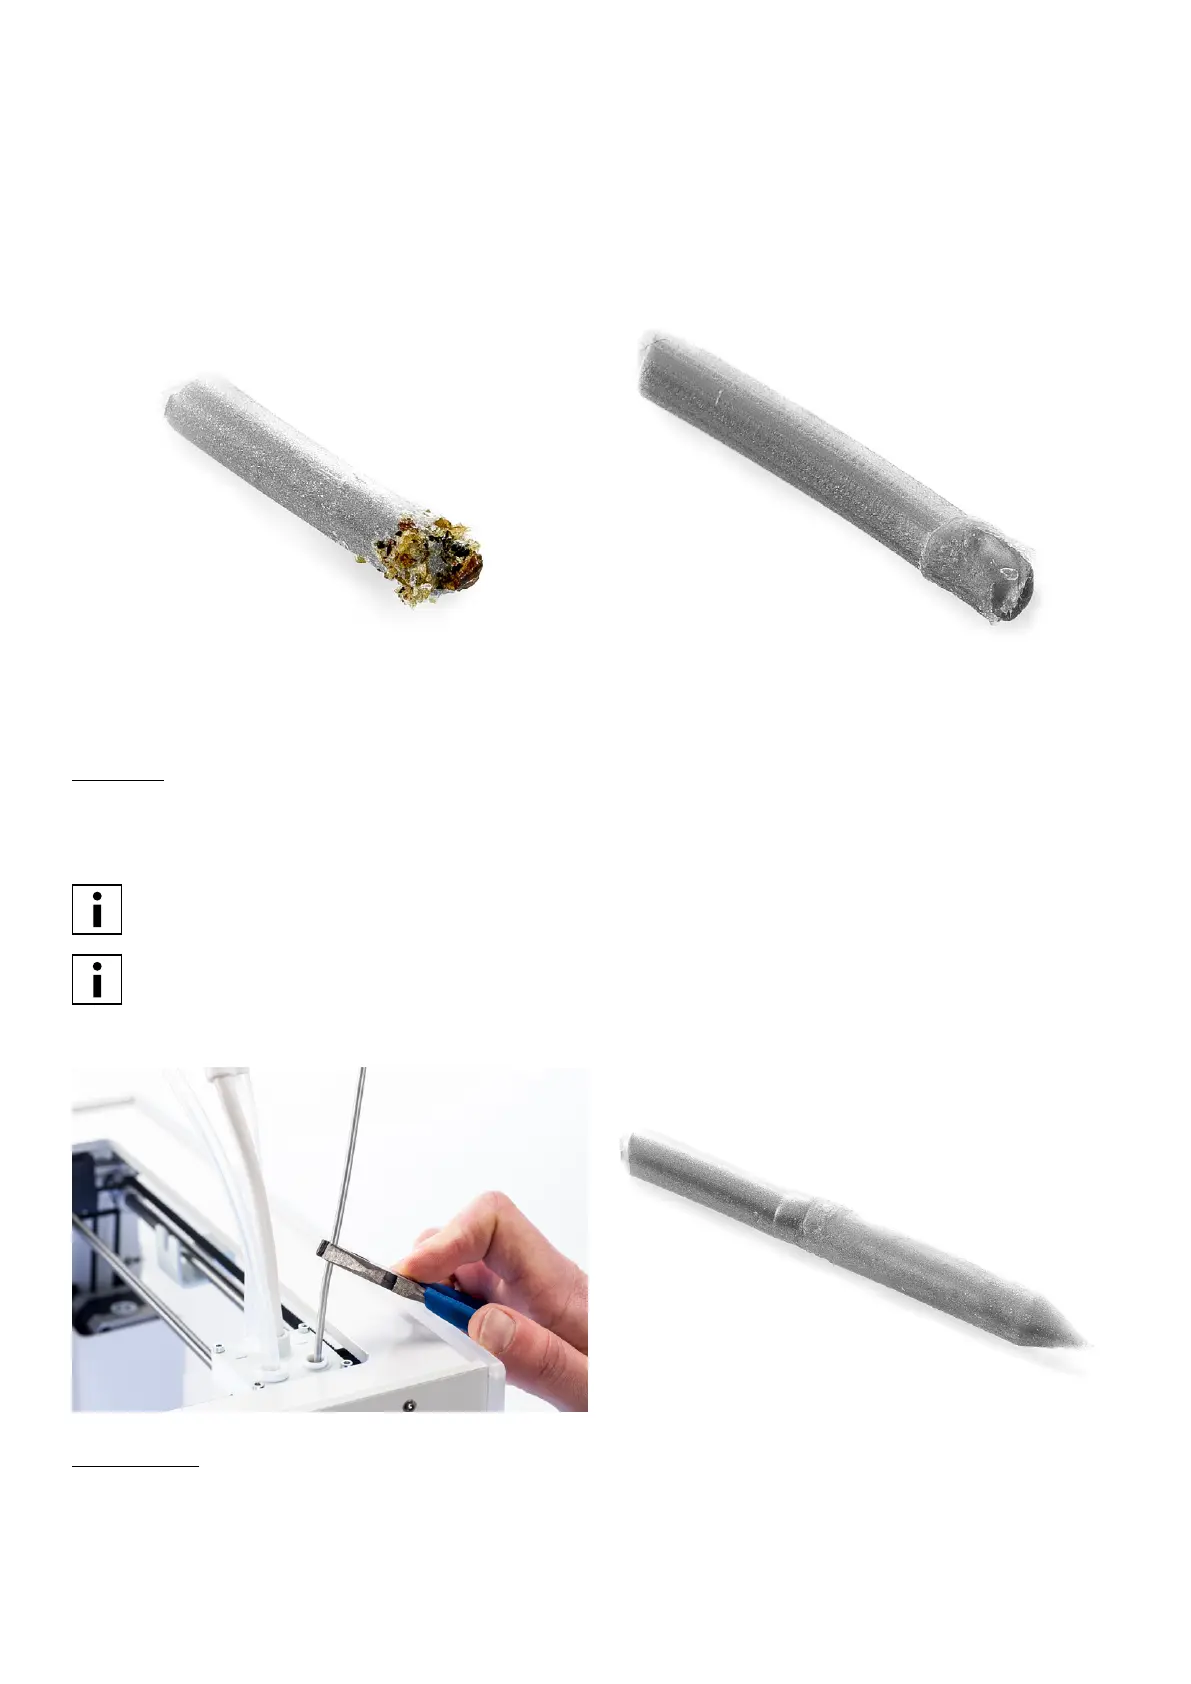
6. Check the color and the shape of the tip of the filament and compare it with the pictures below.
7. Repeat this hot pull process until no more degraded material is visible on the tip of the filament and the tip of the
filament looks as clean as the picture on the right. After completing the hot pull process, manually flush some material
through the print core with pliers and take it out again.
Cold pull
1. Take a new piece of PLA and insert it into the print head by hand until you feel some resistance.
2. Hold the piece of PLA with pliers and gently apply pressure to extrude some material.
3. Lower the temperature of the print core to 75 °C. While the nozzle is cooling down, maintain pressure on the material
with the pliers until it reaches a temperature of 150 °C.
The slight pressure on the material while cooling down is required to prevent air from entering the nozzle.
For AA print cores lower the temperature to a temperature of 15 - 20 °C above the build plate temperature.
4. Wait until the target temperature of 75 °C is reached.
5. Grab the material with pliers and pull it out with a quick, firm pull. The tip should now look as on the right picture.
Re-assembly
1. Insert bowden tube into the print head.
2. Re-attach the clamp clip and keep pressure on the bowden tube while doing this.