EasyManuals Logo

Ultimaker S3 Basic Instructions

Ultimaker S3
7 pages
To Next Page IconTo Next Page
To Previous Page IconTo Previous Page
Page #5 background imageLoading...
Page #5 background image
2
Leave a note with your name and student email address
next to the machine, so you can be contacted if necessary.
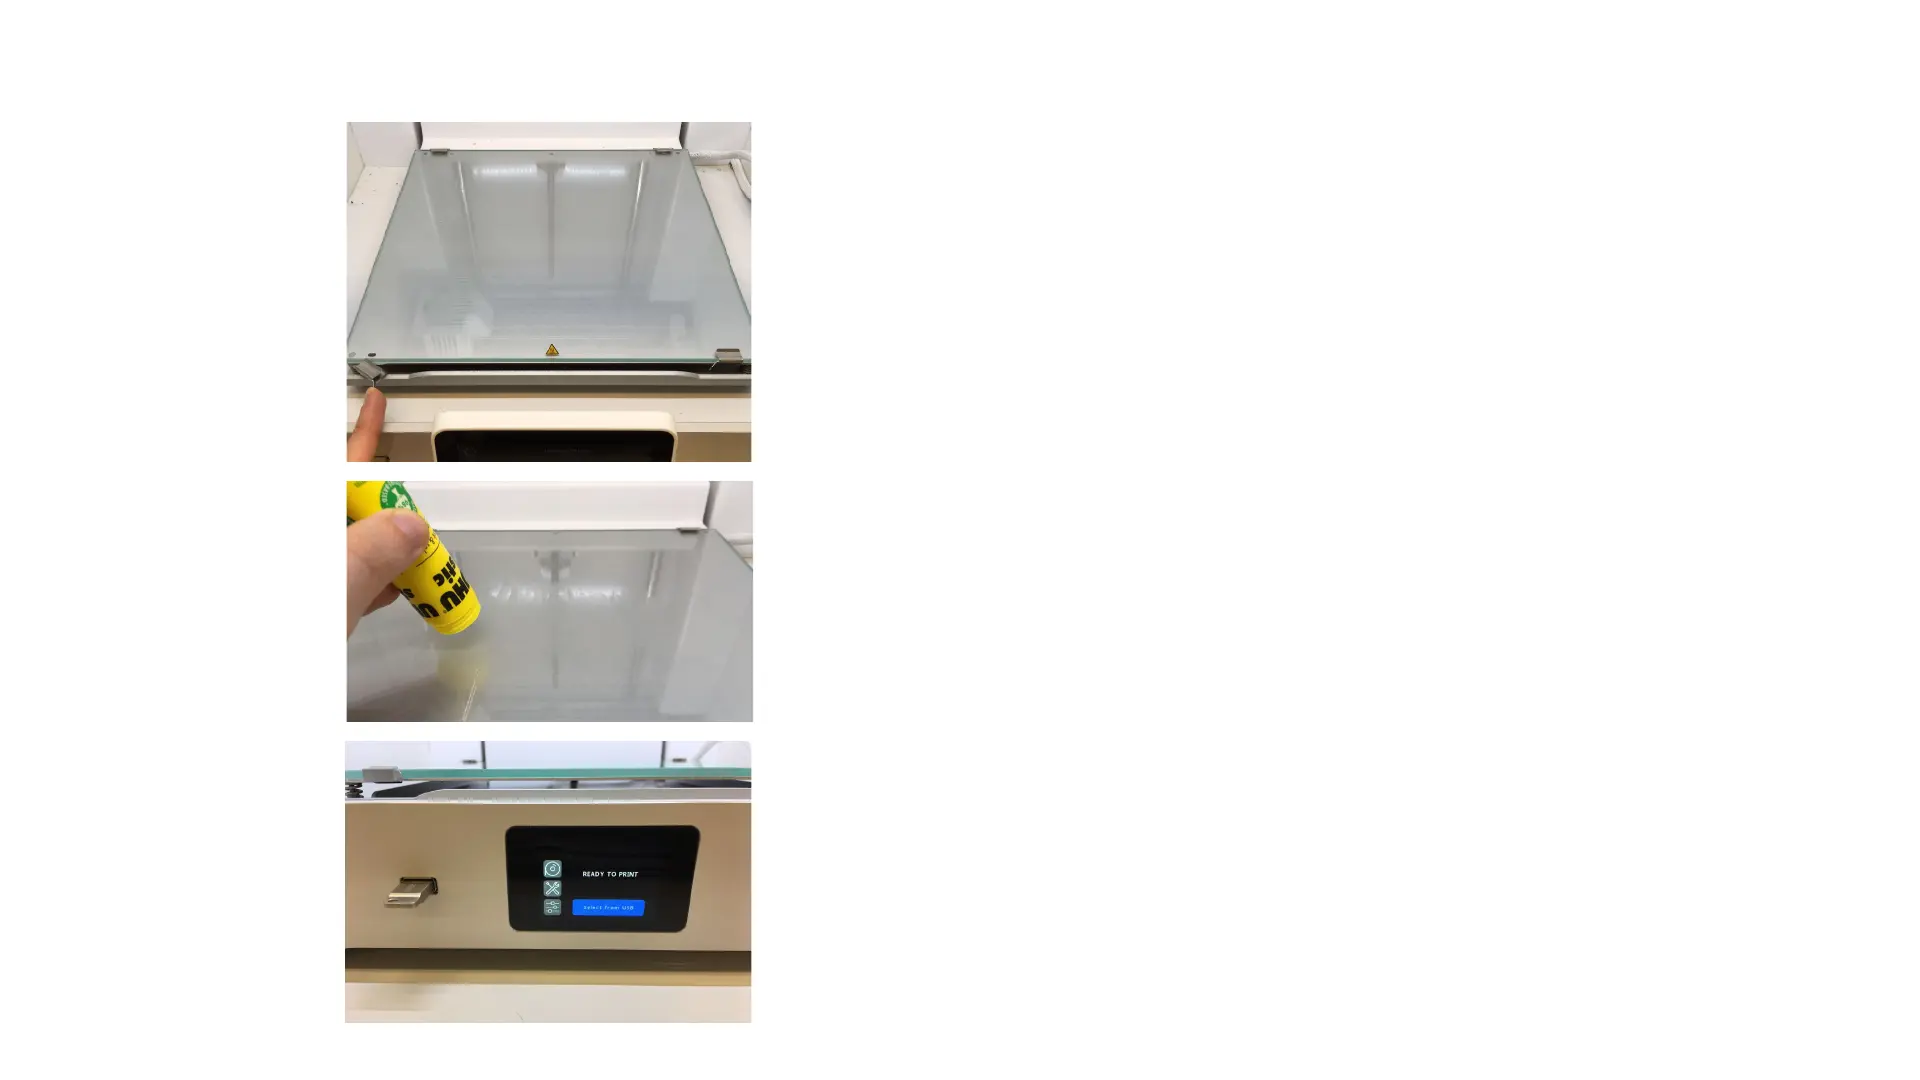
A Check that the glass bed is secured and clear of debris
(if not clean see step 4B). The bed is fully secured if the
clips close parallel with the glass bed.
B Apply a light, single layer of glue to the bed, only on
areas where you have placed models in the slicing
software. Glue is found in the box above each printer.
C Put your .ufp or equivalent gcode file onto a personal
USB or the printer’s USB. Plug this into the port left side
of the touch screen. Press ‘select from USB’.
Do not change any settings or attempt to perform
maintenance from the touch screen menu. Report issues.
A
B
C

Other manuals for Ultimaker S3

Questions and Answers:

Question and Answer IconNeed help?

Do you have a question about the Ultimaker S3 and is the answer not in the manual?

Ultimaker S3 Specifications

General IconGeneral
Build Volume230 x 190 x 200 mm
Print TechnologyFused Filament Fabrication (FFF)
Filament Diameter2.85 mm
Number of Print Heads2
Print SpeedUp to 24 mm³/s
Heated BedYes
Dual ExtrusionYes
Operating Temperature15 - 32 °C
Nozzle Diameter0.4 mm
ConnectivityWi-Fi, USB, Ethernet
Supported MaterialsPLA, ABS, Nylon, CPE, PC, TPU, PP, PVA, Breakaway
TouchscreenYes
Feeder TypeDual-geared feeder
Build PlateGlass
Bed LevelingAutomatic
Power Requirements100-240 V, 50-60 Hz
Layer Resolution20 - 200 microns (0.0007 - 0.008 inches)

Related product manuals