EN UltiMaker S7 Installation and user manual 21
Print recommendations
Eachmaterialrequiresdierentsettingsforoptimalresults.WhenusingUltiMakerCuraandUltiMakermaterials,
the print settings are automatically updated based on the selected print cores and material(s).
For detailed instructions on which settings and adhesion method to use per UltiMaker material, take a look at
the material support pages on support.ultimaker.com.
Whenusingthird-partymaterials,checktheUltiMakerMarketplaceforthelatestprintproles.Theseprolesare
submittedandmaintainedbylamentcompaniesintheUltiMakerMaterialAllianceProgramtoensurethehighest
success rate with your UltiMaker 3D printer.
Tobenetfromtheautomaticmaterialswitchingduringaprintwhenaspoolrunsout,itisrecommendedto
have at least two spools of the same material loaded into the Material Station.
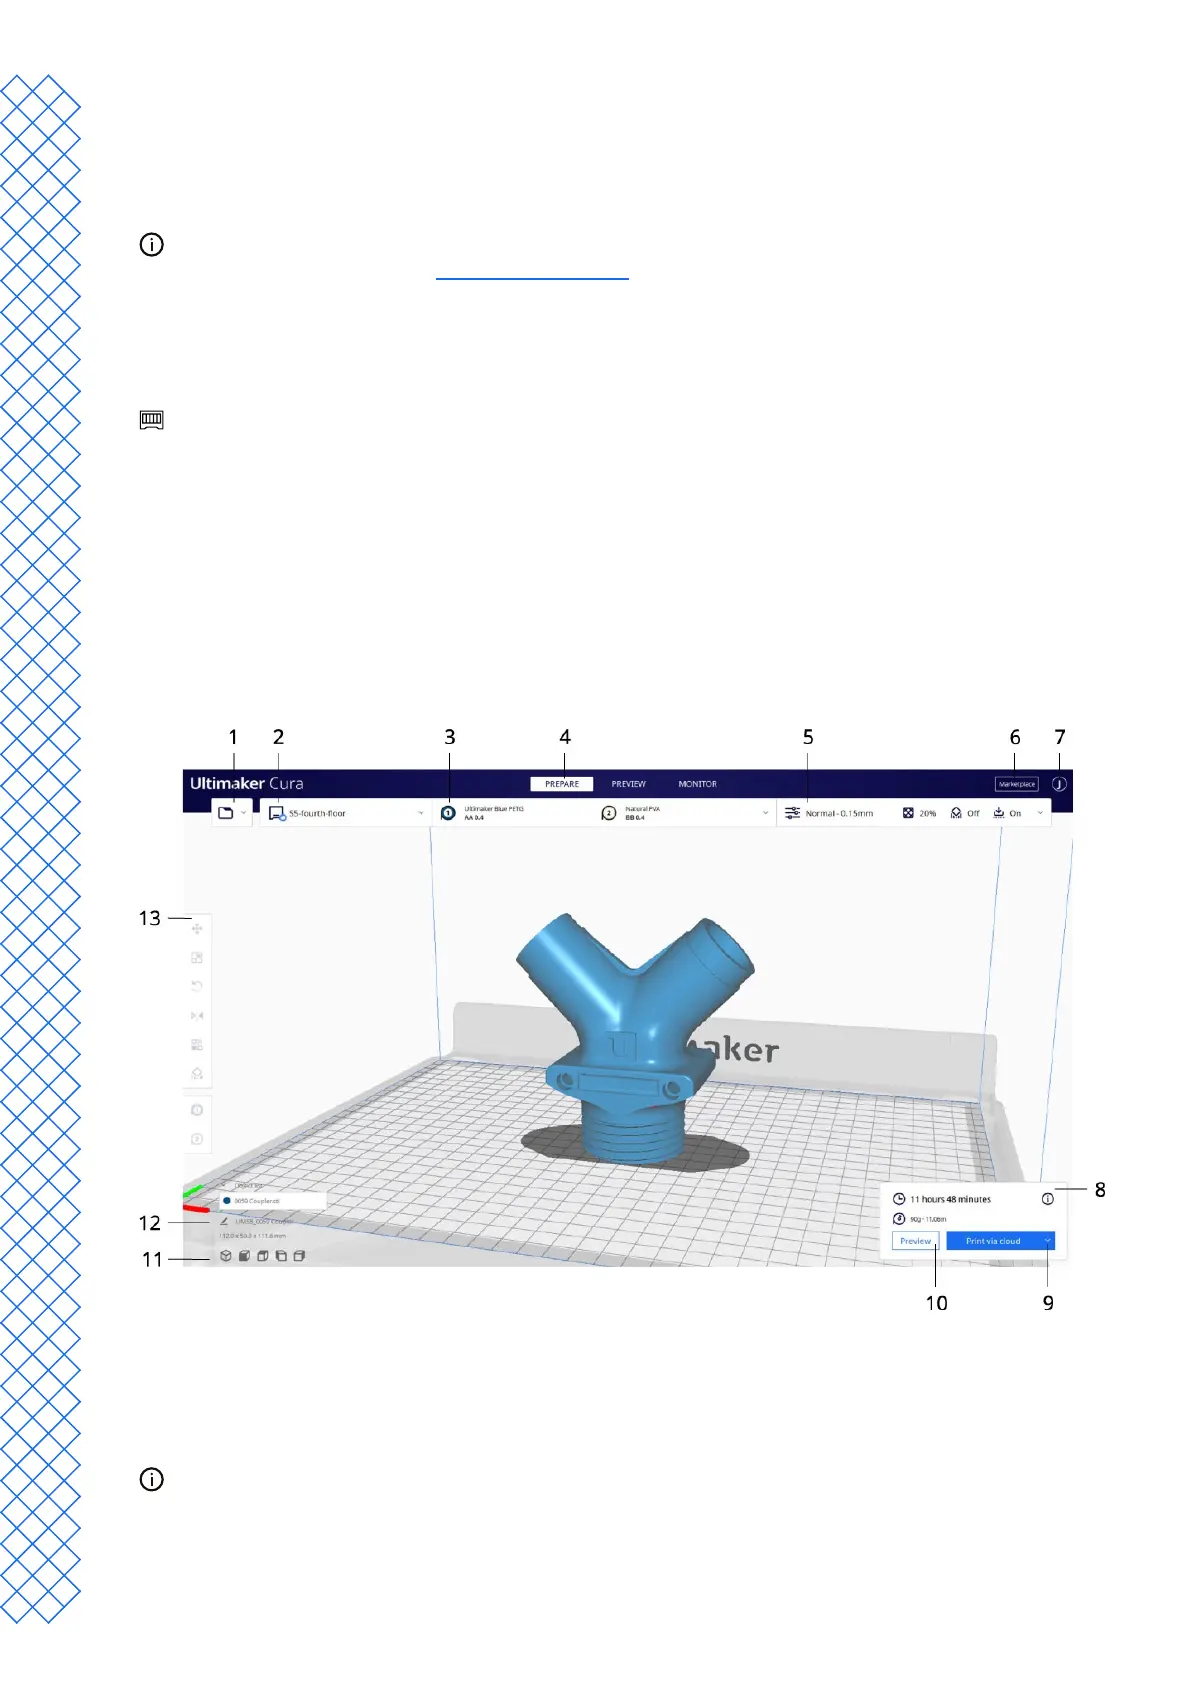
4.3 Preparing a print with UltiMaker Cura
Interface
When the UltiMaker S7 is set up in UltiMaker Cura, the main interface becomes visible. Here is an overview of the
user interface (UI):
1. Openle
2. Printer selection
3. Congurationpanel
4. Stages
5. Print settings panel
6. Marketplace
7. UltiMaker Account
8. Action panel
9. Print
10. Preview
11. Camera position tool
12. Model information
13. Adjustment tools
Due to fast development cycles of UltiMaker Cura software, interface elements may be subject to change.
Always check the Cura support pages for the latest information (interface).