EN UltiMaker S7 Installation and user manual 23
4.5 Remove the print
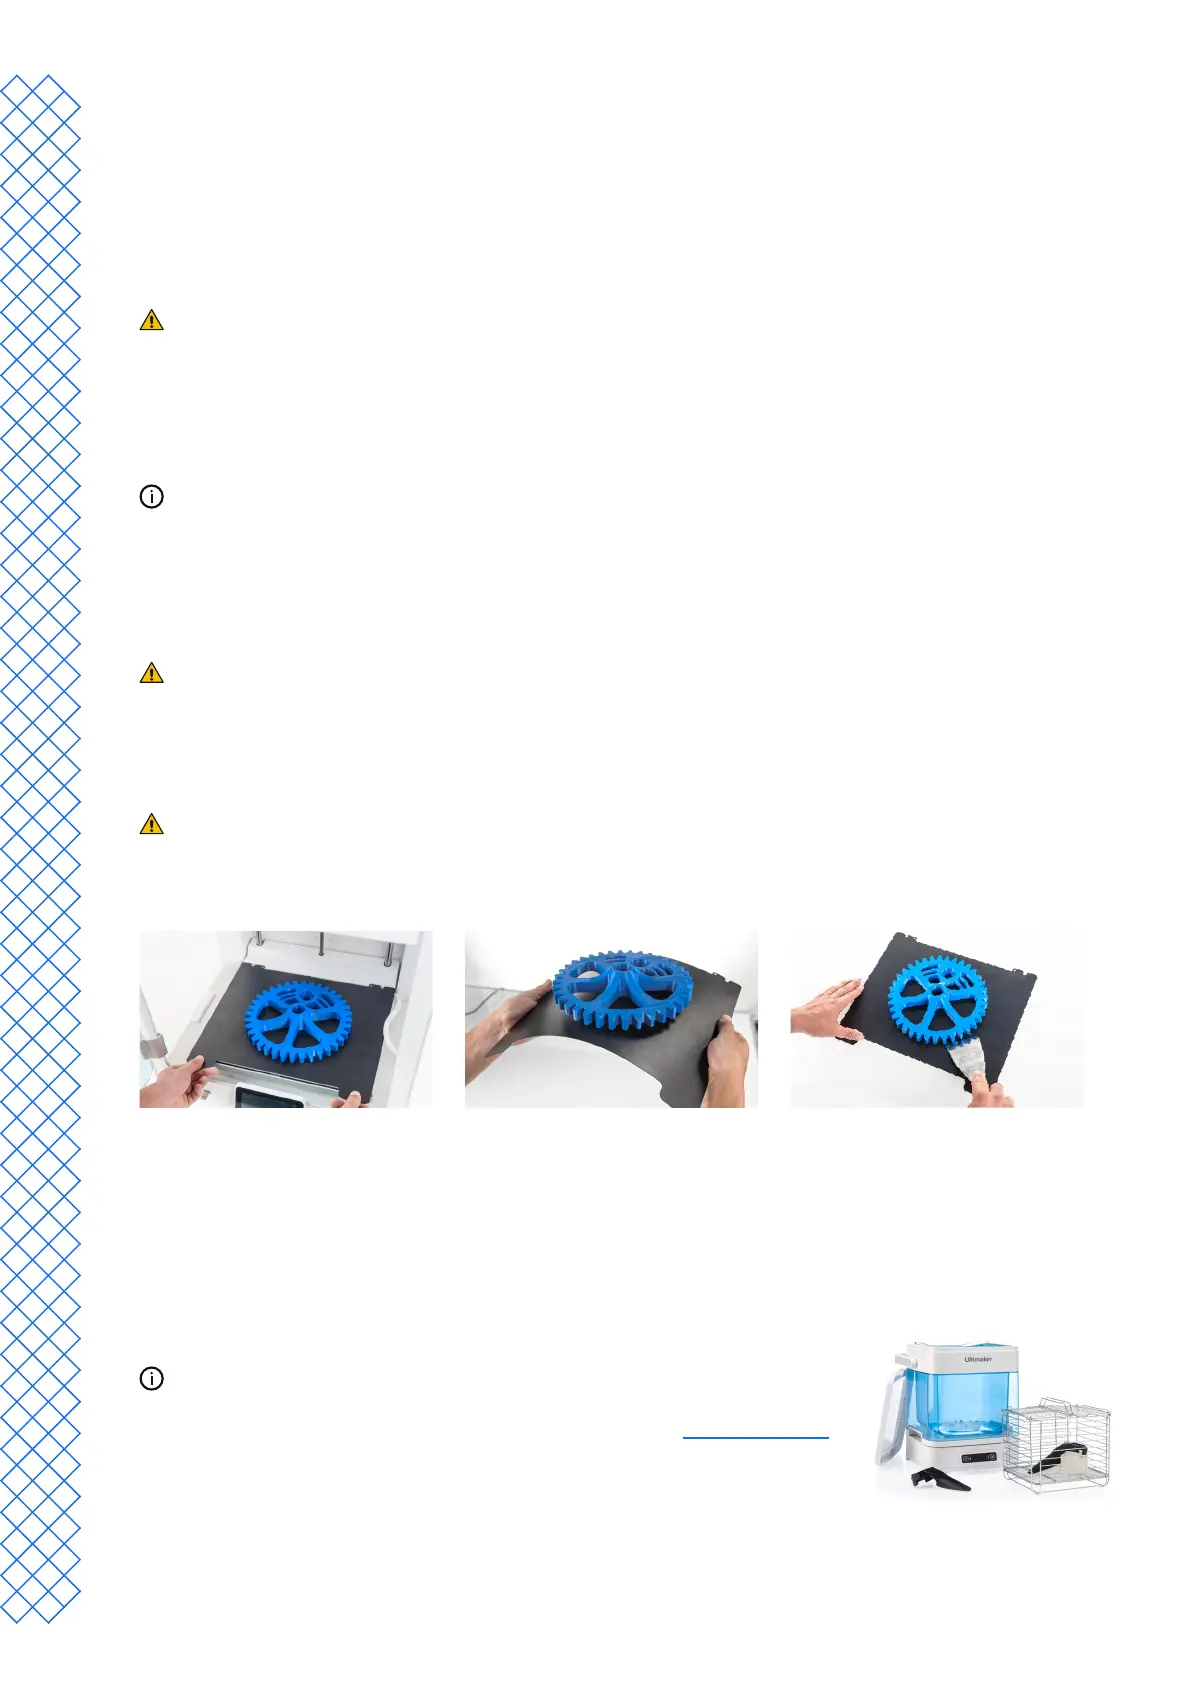
Onceyour3Dprintisnished,itmustberemovedfromthebuildplate.TheUltiMakerS7hasaconvenientexible
build plate, which makes removing prints quick and simple.
1. Wait for the build plate to cool down. The display of the UltiMaker S7 will indicate when it is safe to
remove the build plate.
Never remove the build plate when it is still hot to prevent burning your hands. The build plate can reach
temperatures of over 100 ºC.
2. Open the glass door.
3. Holdtheexiblebuildplateatthetabsatthefront,liftitup,andslideitoutoftheprinter.
4. Carefully bend the plate underneath the printed object until it detaches from the build plate.
Take measures to prevent the printed object from falling and getting damaged when removing it from the
exiblebuildplate.
Notallprintswilldetacheasily,especiallythosewithasmallfootprintorwhenusingexiblematerials.Iftheobject
does not detach by bending the plate, you can use a spatula or scraper. Carefully insert the spatula or scraper
under the print, parallel to the build plate, and apply some force to remove the print.
Use a spatula or scraper with rounded edges and wear protective gloves to prevent injury
when removing the print.
Whentheprintisothebuildplate,removeanybrimsusingadeburringtooland/orremovesupport
structures (see section 4.6).
The edges of the model or brim can be sharp. Wear protective gloves to prevent injury.
Once the print has been removed and the build plate is placed back in the printer, select Conrm removal on the
display of the UltiMaker S7. This will allow the next print job to start.
4.6 Remove support material
PVA support
PVAsupportstructurescanberemovedeasilybydissolvingthePVAinwaterandleavenotraceafterwards.
DissolvingPVAcantakeuptoseveralhours.
Experiencequickerandeasierpost-processingwhenusingPVAsupport
materialwiththeUltiMakerPVARemovalStation.ThePVARemovalStation
removesPVAupto4xfastercomparedtomotionlesswater.Learn more here.
1. SubmergetheprintinwatertoletthePVAdissolve.
2. RinsetheprintwithcleanwatertoremoveanyexcessPVA.
3. Let the print dry completely.
4. Dispose of the wastewater.