EN UltiMaker S7 Installation and user manual 12
3.2 What’s in the box
The UltiMaker S7 is supplied with several hardware accessories. Check if all these items are
included before continuing:
Notes
1
Not required in combination with the Material Station
2
Another AA 0.4 print core is already inserted into print head slot 1
3.3 Hardware installation
BeforeturningtheUltiMakerS7onforthersttime,installtherelevanthardwareaccessories
and connect the cables.
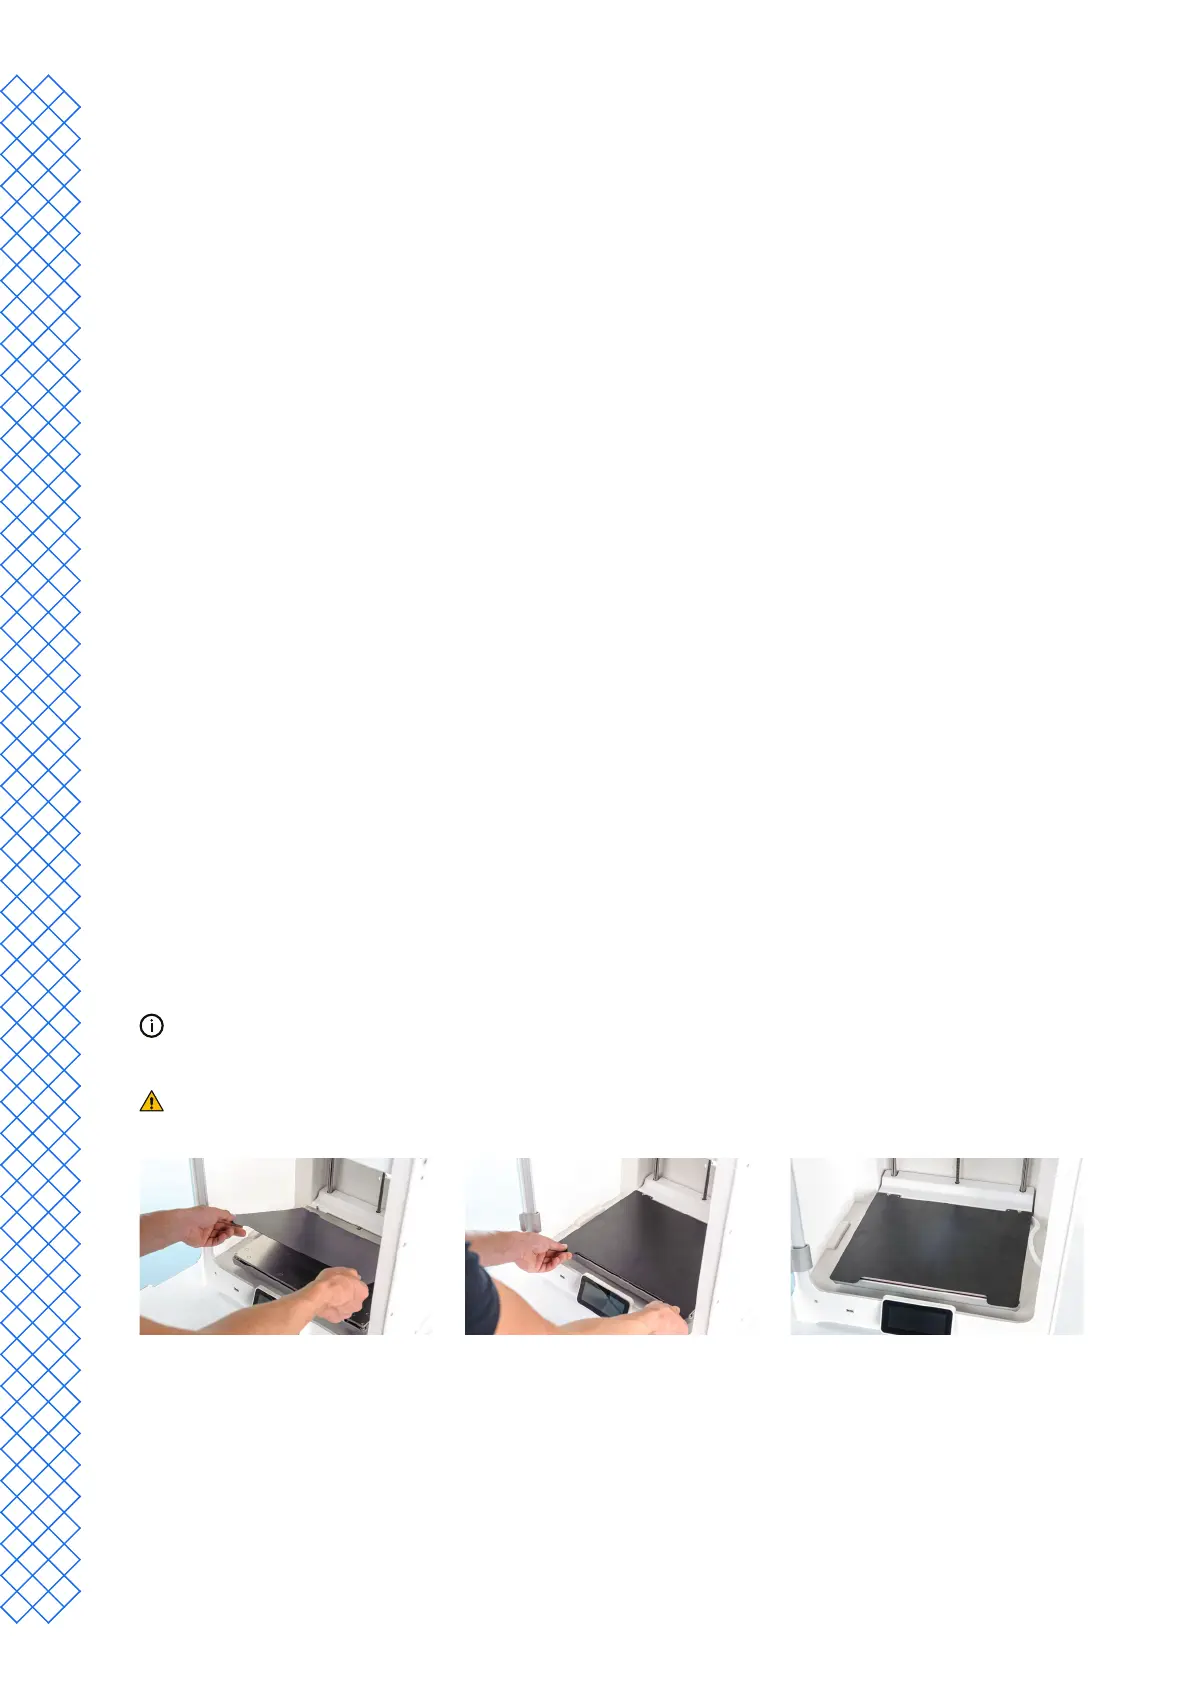
Install the exible build plate
1. Taketheexiblebuildplateoutofthepackaging.
2. Open the glass door of the UltiMaker S7.
3. Hold the build plate at the tabs at the front.
4. Alignthebackoftheexiblebuildplatewiththepinsatthebackofthebaseplate.
5. Lowertheexiblebuildplatesoitsnapsintoplace.
Theexiblebuildplatemustbeplacedfullyagainsttheprinttablebackcoversothatitactivatesthebuildplate
detection sensor. If the plate is too far towards the front, the printer will not recognize it.
Onlyholdtheexiblebuildplateatthetabsatthefront.Keepngersawayfromunderneaththecontact
surface of the plate during installation to prevent getting stuck between the base plate and build plate.
Accessories
1. Flexible build plate
2. Spool holder with material guide
1
3. Power cable
4. Ethernet cable
5. USB stick
6. Print core AA 0.4
2
7. Print core BB 0.4
8. XY calibration sheet
9. Nozzle cover (3x)
Consumables
10. Tough PLA (750 g)
11. PVA(750g)
12. Oil
13. Grease
Tools
14. Hex screwdriver 2 mm