All rights reserved 50 Service Manual e-Series (EN) 1.1.8
5. Use the arrows in the Joint Position window on the right side of the screen to move each joint
to align as shown in the images below. The Speed Slider can be used to reduce the speed of
movement.
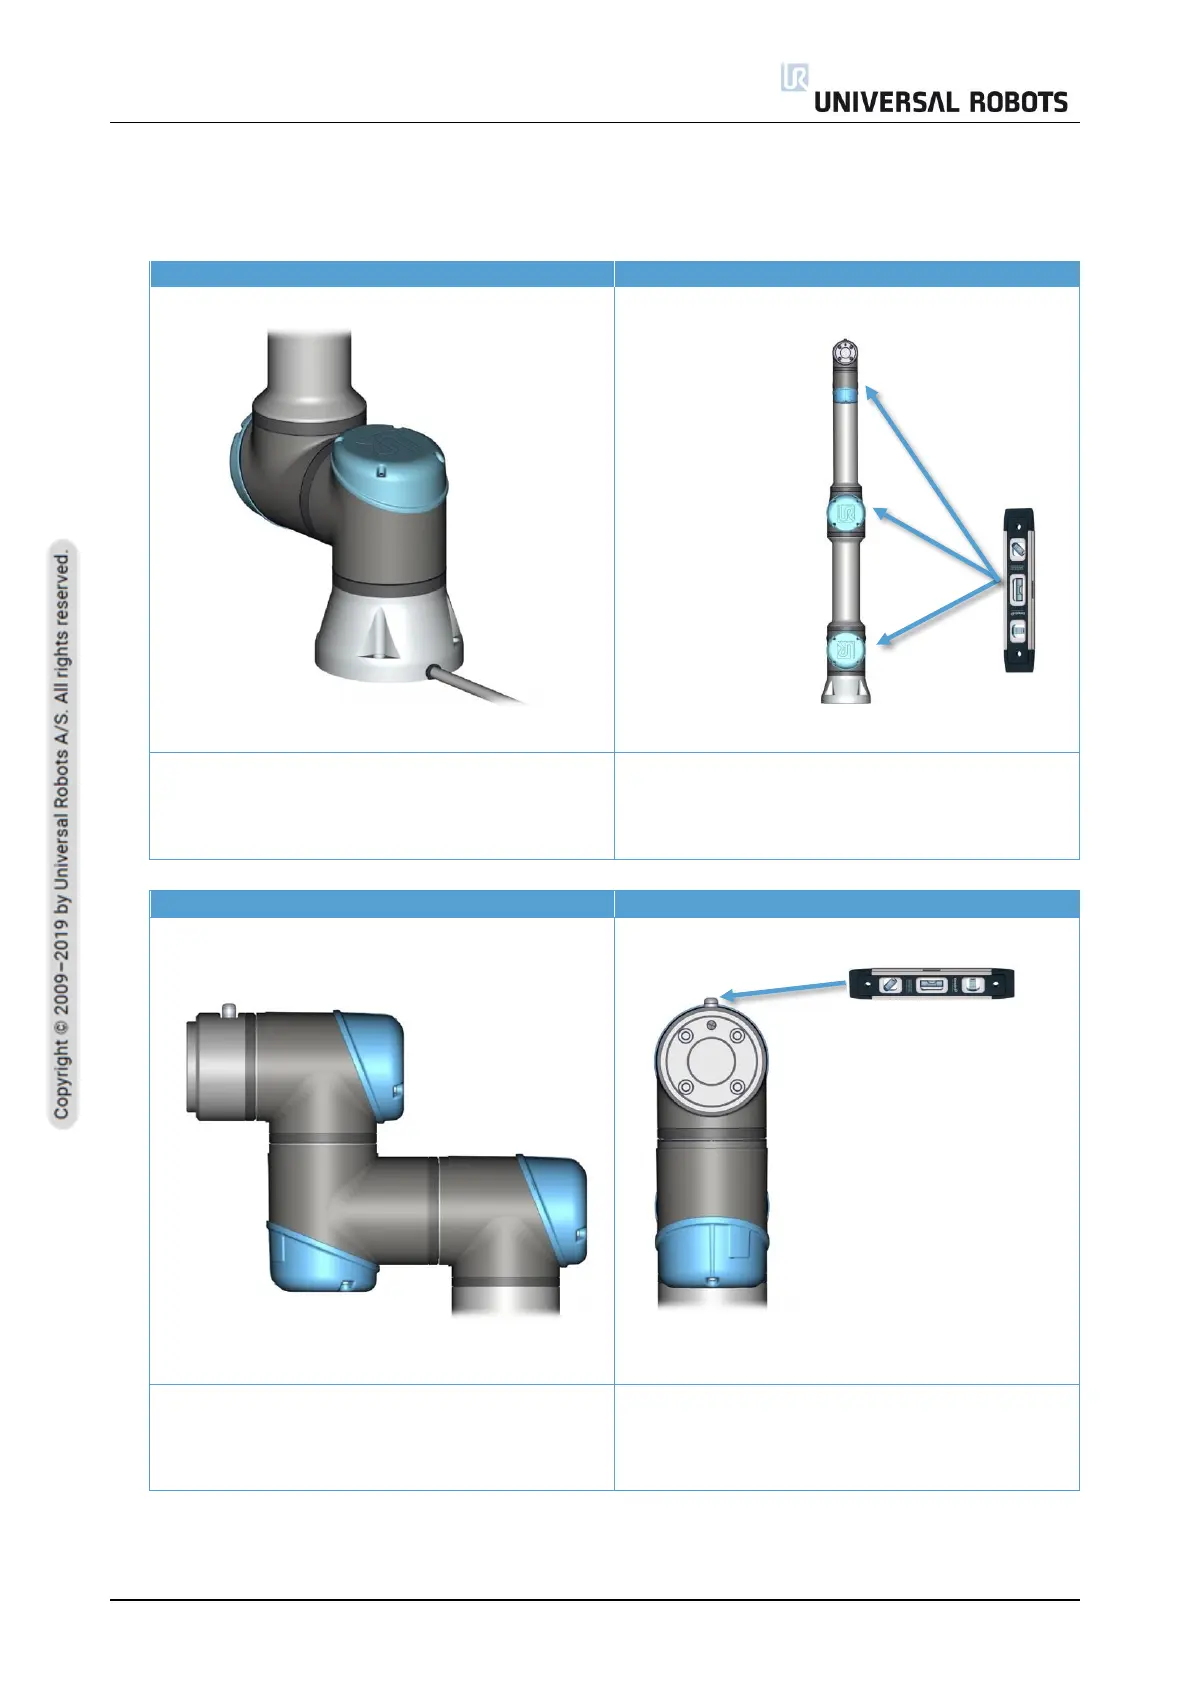
Base zero position is aligned so the Base
joint is offset 180 degrees from the cable at
the back of the robot base.
Shoulder, Elbow and Wrist 1 zero output
flange vertically align (assuming Base is
horizontal). Make sure that Base of the robot
is horizontal, use spirit level to align joints.
Wrist 2 zero position is aligned like the Base
joint, with tool flange parallel with Wrist 1
output flange.
Wrist 3 zero position is aligned so the tool
connector is pointing upward. Mount two
bolts in tool holes and use spirit level to align
joint.
 Loading...


