Do you have a question about the Universal Robots UR20 and is the answer not in the manual?
Explains the purpose of the Service Manual for UR users and integrators.
Provides contact information for Universal Robots A/S.
Outlines copyright, information changes, and liability disclaimers.
Defines various safety message types (WARNING, CAUTION, NOTICE, GROUND).
Explains additional safety symbols and mandatory action indicators.
Provides notices on handling ESD-sensitive parts, including wristbands and bags.
Details precautions for ESD-sensitive parts, including material and humidity.
Introduces inspection activities for the robot arm.
Outlines the inspection plan for the robot arm, including frequency and type.
Details visual inspection steps for the robot arm, including torque values.
Describes functional inspection for the robot arm, checking screws and bolts.
Provides instructions for everyday and additional cleaning of the robot arm.
Introduces inspection activities for the Control Box and Teach Pendant.
Outlines the inspection plan for Control Box and Teach Pendant.
Details functional and safety inspections for the Control Box and Teach Pendant.
Explains how to test the Freedrive and Backdrive functions of the robot arm.
Verifies robot safety settings against the installation risk assessment.
Guides visual inspection of the Control Box, checking terminals and dust.
Provides cleaning instructions for the Teach Pendant touch screen and Control Box filters.
Lists tests and verifications to be conducted before first use or after modifications.
Lists recommended tools for robot arm and control box service.
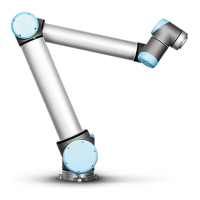
Illustrates and labels the main components and joints of the robot arm.
Specifies torque values for clamp connections between robot arm joints.
Details torque specifications for clamp sizes 2.5, 4, and 5.
Lists joint sizes and their corresponding masses for handling.
Provides a warning and instructions for disassembling a joint with a clamp connection.
Details the step-by-step process for disassembling a robot arm joint clamp.
Continues the steps for disassembling a robot arm joint, including connector unplugging.
Provides notices and instructions for reassembling a robot arm joint clamp.
Explains that the tool flange uses a clamp connection and refers to previous section.
Describes how to dismount trim plates on the UR20 robot arm.
Explains the procedure for mounting trim plates on the UR20 robot arm.
Details the steps for verifying a replacement joint with the controller.
Explains the need and requirements for Dual Robot Calibration.
Describes how program correction by key waypoints adjusts programs after joint replacements.
Provides warnings and initial steps for dismantling the control box.
Continues the steps for dismantling the control box, including power supply removal.
Lists torque values for various components within the Control Box.
Details specific torque values for Control Box assembly and disassembly.
Describes how to replace a Teach Pendant with a 3PE Teach Pendant.
Details the steps for removing and replacing the Teach Pendant.
Explains the importance of keeping robot software up to date for safety and performance.
Provides a step-by-step guide for updating the robot’s software via USB.
Explains how to create a support file for robot data backup.
Describes how to use Magic Files for automatic data backup to a USB stick.
Lists the necessary hardware for performing data backup.
Details software requirements for accessing the robot's Linux partition.
Guides on accessing the robot's SD card Linux partition from Windows.
Explains how to copy specific files and folders from the SD card.
Discusses connecting external equipment like mouse, keyboard, and monitor for troubleshooting.
Introduces the UR Log Viewer software for analyzing robot logs and support files.
Explains the meaning of power and communication LEDs on the Safety Control Board.
Specifies the type and specifications of the fuse used in the control system.
Provides a step-by-step guide for completely rebooting the robot system.
Explains how to handle protective stops and avoid ignoring them.
Warns about the risks and warranty voiding associated with ignoring protective stops.
Lists checks to perform before shipping robots or spare parts back to Universal Robots.
Provides notices regarding third-party products, software updates, and cleaning.
Guides on how to pack down the robot and control box for shipping.
Offers recommendations for transporting the robot without original packaging.
| Payload Capacity | 20 kg |
|---|---|
| Reach | 1750 mm |
| Weight | 64 kg |
| Repeatability | ± 0.05 mm |
| Degrees of Freedom | 6 |
| Protection Rating | IP54 |
| Operating Temperature | 0°C to 50°C |
| Footprint | 245 mm diameter |
| Power Consumption | 500 W |
| Programming | URScript, Polyscope |
| Mounting | Floor, Ceiling, Wall |


