Installation Guide for Uplogix Local Managers 22
special cables. Consult your power controller documentation if a straight Ethernet cable does
not work.
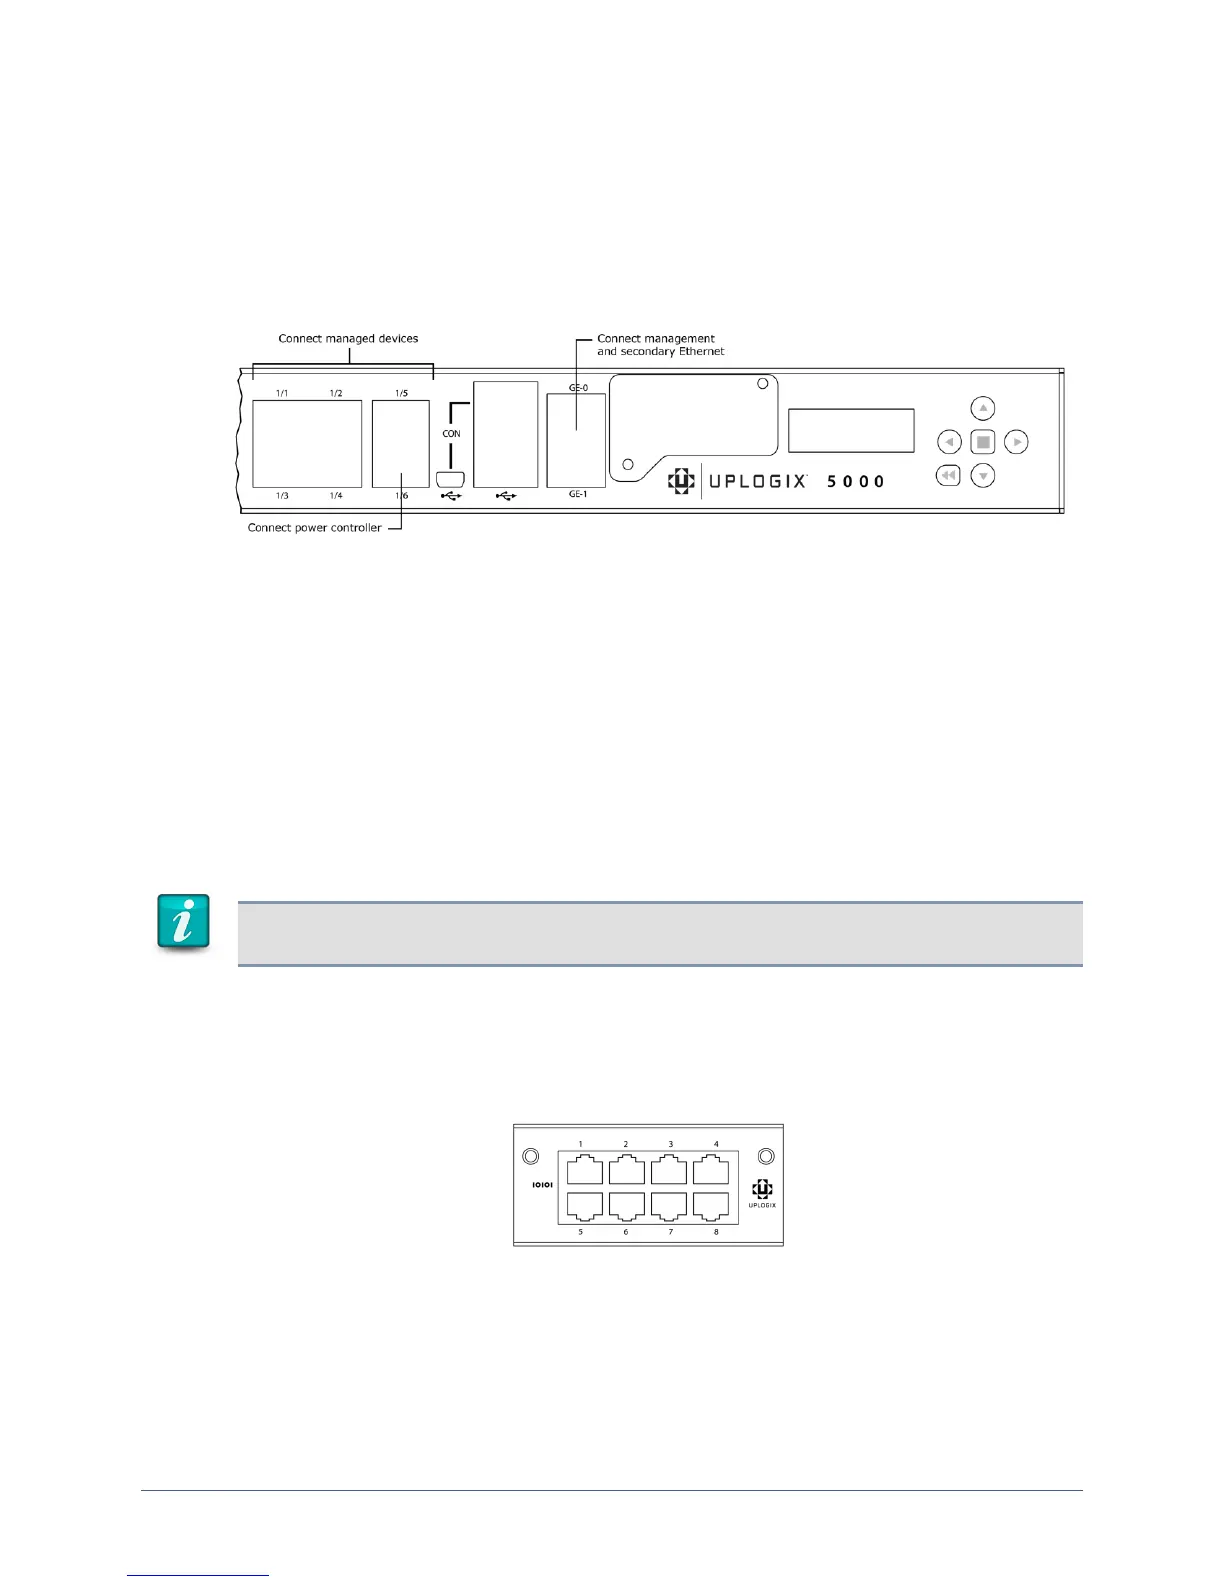
Connecting management Ethernet
To manage the Local Manager and attached devices in-band through the network, connect
Gigabit Ethernet port 0 (GE-0) on the front panel to your network using a straight Ethernet
cable. Both GE-0 and GE-1 auto negotiate their speed and duplex settings by default.
When connected, secondary management Ethernet port GE-1 acts as a standby redundant
Ethernet management connection by default. GE-1 will become active if the GE-0 link drops.
Therefore, it is important that GE-0 and GE-1 be connected to switch ports on the same
network or VLAN.
If your management network is fiber based, connect to the SFP in the option slot. If GE-0 or
GE-1 are connected to the network, they will take precedence over the fiber connection.
Connecting devices to be managed
Connect the console ports of network devices to the serial ports on the Local Manager. A
straight Ethernet cable works for most devices, but some devices do require a rolled cable or a
cable with a non-standard pin out. Consult your managed device documentation for console
port serial setting and pin out information as necessary. Depending upon configuration of your
Local Manager, optional Ethernet connections may also be available for managed devices.
Note: Ensure that RJ45 or RJ11 connectors used to connect devices to the Uplogix have a
locking tab and that the connector is installed in the proper orientation.
Connecting managed devices to a serial expansion card
Connect the console ports of up to five network devices to the first five serial ports (1/1
through 1/5) on the Local Manager. Connect the console ports of up to 8 or 16 additional
network devices to the serial ports on the expansion card.
Connecting managed devices to an Ethernet expansion card
Connect management Ethernet ports of up to eight network devices to the eight Ethernet
ports on the expansion card.