Installation Guide for Uplogix Local Managers 8
Installing an SFP module
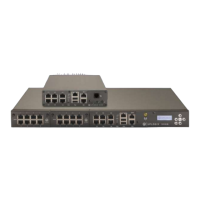
Follow these steps to install the SFP module in the chassis option slot of the Local Manager:
1. Power off the Local Manager
2. Remove the option slot cover, align the carrier card with the internal rails, and slide the
module into place.
3. Replace the screws.
4. Install either a 1000Base SX (GLC-SX-MM) SFP or the 1000Base LX/LH (GLC-LH-SM) SFP
for fiber connectivity. Both the 1000Base SX (GLC-SX-MM) SFP and the 1000Base LX/LH
(GLC-LH-SM) SFP are customer-provided equipment.
Note: SFP modules are hot swappable, but the SFP carrier option card is not hot
swappable.
Installing a Temperature and Humidity Sensor
The Local Manager supports a USB-connected temperature and humidity sensor. Follow these
steps to connect the sensor. Note the Local Manager does not need to be powered down for
installation of this sensor.
1. Plug the sensor into one of the two USB connections on the Local Manager
2. Place sensor collection end in the area you wish to collect environmental information,
ideally not near a fan or on hot equipment.
It may take up to 10 minutes for the sensor to normalize to the environmental temperature
and begin reporting consistent data.
Installing the chassis
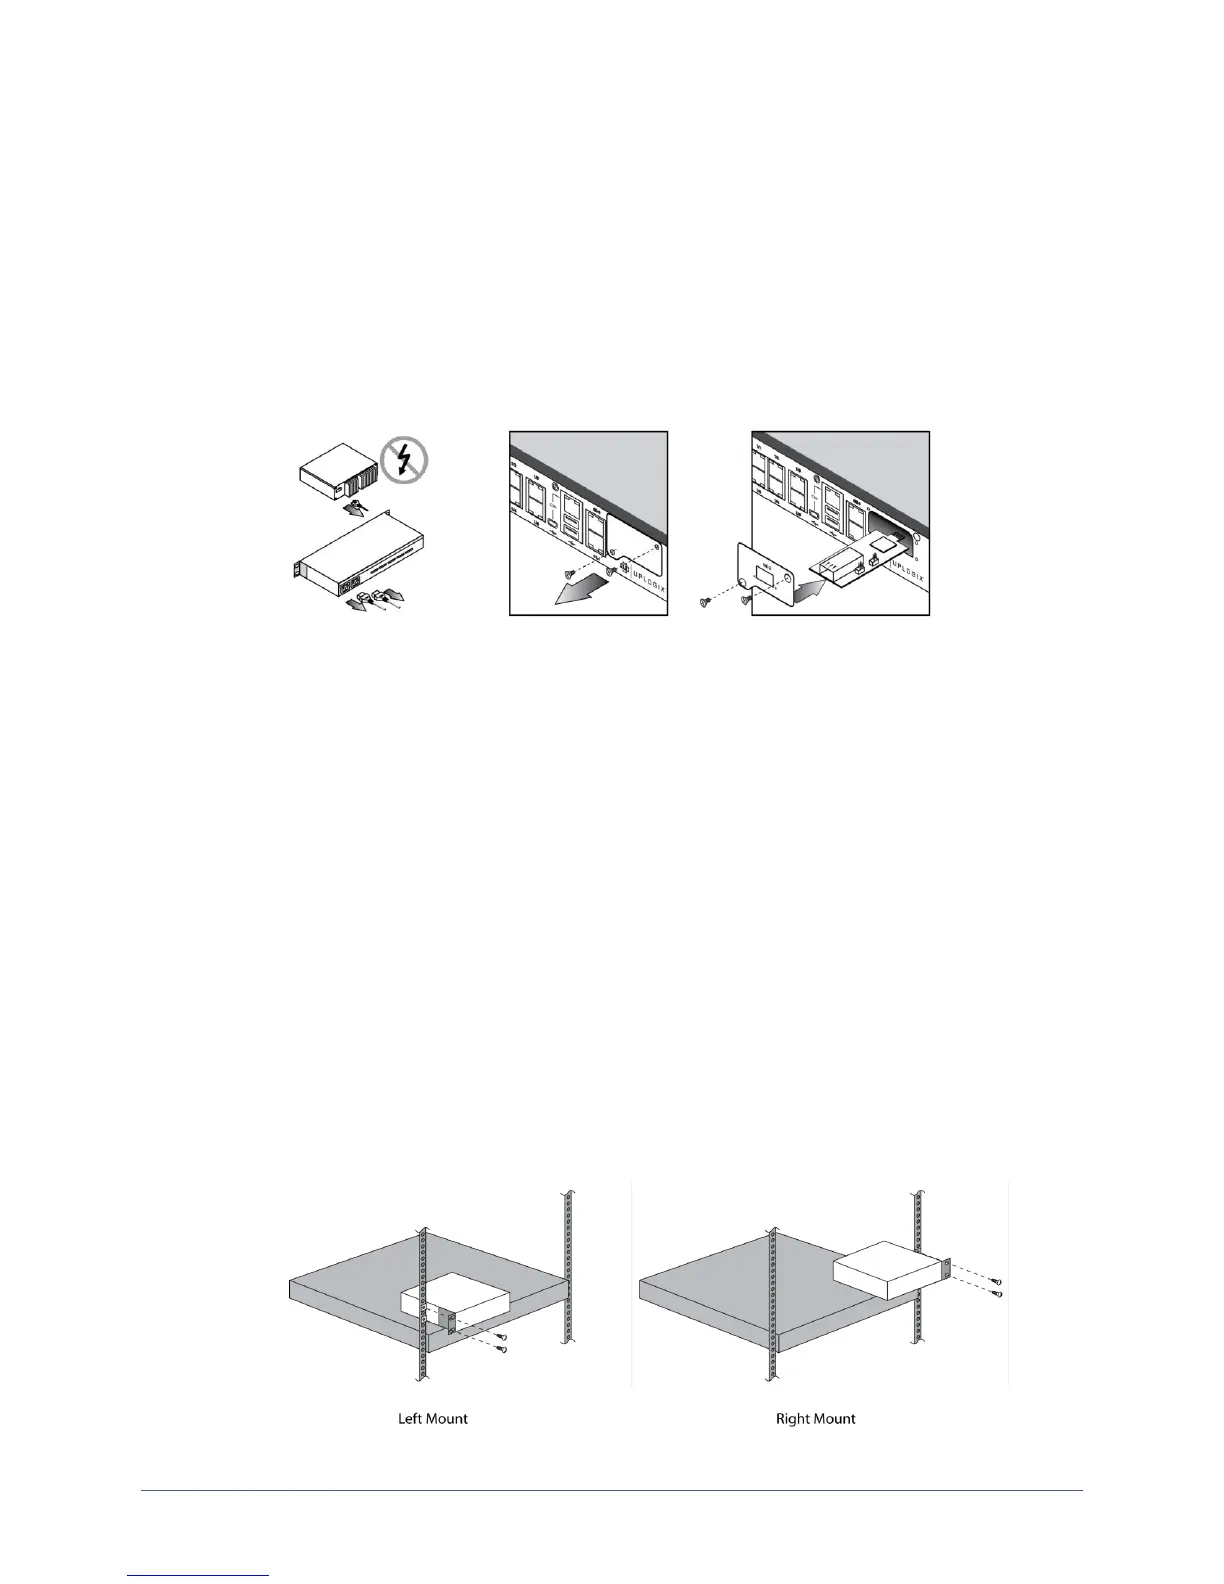
The Local Manager is designed to be mounted in a rack or placed on a tabletop. To mount the
Local Manager in a rack:
1. Use the screws provided to attach the mounting bracket.
2. The mounting bracket can be installed on either side of the Uplogix 500.
3. Mount the Local Manager in the rack.