24 25
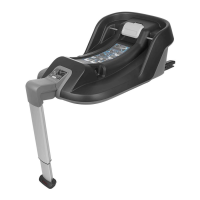
BASE INSTALLATION WITH LOWER ANCHORS
We recommend using the load leg to optimize safety of the child in the seat. Load leg should be placed in stowed
position when not in use. If installing without the load leg, bypass step 1 and proceed to step 2.
LEVELING BASE
1 Press the load leg release button on bottom of the
base and pull load leg out from storage. Place on the
vehicle seat with the load leg extended toward the
front of the vehicle cushion.
NOTE: We recommend removing the vehicle floor
mat before installation.
2 Lift the level adjust handle on the top of the base to
extend the foot and change the recline angle. Check
the bubble level angle indicator on either side of
the base. The base is level when the bubble is fully
between the lines. NO partial bubble allowed.
NOTE: If the bubble is not visible, lower the foot to
the lowest position and complete installation. Upon
completion, the bubble should fall between the two
lines.
NOTE: Vehicle must be parked on a level surface to
properly level the base.
If proper angle cannot be achieved with level
adjustable foot, a rolled towel may be used.
Foot must be in fully extended position.
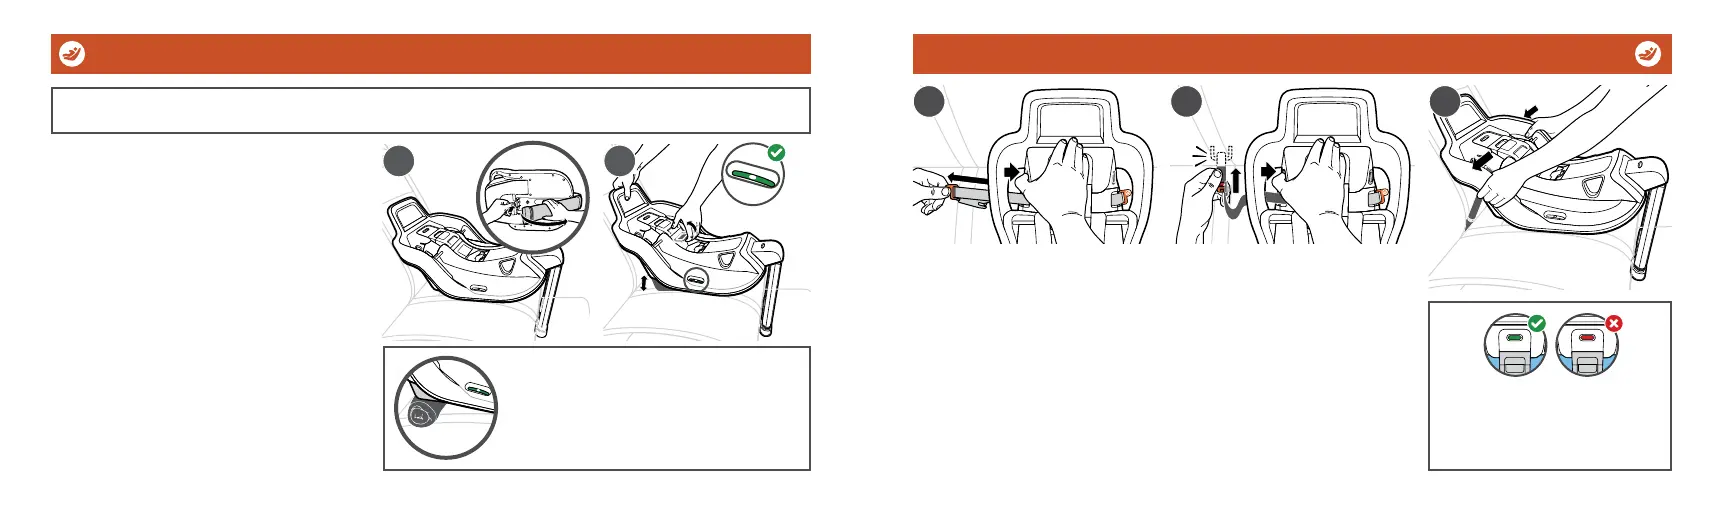
BASE INSTALLATION WITH LOWER ANCHORS
1 Locate the lower anchor connectors on either side of the base and remove
by pushing the corresponding orange button while pulling the connector out
of the lower anchor storage pocket.
2 Attach the lower anchor connectors to the vehicle lower anchors located
in the vehicle seat bight (crease of seat).
NOTE: Check lower anchor connectors are in the upright position.
3 Apply pressure firmly into the base allowing excess lower anchor connector
webbing to retract and tighten.
NOTE: A rocking motion may be necessary to retract excess lower anchor
connector webbing.
NOTE: Anti-Rebound+ Panel must make full contact with the seat back.
If it does not make full contact, please refer to the Waterfall note (pg 27).
Installation is complete when
tightness indicator turns from RED
to GREEN and stays green when
downward push is discontinued.
32
1 2
1