Page 8 Operator Manual
067903-004R1 LX Series Work Platform Operation
T
RAVEL
WITH
W
ORK
P
LATFORM
E
LEVATED
Travel with the platform elevated
ONLY
on firm and level surfaces.
NOTE:
The work platform will travel at reduced speed when in the elevated position, and only if the front axle is
parallel with the rear axle.
1. Check that the route is clear of persons, obstructions, holes and drop-offs, is level and capable of sup-
porting the wheel loads.
2. Check clearances above, below and to the sides of the platform.
3. Position the Lift/Drive switch to the DRIVE position.
4. Push the control lever to FORWARD or REVERSE for the desired direction of travel.
5. If the machine quits driving and the tilt alarm sounds, immediately lower the platform and move the
machine to a level location before re-elevating the platform.
S
TEERING
Push the steering switch
RIGHT
or
LEFT
to turn the wheels. Observe the tires while maneuvering to
insure proper direction.
NOTE:
Steering is not self-centering. Wheels must be returned to the straight ahead position by operating the steering
switch.
R
AISING
AND
L
OWERING
THE
P
LATFORM
The machine must be on a firm, level surface, capable of supporting the weight of the machine. On
machines equipped with optional outriggers, use the outriggers to level the machine (refer to “Leveling the
Platform (Outrigger equipped machines only)” on page 10.
1. Position the Lift/Drive switch to LIFT.
2. While holding the control lever so the interlock lever switch is depressed, push the control lever slowly
to UP to raise the platform. Pushing the control lever farther increases the lift speed.
3. When the work task is completed, position the Lift/Drive switch to LIFT, and lower the platform by pulling
back on the control lever until the platform is fully lowered.
Transporting Work Platform 067903-004R1 LX Series Work Platform
Operator Manual Page 13
T
RANSPORTING
W
ORK
P
LATFORM
P
REPARATION
FOR
S
HIPMENT
1. Fully lower the platform.
2. Disconnect the battery negative (-) lead from the battery terminal.
3. Band the controller to the front guardrail.
4. Band the elevating linkage to the frame.
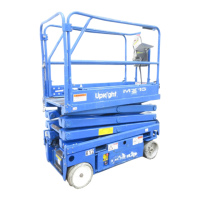
Figure 10:
Transporting Work Platform
L
IFTING
B
Y
C
RANE
1. Secure straps to chassis tie down/lifting lugs
only.
2. Place the platform onto the transport vehicle
in transport position.
3. Chock the wheels.
4. Secure the work platform to the transport
vehicle with chains or straps of adequate
load capacity attached to the chassis tie
down/lifting lugs.
D
RIVING
OR
W
INCHING
ONTO
A
T
RUCK
OR
T
RAILER
NOTE:
Do not winch faster than 0,3 m/s (1 ft/s).
1. Move the machine onto the truck or trailer;
A. To
Drive
the machine onto the transport vehicle:
a. Move the work platform up the ramp and into transport position.
b. Set the wheels straight and turn off the machine.
c. Chock the wheels.
B. To
Winch
the machine onto the transport vehicle:
a. Move the work platform up to the ramp.
b. Attach the winch cable to the tie down/lifting lugs.
c. Release the parking brakes (refer to “Parking Brake Release” on page 11).
d. Winch the platform into transport position
e. Chock the wheels.
NOTE:
Engage the parking brakes after transporting.
2. Secure the work platform to the transport vehicle with chains or straps of adequate load capacity
attached to the chassis tie down/lifting lugs.
 Loading...