WWW.UTOPIAGROUP.COM
page 11
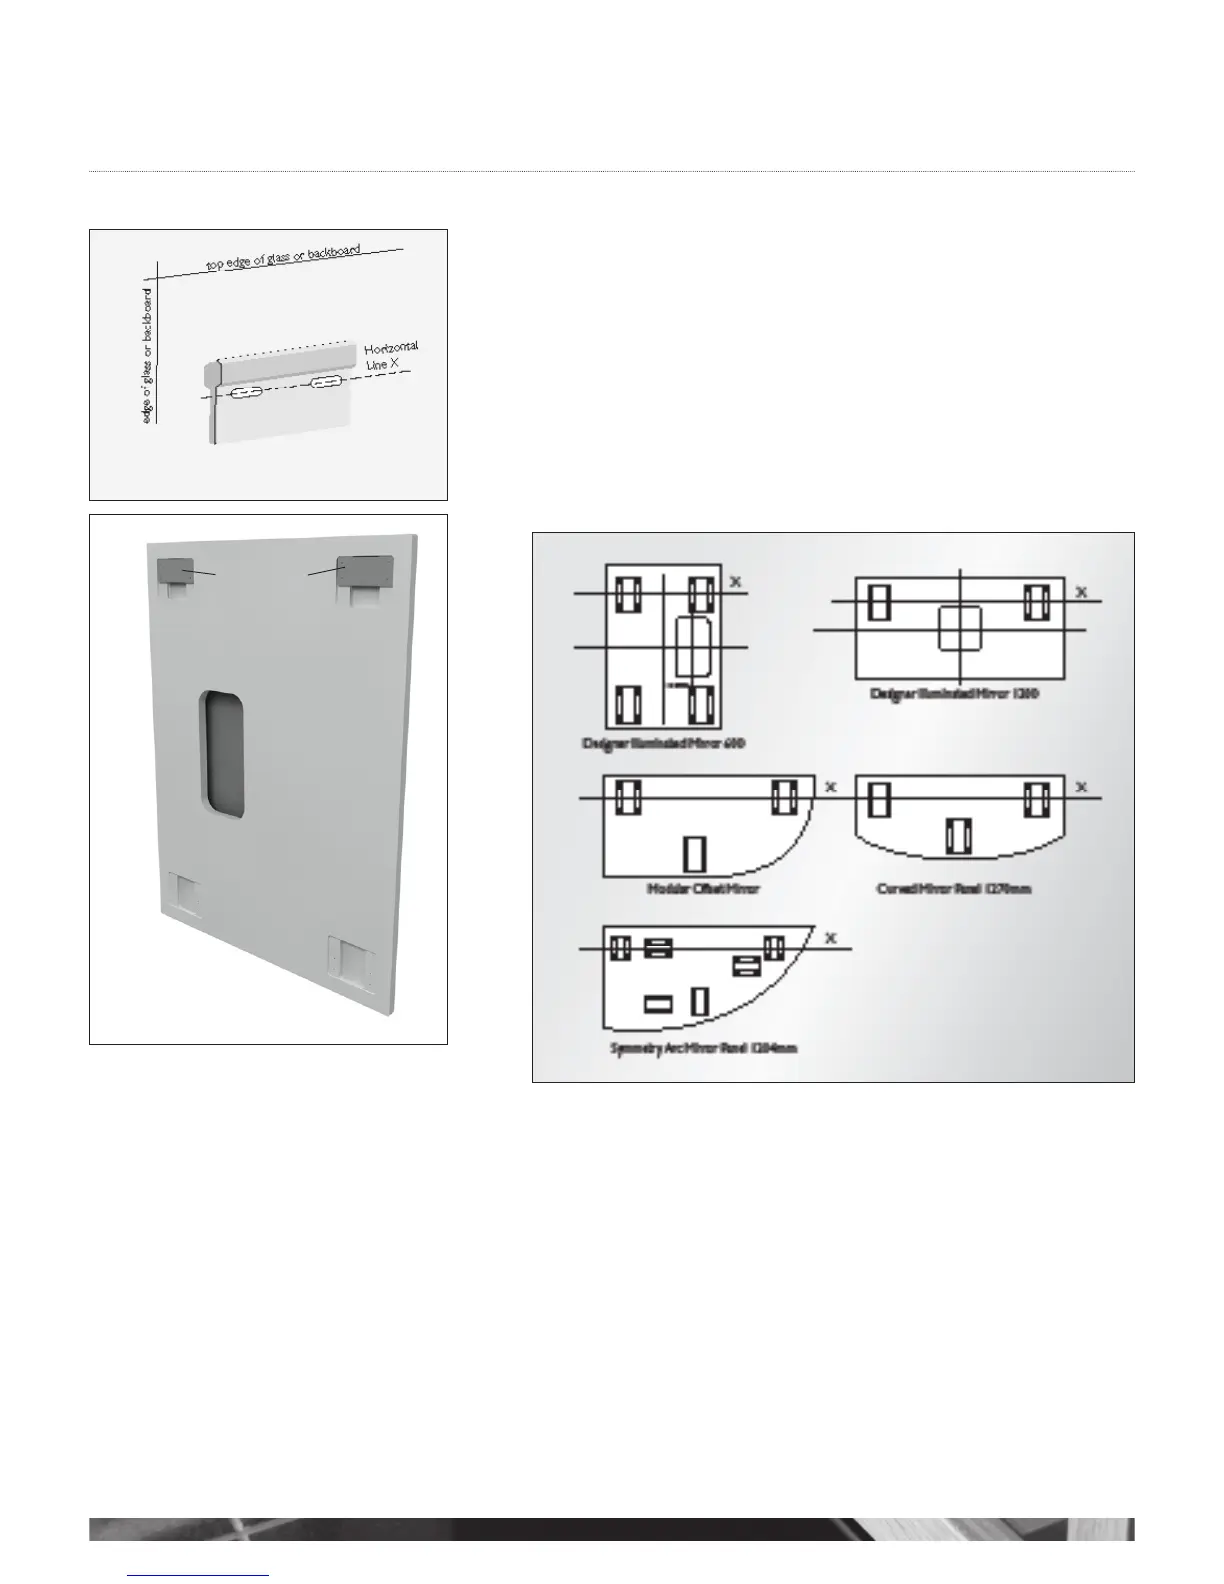
Designer Illuminated, Curved and Modular Offset Mirrors
Decide on the position that you want your mirror and mark a horizontal line on the wall.
(see g 1).
Mark out the position of the supporting brackets. It is important that they are fitted as
accurately as possible, so the mirror does not move left or right when installed.
Fix the brackets to the wall using appropriate fixings for your wall type.
Please note that LED lights (when supplied), should be installed by a qualified electrician.
Screw the supplied hanging plates to the rear of the mirror in the position to suit your
desired orientation (see g 2 and 3)
Hang the mirror unit in place on to the brackets.
Please note
When fitting one of these mirrors the installer must allow a minimum distance of 150mm
from the sensor to the next facing surface.
g 1
g 2
g 3
Hanging Plates
Transformer recess
Pockets labelled A for horizontal hanging
Pockets labelled B for vertical hanging
AA
A
B
B
B