WWW.UTOPIAGROUP.COM
page 24
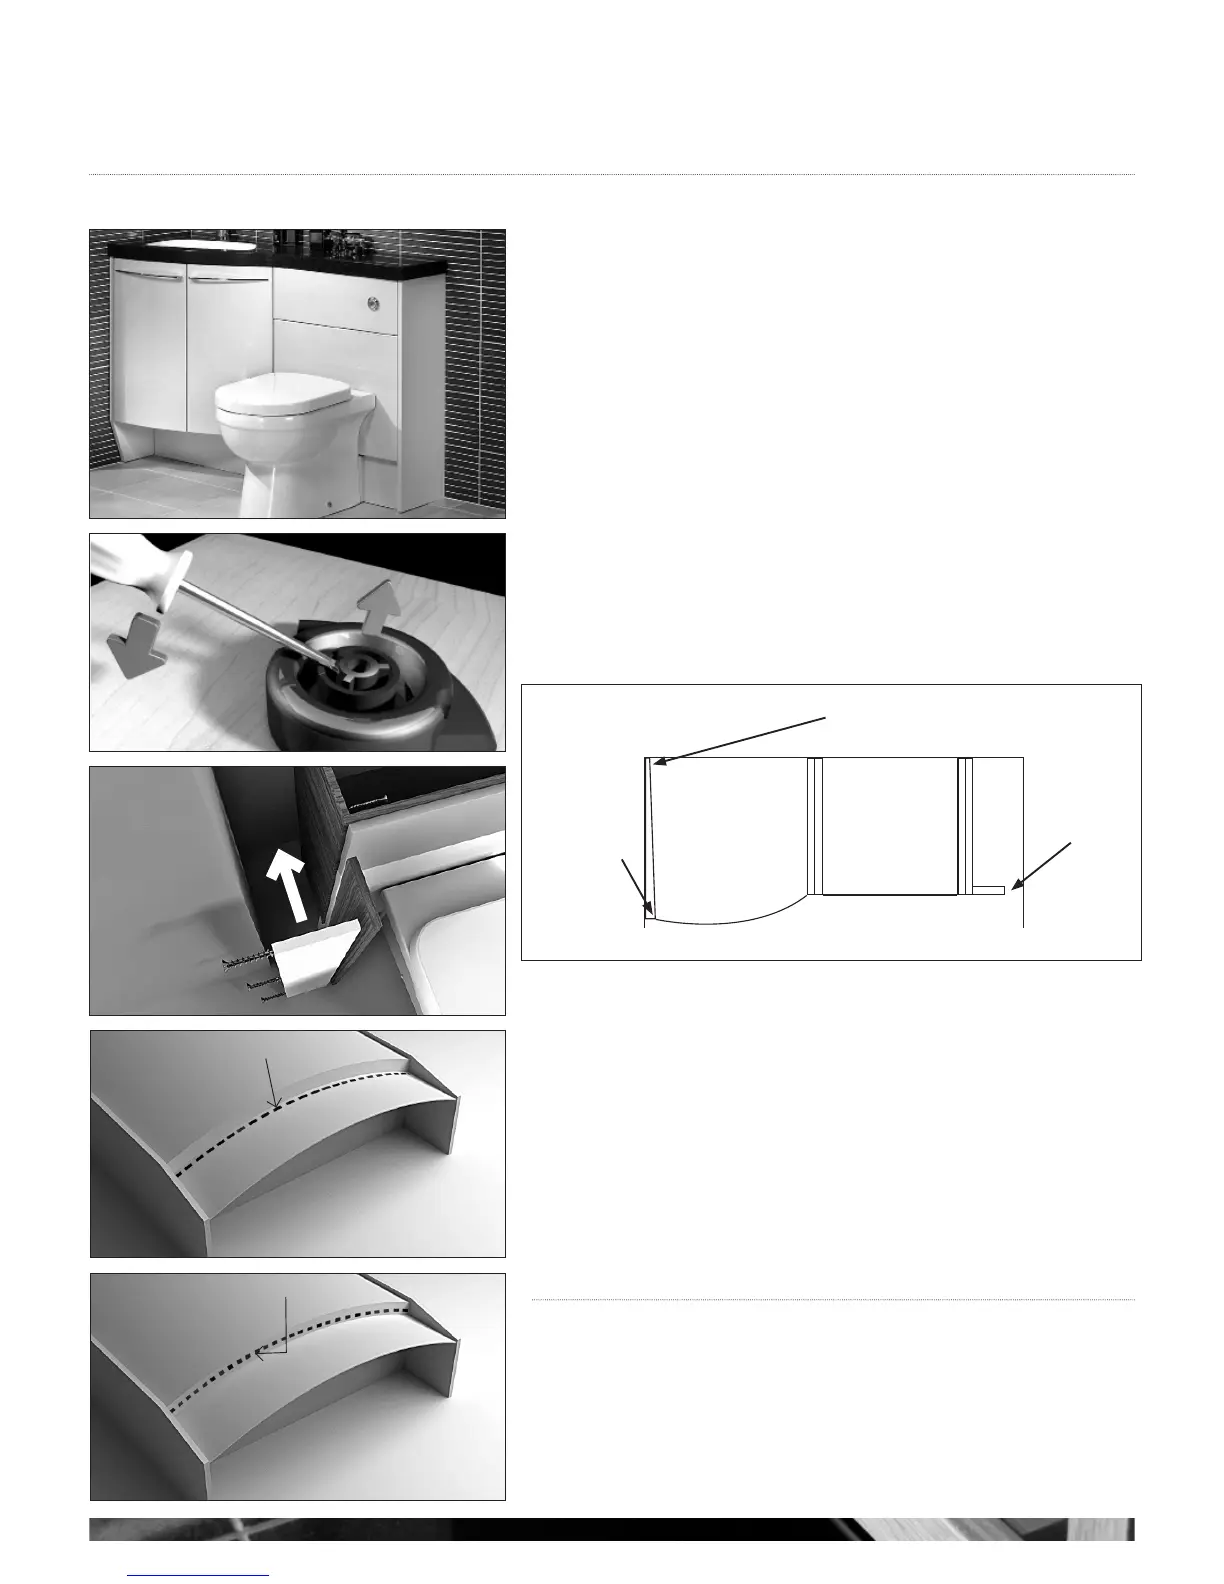
Symmetry Furniture
All units are fitted with extra leg sockets during manufacture. When installed next to a WC
unit a straight plinth is supplied (see g 1) so you will need to remove the leg sockets
from the front curve of the unit before installation. To do this, insert a small flat-headed
screwdriver into the centre section and carefully lever out the centre pin. The bracket can
now be easily removed (see g 2). Refer to page 6 for WC unit installation instructions.
DECORATIVE END PANELS
Decorative end panels are attached by drilling pilot holes and are fixed with the screws
provided from inside the cabinet into the side panel. We suggest making fixing less obvious
by drilling behind hinges and/or loose shelves.
Decorative end panels are supplied with 8mm locating dowels which when pushed into
the predrilled holes will locate with the unit being installed, with the exception of a WC
unit and any Symmetry unit that has a decorative panel adjacent to the side wall (see fig 6).
Should this unit be fitted into an alcove always install the washbasin unit first ensuring that
units decorative side panel is fitted against the side wall. If the wall is out of square and
narrower at the back, cut the decorative side panel down to allow the front to meet the
side wall. The filler panel would then be fitted between the WC units decorative panel and
the opposite side wall. The worktop will need to be trimmed from the WC end to allow
for fitting.
FITTING SIDE PANELS WITH AN EXTERNAL FILLER PANEL
Measure and mark the filler panel cut to the required width. Screw the filler panel to the 16mm
side panel (see g 3 A).
Slide both parts into position (see g 3) and secure by screwing through the base unit - (see g
3 B).
FITTING SYMMETRY PLINTHS
Insert one end of the plinth into the groove of the side panel. Carefully bend around the
unit legs and ease into the groove on the opposite side panel.
Please note that Symmetry WC units have a standard plinth arrangement. Please refer to
page 6 for fitting instructions.
PLINTH LIGHTING
THESE SHOULD BE FITTED BY A QUALIFIED ELECTRICIAN.
LED plinth lights are fitted either around the top of the flexible plinth (see g 4), or under
the base of the unit (see g 5). Transformers etc. can be concealed behind the plinth or at
the back of the unit.
g 1
g 6
g 3
g 4
g 5
lights fixed to plinth
lights fixed to
underside of unit
B
A
g 2
INSTALLATION INSTRUCTIONS
Only cut top when the wall goes narrower at back corner
Cut side filler
and top to
this end
Cut away panel
at the back
which will give
a better fit to
the front