WWW.UTOPIAGROUP.COM
page 13
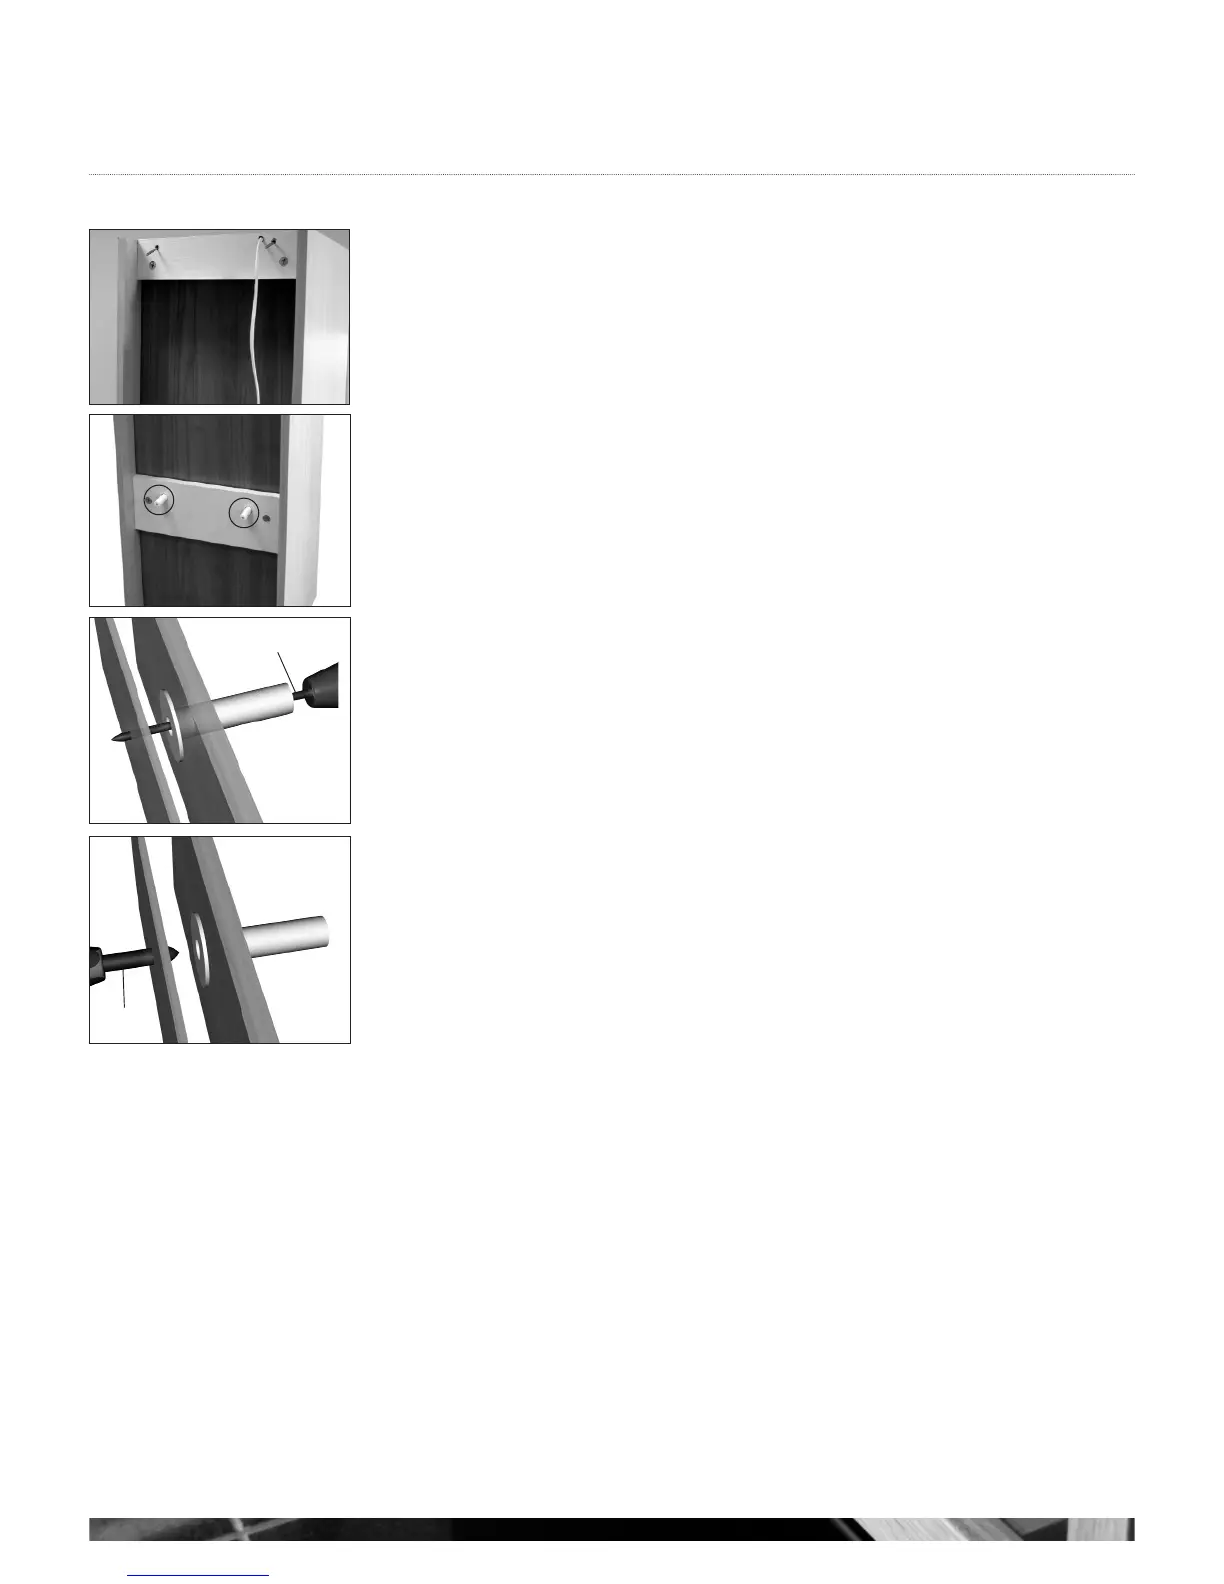
Tall Units
Fixing Spacers
Back rail
Back panel
5mm drill
10mm drill
g 2
g 3
g 4
FITTING A TALL GLASS SHELF DISPLAY UNIT AND
ALL OTHER TALL UNITS
With either drawers or cabinet.
Drill the fixing holes in the back of the unit as follows:
a In the top and bottom sections of the unit, mark the positions of the two
fixing holes as shown (see gs 1 and 2).
b In the bottom section of the unit mark the positions of the two holes (see g 2).
Also note drilling method (see gs 3 and 4).
c Once the hole positions have been marked, open up the hole in
the 8mm back to10mm, to accommodate the cover cap. (see g 4).
Once the unit has been positioned level (using a spirit level on all sides), push the supplied
fixing screws through the Ø5mm holes until they touch the wall. Gently tap the screw
heads to enable the screw points to mark the fixing points on the wall.
Remove the unit from its position and drill the wall in the positions you have just marked. If
you are attaching the unit to a plasterboard wall, please ensure you use the correct fixings
(not supplied).
Replace the unit into the desired position and use the screws provided to fix it to the wall
through the back panel, through the plastic spacers, and into the wall. Ensure the unit is still
level in all directions. Insert the 10mm screw covers.
If you are fitting the drawer pack version of this unit, there will not be an 8mm back
behind the drawer boxes, simply fix through the back rail which can be easily accessed by
removing the drawers. See drawer pack information on page 5.
Once all units are in place they can be joined together (if applicable) by means of drilling
and screwing through adjacent side panels. We suggest making fixing less obvious by drilling
behind hinges and shelves.
g 1