WWW.UTOPIAGROUP.COM
page 38
INSTALLATION INSTRUCTIONS
Worktops
FITTING A WORKTOP
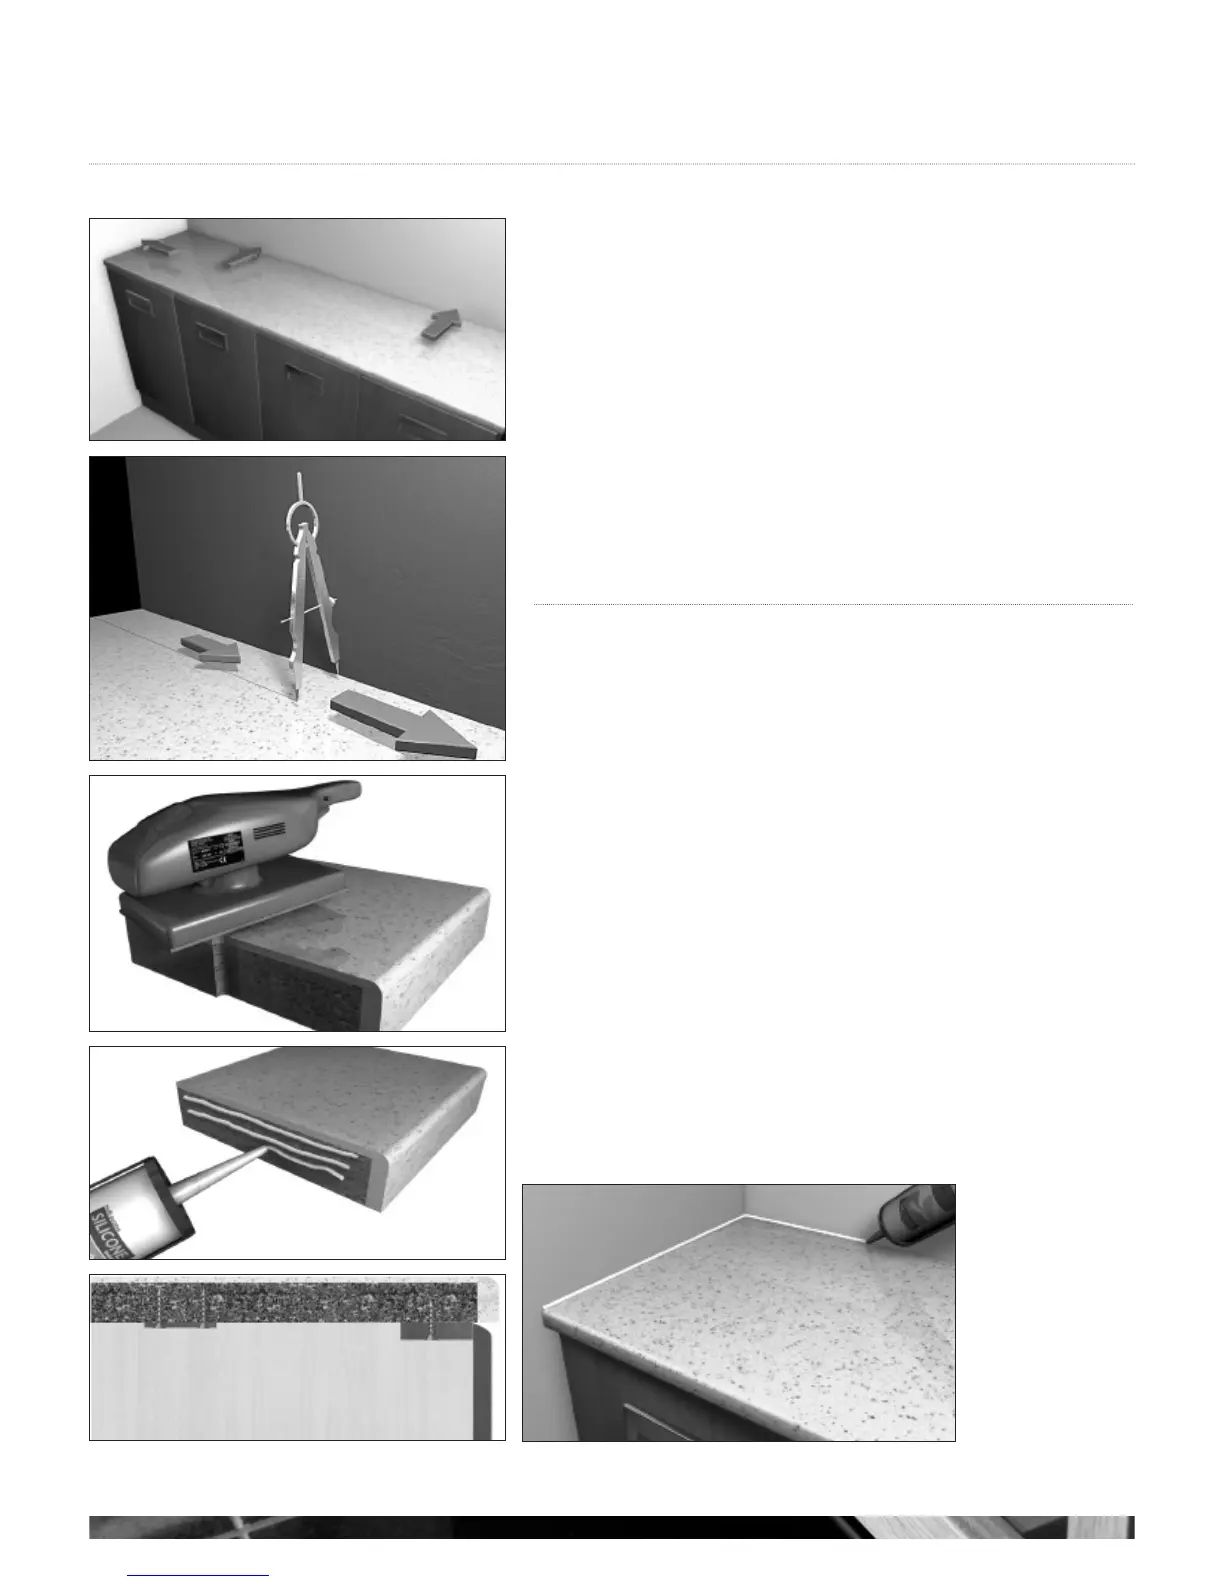
Position the worktop on the units and push up against the wall to enable you to mark
and measure for cutting (see g 1).
If the worktop needs scribing to the wall contours do so using a compass and pencil
(see g 2).
We suggest that an allowance of 10mm is made to accomodate a worktop overhang on
an exposed worktop edge or show ends.
Use a belt sander to remove the final bit of material and to eliminate small chips or saw
kerfs, the latter is most important. If necessary hand finish the cut edge using sandpaper
(see g 3).
Seal all cut or raw edges (including those that meet the wall) using good quality silicone
sealer ensuring that a full coverage is obtained (see g 4).
Screw the worktop down to the cabinets, making sure the screw does not penetrate too deep
into the substrate of the worktop (see g 5). Change screw size from 1” to ¾ “ (see g 5).
Finally run a small bead of silicone between the join of the worktop and the wall
(see g 6).
Stretcher plate
Max ¾” Screw
Front rail
Max 1
1
/2” Screw
g 1
g 3
g 4
g 5
g 6
g 2