WWW.UTOPIAGROUP.COM
page 25
INSTALLATION INSTRUCTIONS
Downton
g 1 g 2
g 3
g 5g 4
g 6
Basin Support shelf
Fit with overflow to the front
10mm
space
Front
slacken
screws
to adjust
support
shelf
place a
2nd screw
to fix shelf
permanently
g 7
apply silicon within hatched areas
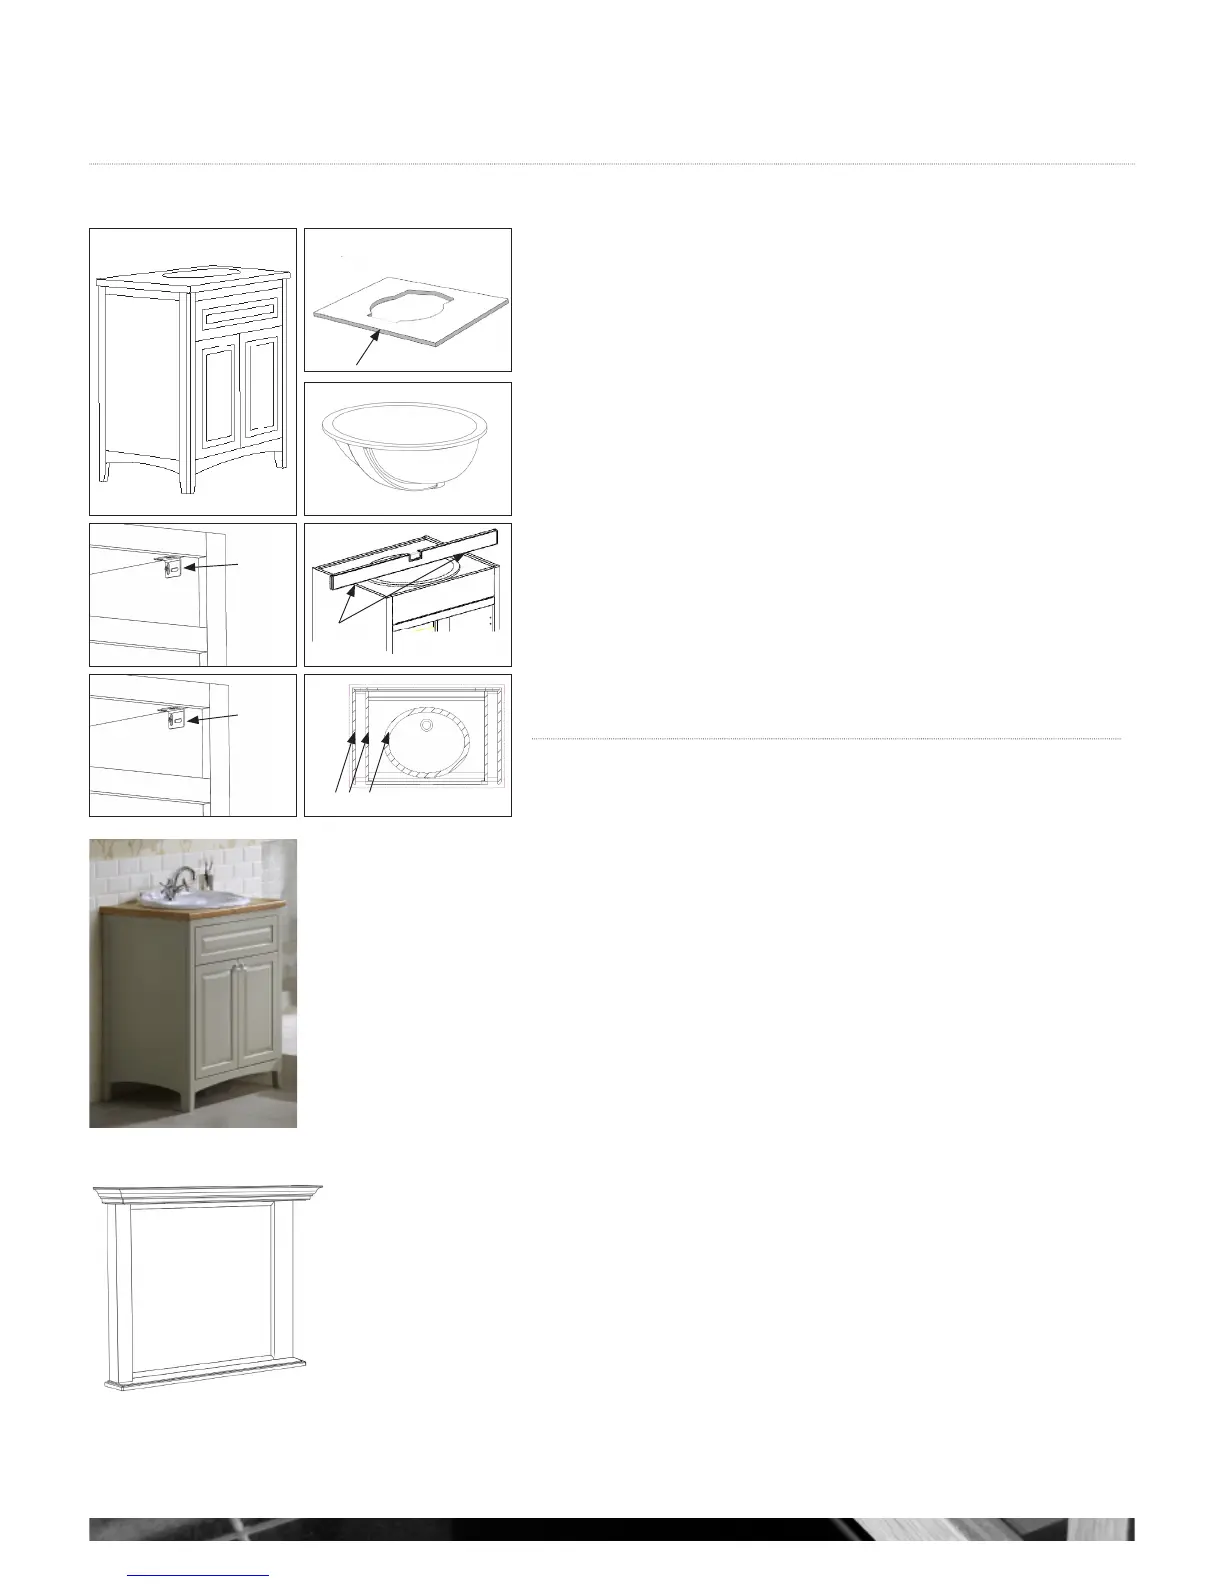
TRADITIONAL BASE UNITS
The base unit comes in two parts.
Base unit assembled (see g 1).
Worktop and Basin come separately.
1. Place and fix base unit into position (see g 1).
2. When fitting the basin support shelf always make sure the white side is facing upwards
and the small cut out is to the front of the unit as the overflow on the basin is at the
front. Place the basin into the support shelf, which will need to be adjusted to level the
basin with the unit (see g 5). Place a spirit level across the basin and a space of 10mm
will be needed at each side panel. To adjust this slacken off the screws in the stretcher
bracket, this allows the shelf and basin to be levelled (see g 4).
NOTE :- if the basin protrudes above the 10mm at the gable ends it risks damaging the
worktop when fitted.
Once the shelf has been levelled, fix the shelf permanently into place by placing a 2nd
screw into the horizontal slot on the stretcher bracket (see g 6).
Place the basin into the shelf apply a bead of silicone to the top face of the basin and
to the top of the gable ends (g 7). We suggest fitting your tap to the worktop before
placing the worktop on top of the unit and wipe clean any excess silicon as required.
TRADITIONAL MIRROR
Refer to page 11 for fitting instructions on how to fit a mirror