INSTALLATION INSTRUCTIONS
WWW.UTOPIAGROUP.COM
page 15
Modular Units
All wall mounted units and basins are supplied as standard with hanging brackets. Please note it is the installer’s responsibility
to obtain fixings that are suitable for the unit to be installed against either a solid or a studded wall; see page 4.
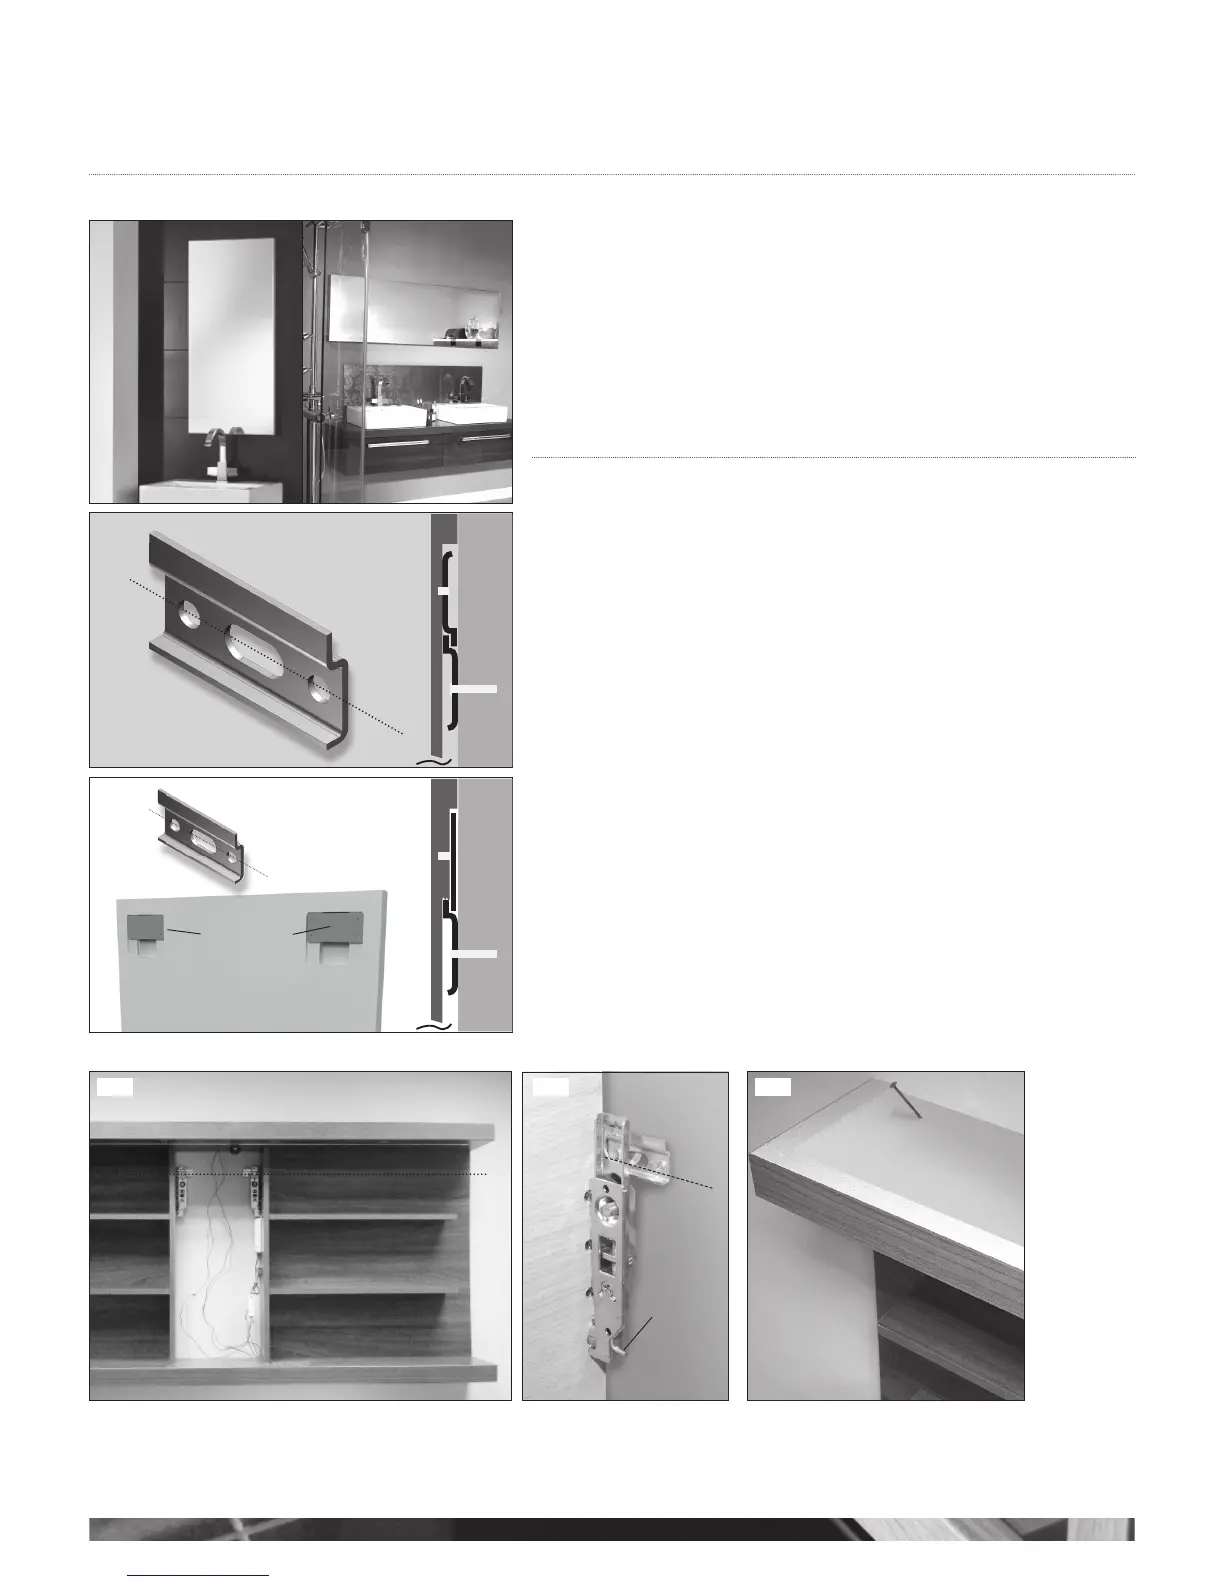
MODULAR WALL MIRROR FITTING
Determine the orientation of the mirror required for this installation, either vertical or
horizontal (see g 1).
It is advised that a line is now drawn along the length of the wall, level with where the unit
is to be fitted at the desired height above floor level at position x (see g 2 and 3).
Fix the brackets to the wall with appropriate plugs and screws for your wall type (not
supplied). (Please see either g 2 or g 3 depending on which brackets you have been
supplied)
Position mirror against the wall slightly above the brackets, then lower until the brackets on
the back of the mirror interlock with those on the wall - (see g 3).
MODULAR SLIDING MIRROR FITTING
Wall cabinet hanging brackets are supplied with the unit.
It is advised that a line is now drawn along the length of the wall, level with where the unit
is to be fitted at the desired height above floor level at position x (see g 4).
If you are attaching this unit to a plasterboard wall please ensure that you use the correct
fixings.
The units then simply hook onto the wall fixed brackets. Adjust to gain a level top edge
using the adjustment screws - (see g 5).
Pull the cabinets tightly against the wall using the adjustment screws on the brackets.
(see g 5).
This unit is 1200mm or 1600mm wide and will need a screw fitted as shown in (see g 6).
A pocket hole has been drilled to the left and right of the top, and can be used when
drilling into the wall for fixing.
Fitting the mirror (packed separately)
Place bottom groove over the two pegs set in the base shelf. (see g 7) top of page 18
Hold the mirror and push the two roller guides into the mirror backboard. (see g 8, page
18).
To remove the mirror release the top roller guides by gently releasing the catch with a
screwdriver, (see g 9). Carefully lift the mirror off the grooves, (see g 7, page 18).
g 1
g 3
g 2
WALL
WALL
MIRROR MIRROR
X
X
X
X
securing pin
A
in +
out
up +
down
B
g 4 g 5 g 6
Hanging Plates