WWW.UTOPIAGROUP.COM
page 28
Definity Bath Panels
DEFINITY FITTED BATH - CORNER OR RECESSED
INSTALLATION
Remove all protective film from panels before fixing together. Note in some
instances the pre-drilled holes will be covered by the panels finish. These
holes will need to be reinstated.
NOTE when fitting a top rail this is to be done first. See top rail notes
below, (see g 3, and 4)
Level the bath to ensure the panels will not have to be cut to the floor when
they are installed.
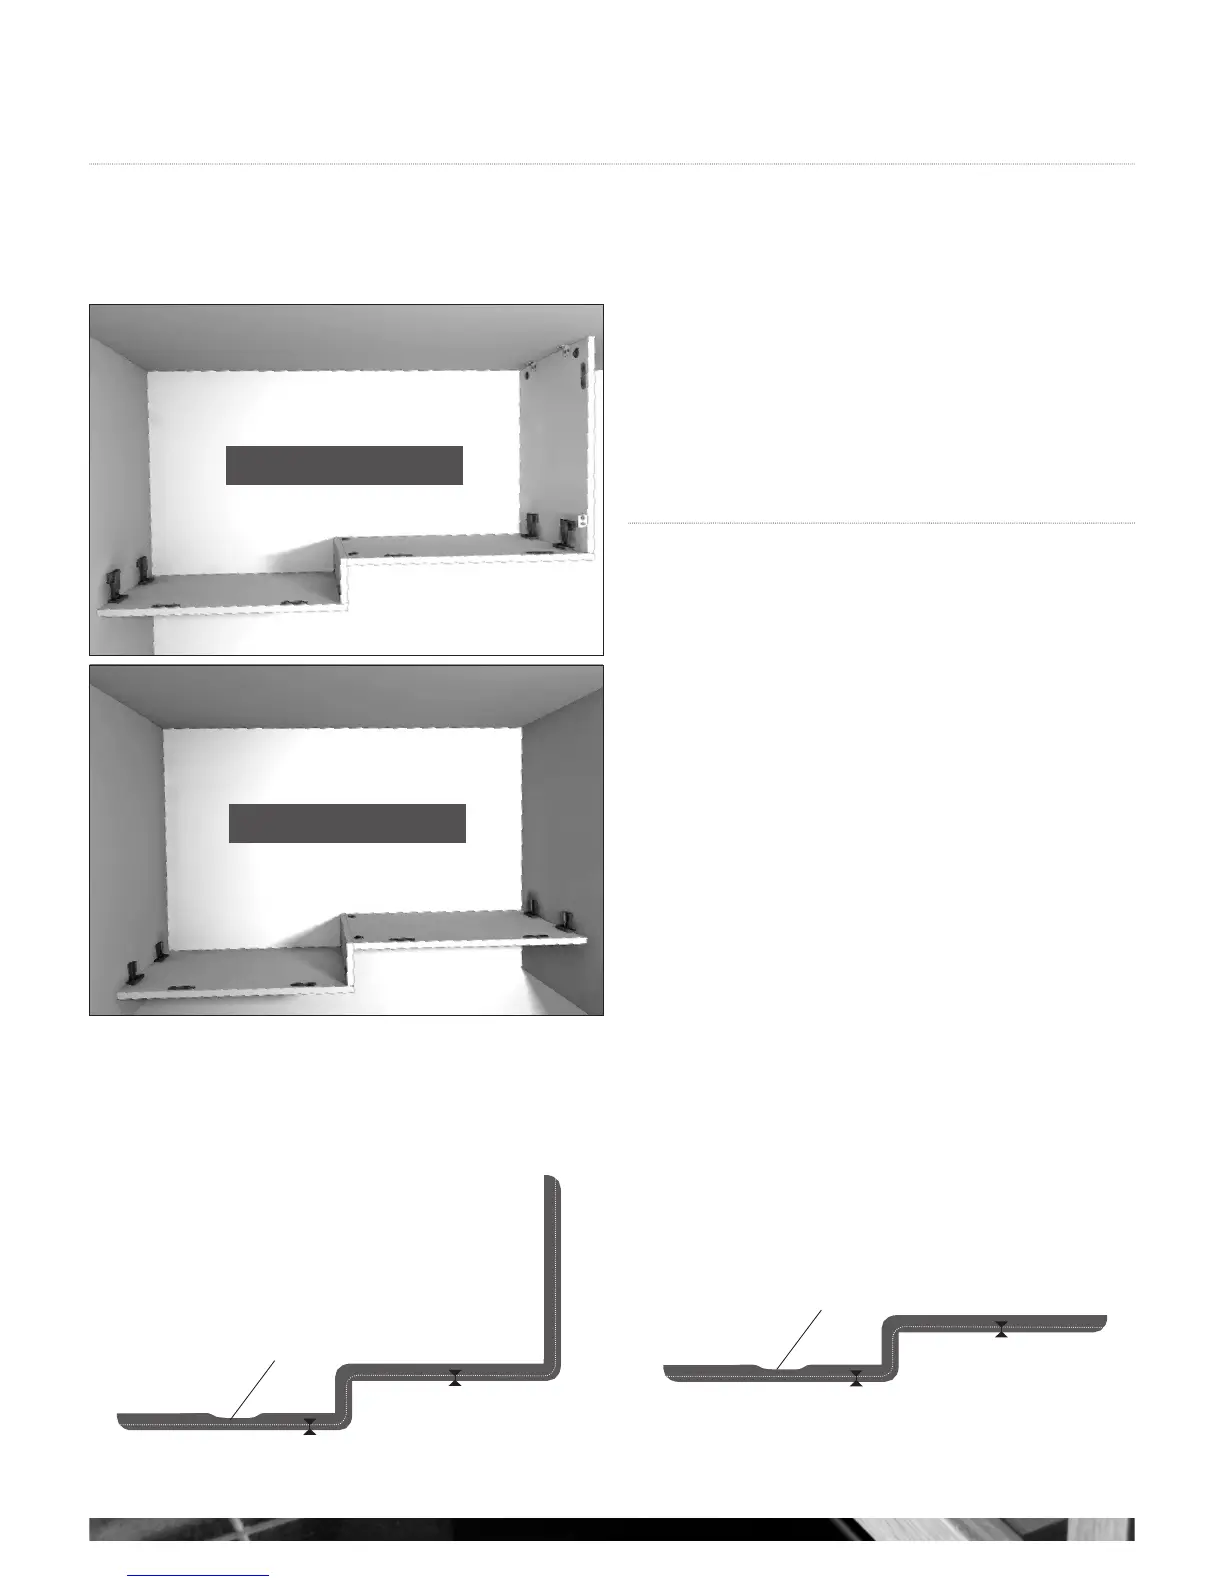
The side panel set of three parts D, E & F are held together with the cams
and bolts provided. Panels D & E have two magnetic catch plates to be
fixed at the top in the pre-marked positions. The black Keku clips are for
extra support and are fitted at each end where the panels meet the end
panel (see g 1) or a wall (see g 2). The pre-marked positions are set
away from the edge as panels E and D are also used with return panels as
shown in (see g 1).
Fix the end return panel as shown (see g 1) using the stretcher plates
provided. The three side panels will then push into place.
(see g 2), also see notes on page 29.
TOP VIEW OF DEFINITY BATH
PANELS FITTED INTO A CORNER
TOP VIEW OF DEFINITY BATH
PANELS FITTED INTO A RECESS
g 1
g 2
WALL
WALL
WALL
WALL
WALL
END
PANEL
C
D
D
F
F
E
E
POSITION THE BATH TO ALLOW
AN EQUAL DISTANCE AROUND
THE BATH RIM AND TOP RAIL
TOP RAIL OPTIONS CUT TO SIZE ON
INSTALLATION AT POINTS A & B
A
B
CUTOUT FOR OVERFLOW
POSITION THE BATH TO ALLOW
AN EQUAL DISTANCE AROUND
THE BATH RIM AND TOP RAIL
TOP RAIL OPTIONS CUT TO SIZE ON
INSTALLATION AT POINTS A & B
A
B
g 3
g 4
CUTOUT FOR OVERFLOW
CUTOUT FOR OVERFLOW