WWW.UTOPIAGROUP.COM
page 17
Modular Units
FITTING THE MODULAR SQUARE PROFILE LAMINATE
WORKTOPS - 1006MM, 1206MM, 1606MM LENGTH
Note: Utopia as standard provides 2 brackets with each 1006mm, 1206mm and 1606mm
worktop purchased separately to cover any possible installation. Dependent upon
installation arrangement and number of worktops used, you may find that some brackets
are not required.
If you are installing a fascia box and/or drawer unit along with the worktop(s) (see g 1) and
refer to page 14 of these instructions.
50MM LAMINATE WORKTOPS
Use the Nylon Sleeve Insert, specially designed for use with 50mm laminate worktops,
when fitting a worktop mounted tap.
Drill a small pilot hole at the centre of tap position.
Drill part way from under side a hole of 52-54mm Diameter (see g 3). Then drill a
35mm hole from the top which will accommodate your tap. Insert the nylon sleeve. Use a
quality silicon seal around both hole cuts and insert sleeve and fit tap.
INSTALLATION OF A WORKTOP ON ITS OWN OR
AS THE LOWER WORKTOP OPTION SEEN IN FIG. 1
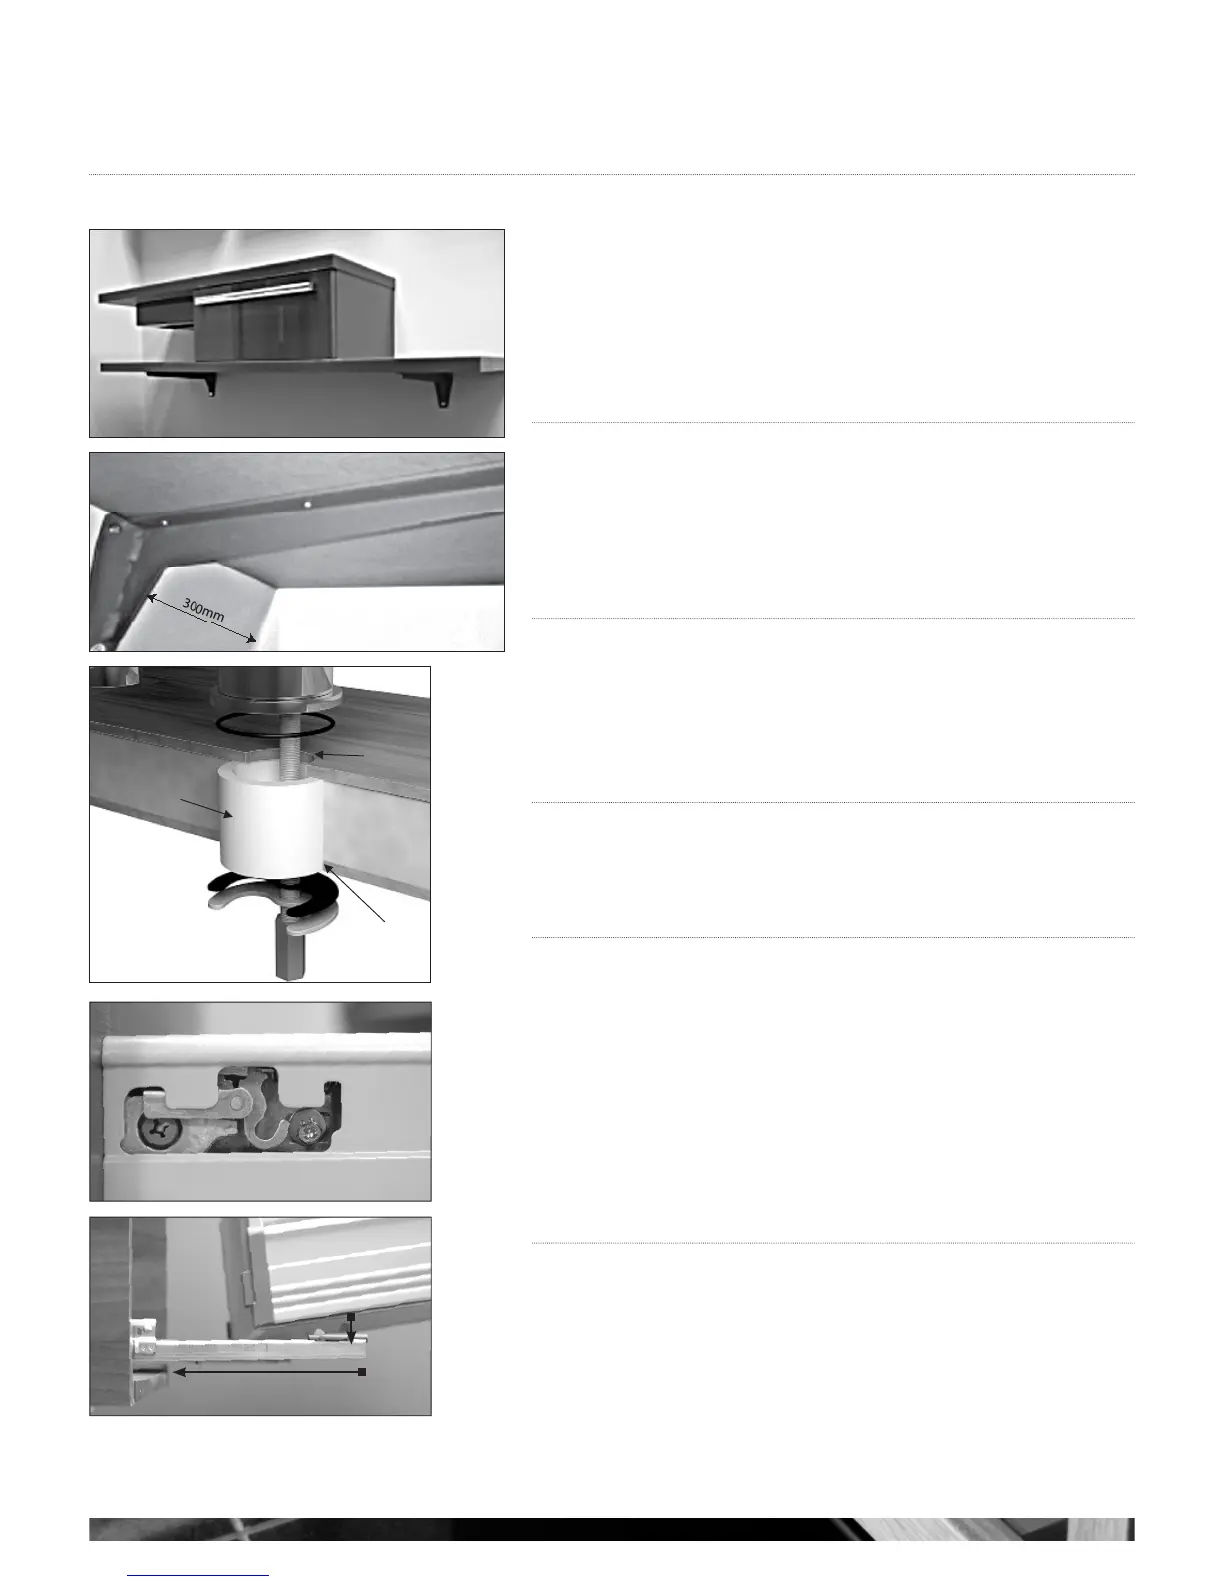
Work out the desired height on the wall of the shelf location and mark out where the
brackets are going to be. We advise that the brackets are set approximately 300mm in from
the ends of the shelf (see g 2).
Making sure the brackets will be level, screw the brackets to the wall using suitable fixings.
BASIN WASTE RECOMMENDATION
A standard 32mm P trap or bottle trap can be accommodated in all washbasin unit
installations. An in-line trap, or an extendable waste connector can be accommodated in all
washbasins.
ADJUSTING A SOFT CLOSE DRAWER BOX
Drawer boxes are factory installed and should not need to be adjusted. However, if
adjustment is required, pull the drawer box out and remove the Utopia branded plastic
cap. This will reveal the two adjustment screws. Use one of the screws to raise and lower
the drawer box (see g 4 A) and the other (see g 4 B) to move it left and right.
Large drawer units have a fixing bracket, located in the centre of the drawer box on the
underside, that needs to be slackened off before adjustment and re-tightened after.
If you need to remove a drawer box, lift up and away from the drawer runners.
To replace the drawer box, fully extend the drawer runners, place the drawer box onto
them and close the drawer. The box will clip itself in to place upon closing (see g 5).
To remove drawer front from the side turn screw (see g 4 C).
g 1
g 2
g 3
35mm hole
tap
52-54mm hole
Nylon sleeve
A
C
B
g 4
g 5