WWW.UTOPIAGROUP.COM
page 23
Symmetry Furniture
FITTING SYMMETRY MODULAR BASE UNITS AND
FITTED/FREESTANDING BASE UNITS
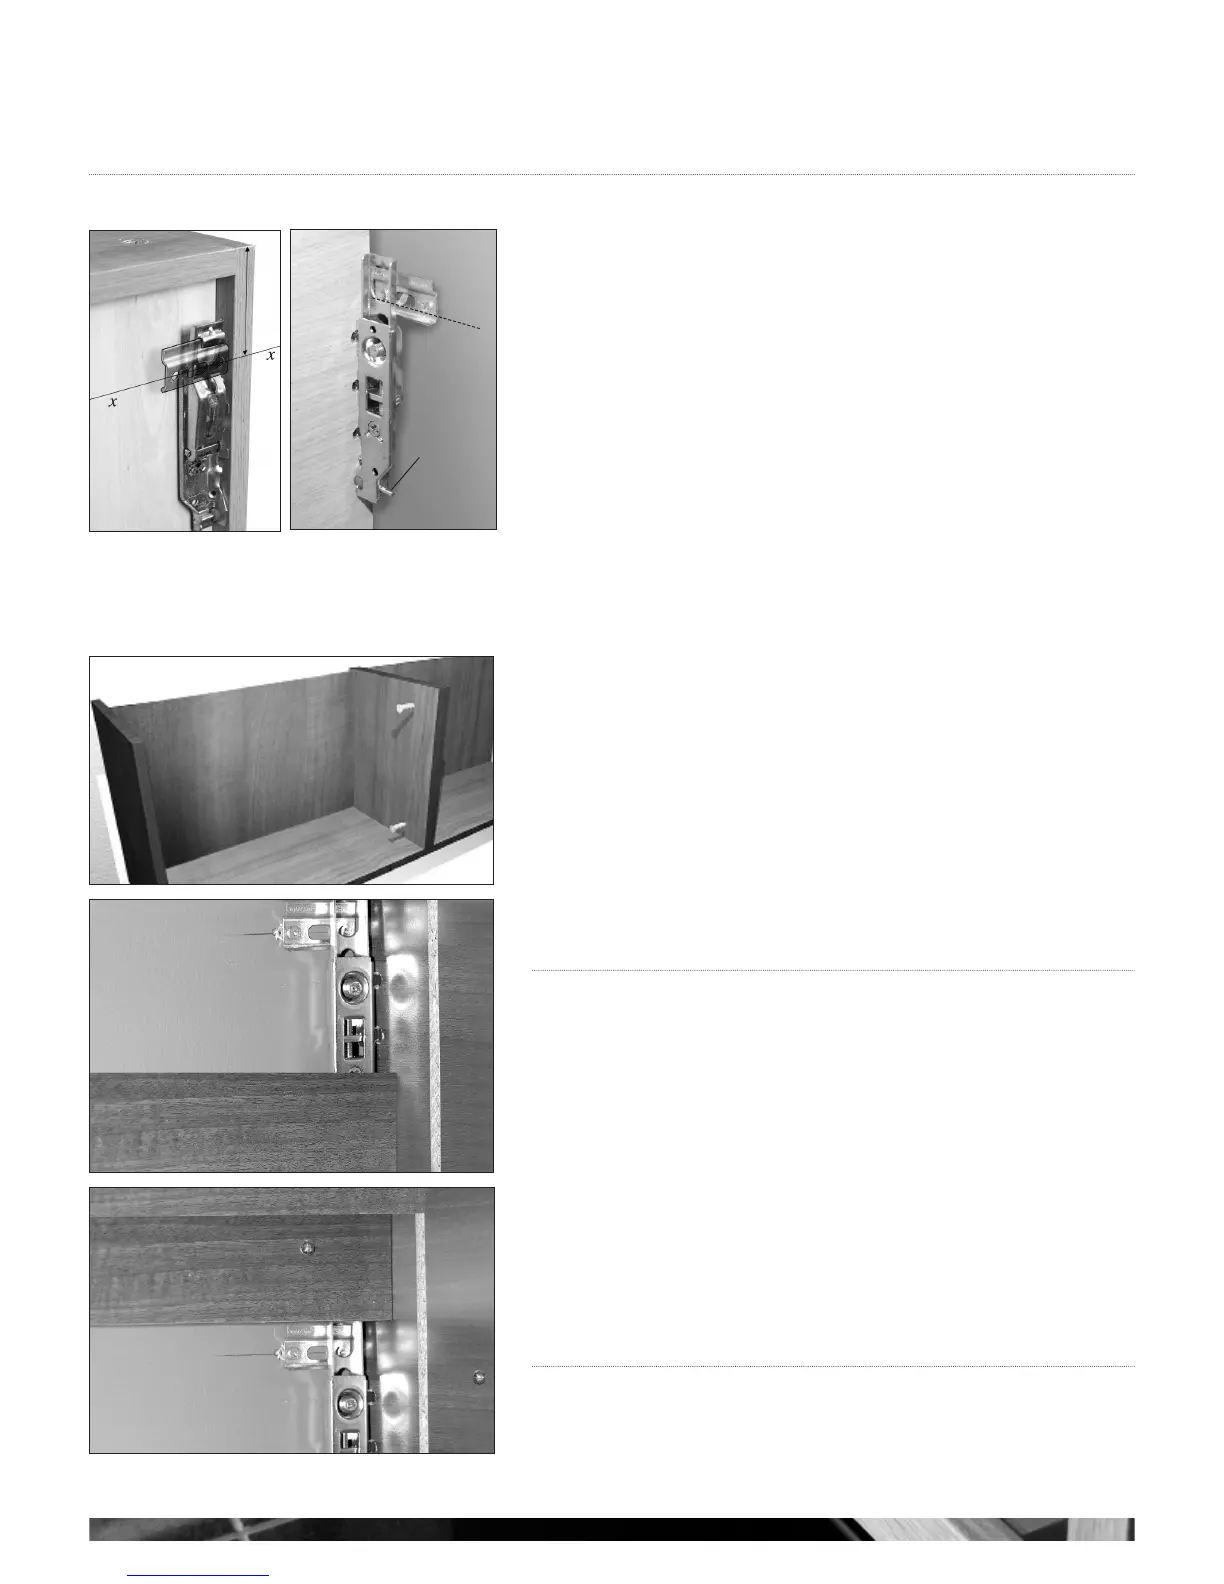
It is advised that a line is drawn along the length of the wall, level with where the units are
to be fitted at the desired height above floor level. The space between the floor and the
unit is 175mm when using a plinth or as required for a modular unit. Draw the line shown
as x (see g 1) onto the wall.
Fix the brackets to the wall with appropriate plugs and screws for your wall type (not
supplied).
The units then simply hook onto the wall fixed brackets. Adjustment to gain a level surface
is as follows,
A - Adjust this to pull the cabinet into the wall
B - Adjust this to move the cabinets up or down (see g 2);
Pull the cabinets tightly in against the wall using the adjustment screws on brackets. It is
important to ensure you have sufficient support for the weight of pottery and unit plus
contents when fitting wall hung units.
Once all units are in place they can be joined together by means of drilling and screwing
through adjacent side panels. We suggest making fixing less obvious by drilling behind
hinges and/or loose shelves, (see g 3).
A securing screw should then be fitted through the back of the unit, through the fixed back
rail of the cabinet and into the wall on a base unit, this will help to stabilise the unit
(see g 5 point 4).
FITTING SYMMETRY WORKTOPS/SOLID SURFACE
Please refer to pages 36-41 for instructions on fitting Worktops and Taps.
g 3
g 1
level line
securing pin
A
in +
out
up +
down
B
TOP OF UNIT
g 2
g 4
6 in/out
4
g 5