INSTALLER’S GUIDE
Page 48
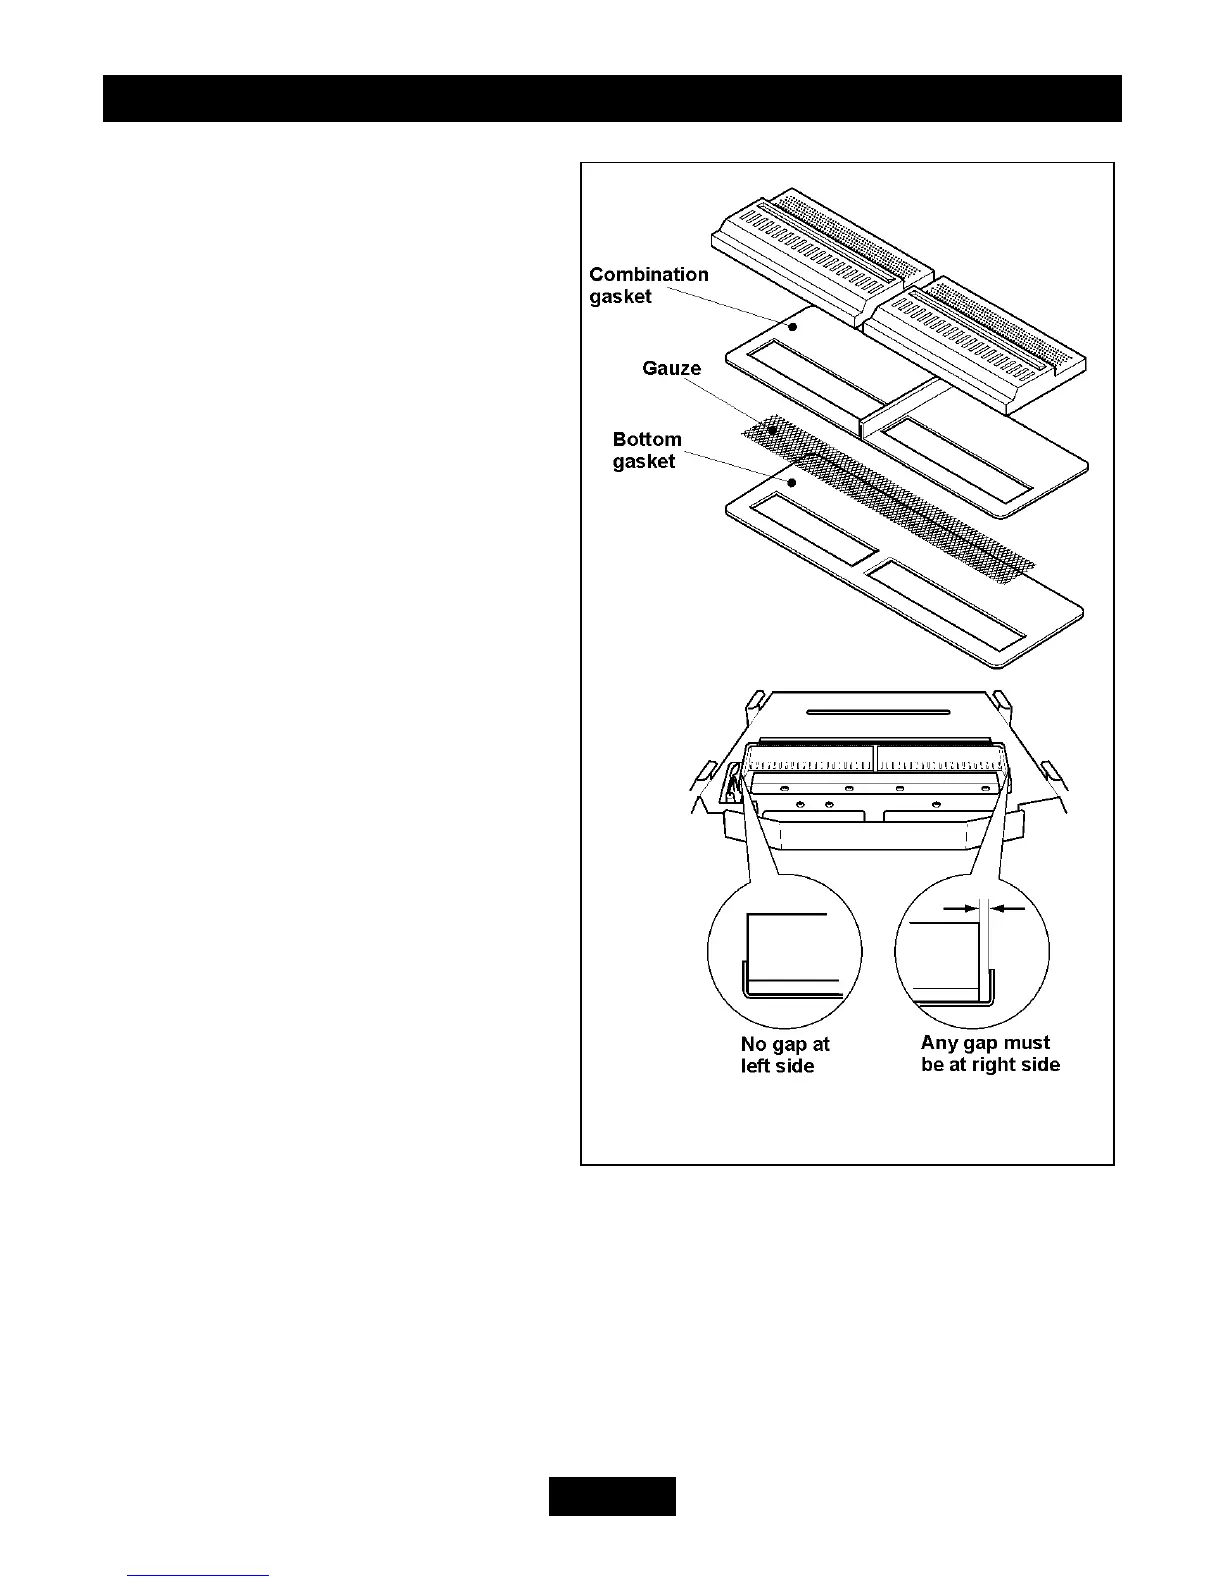
Figure 65. Burner plaque positions
16.14 To Replace Burner Plaques
See figure 65.
1. Remove the bottom front and fire
front castings.
2. Remove the loose coals, the front
coals and the base coal.
3. The plaques can be then be removed
as follows without detaching the front
surround or ceramic walls but be careful
not to damage the ceramic walls while
working inside the firebox.
4. Remove the ceramic support platform
by detaching 2 screws (See figure 64
5. Remove the plaque clamping strips by
detaching 8 screws.
6. Remove the plaques and the
combination gasket between and under
the plaques. If necessary remove the
gauze and the gasket beneath it.
7. If necessary fit a new gasket below
the gauze. Clean and replace the gauze.
Fit a new combination gasket below the
plaques. Push the gasket ends inwards to
form a dividing gasket between the
plaques.
8. Place the new left hand plaque in
position. The left side of the plaque must
touch the inside edge of the retaining
flange at the left side of the burner well.
9. Place the new right hand plaque in
position. Make sure that the centre section of the combination gasket is between the two
plaques. If there is any play between the plaques and the end retaining flanges, push the
plaques firmly to the left squeezing the centre section of the combination gasket between
the two plaques. Any gap should be between the right side of the plaque and the right side-
retaining flange.
10. Fit the front and rear plaque clamping strips. Make sure that the plaques are as far to the
left as possible. . It is important that the left side plaque is accurately positioned so that it
has the correct relationship to the pilot. Fully tighten the clamping strips.
11. Refit the coals as described in section 12 of this manual. Refit the bottom castings.


 To Next Page