Page 35
Illustrations For Replacing An Old Thermostat With a New Thermostat
Study the illustrations on the next pages. This is an example of replacing an old V-SST-1
thermostat with a new thermostat. The Q-ETS3 and External sensors do not need to be replaced.
The old External Processor Boards are not needed and must be bypassed in the new installation.
The two wire remote sensors connect directly to the new thermostat Base as illustrated. The two
remote sensors share the RS GND (common) screw 6 on the new base. The 24V and the R
terminals on the old thermostat are synonymous with the R terminal, screw number 14 on the
new thermostat as illustrated.
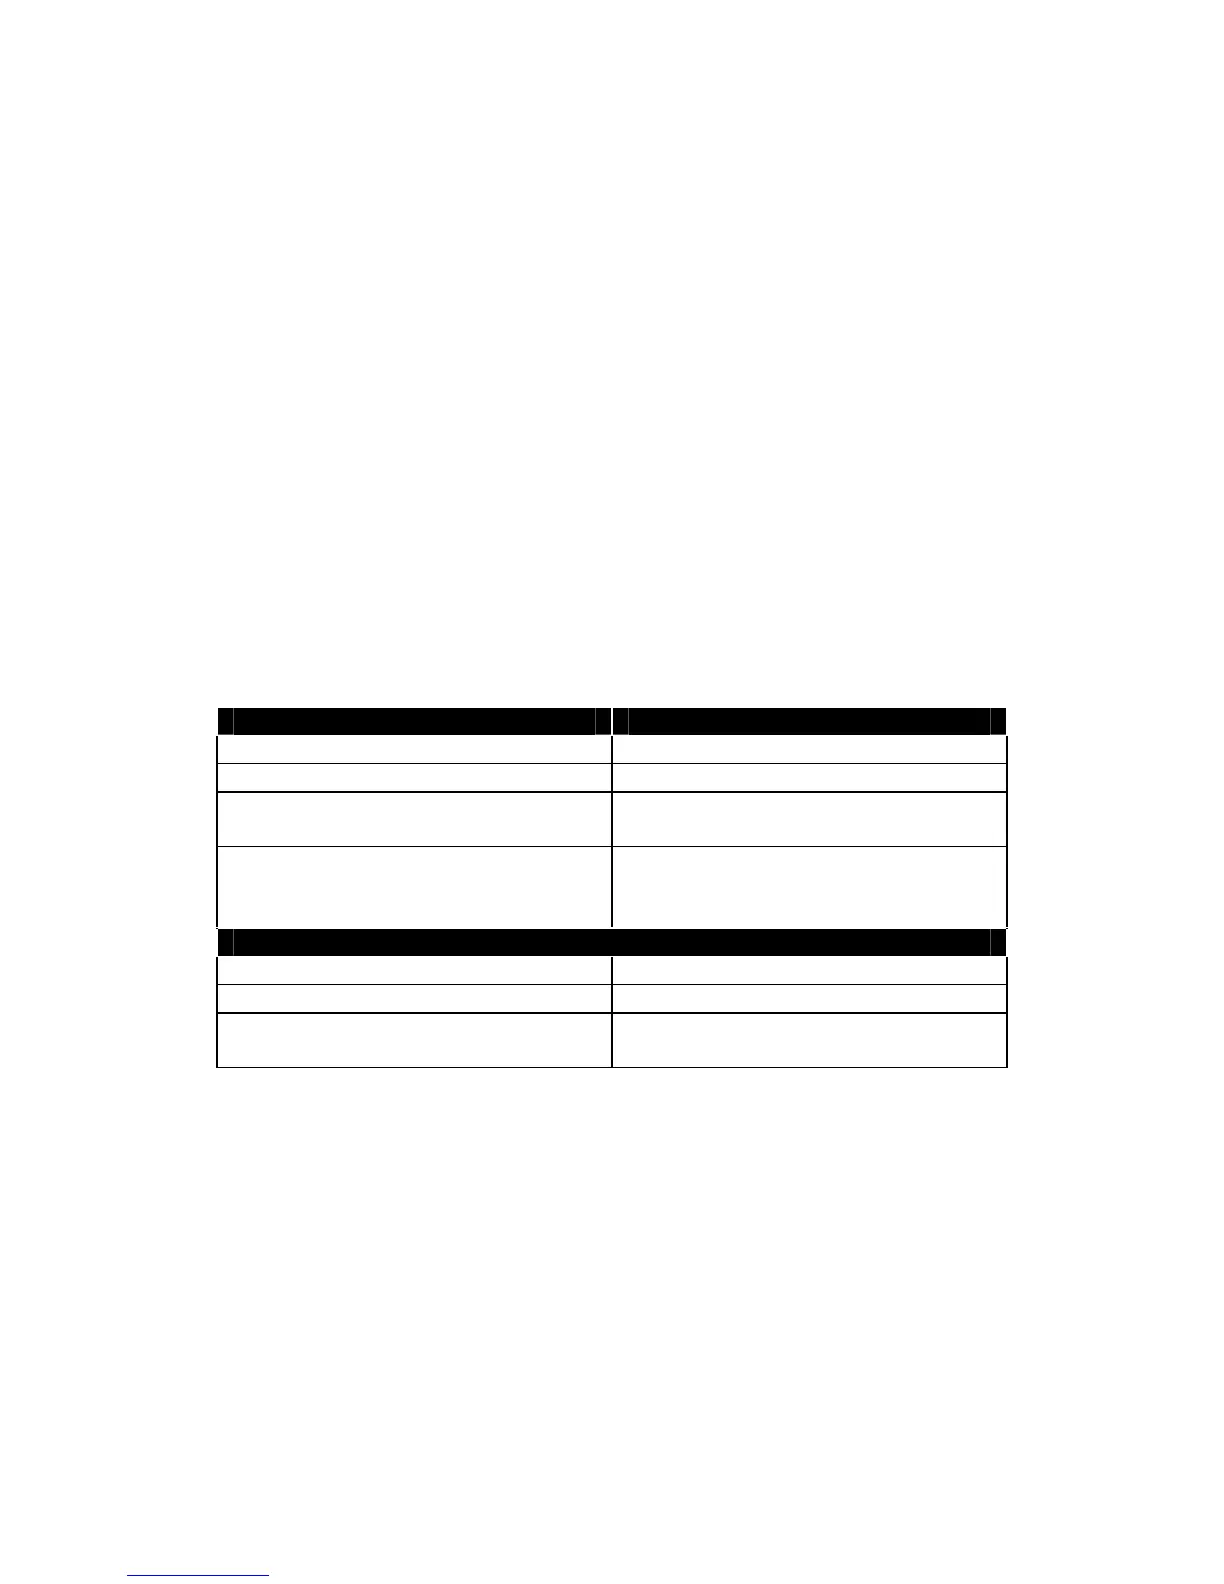
Old Thermostat New Thermostat
W1 (first stage heat) W1 (screw 15 right side)
Y1 (first stage cool) Y1 (screw 17 right side)
RS1, RS2 and RS+V (Processor
Boards)
No Connect
Indoor and Outdoor Remote
Sensors
RS OUT (screw 5 left side)
RS IND (screw 7 left side)
RS GND (screw 6 left side)
Q-ETS3
X2 (green - from Q-ETS3) X2 (screw 8 left side)
X1 (black - from Q-ETS3) X1 (screw 10 left side)
24V (red - from Q-ETS3)
R (screw 14 right side)
shared with 24V from HVAC