SECTION 2
GETTING STARTED
2.3 Setting Up the Osmometer
19
Carefully unpack the instrument and compare the
contents with the packing list to be certain that
everything needed for operation is at hand.
1
Place the osmometer on a suitable work sur-
face.
NOTE:
Avoid locations where instrument precision will be
altered by thermal gradients or rapid temperature
changes caused by heavy foot traffic, air vents, blow-
ers, heaters, or windows.
2
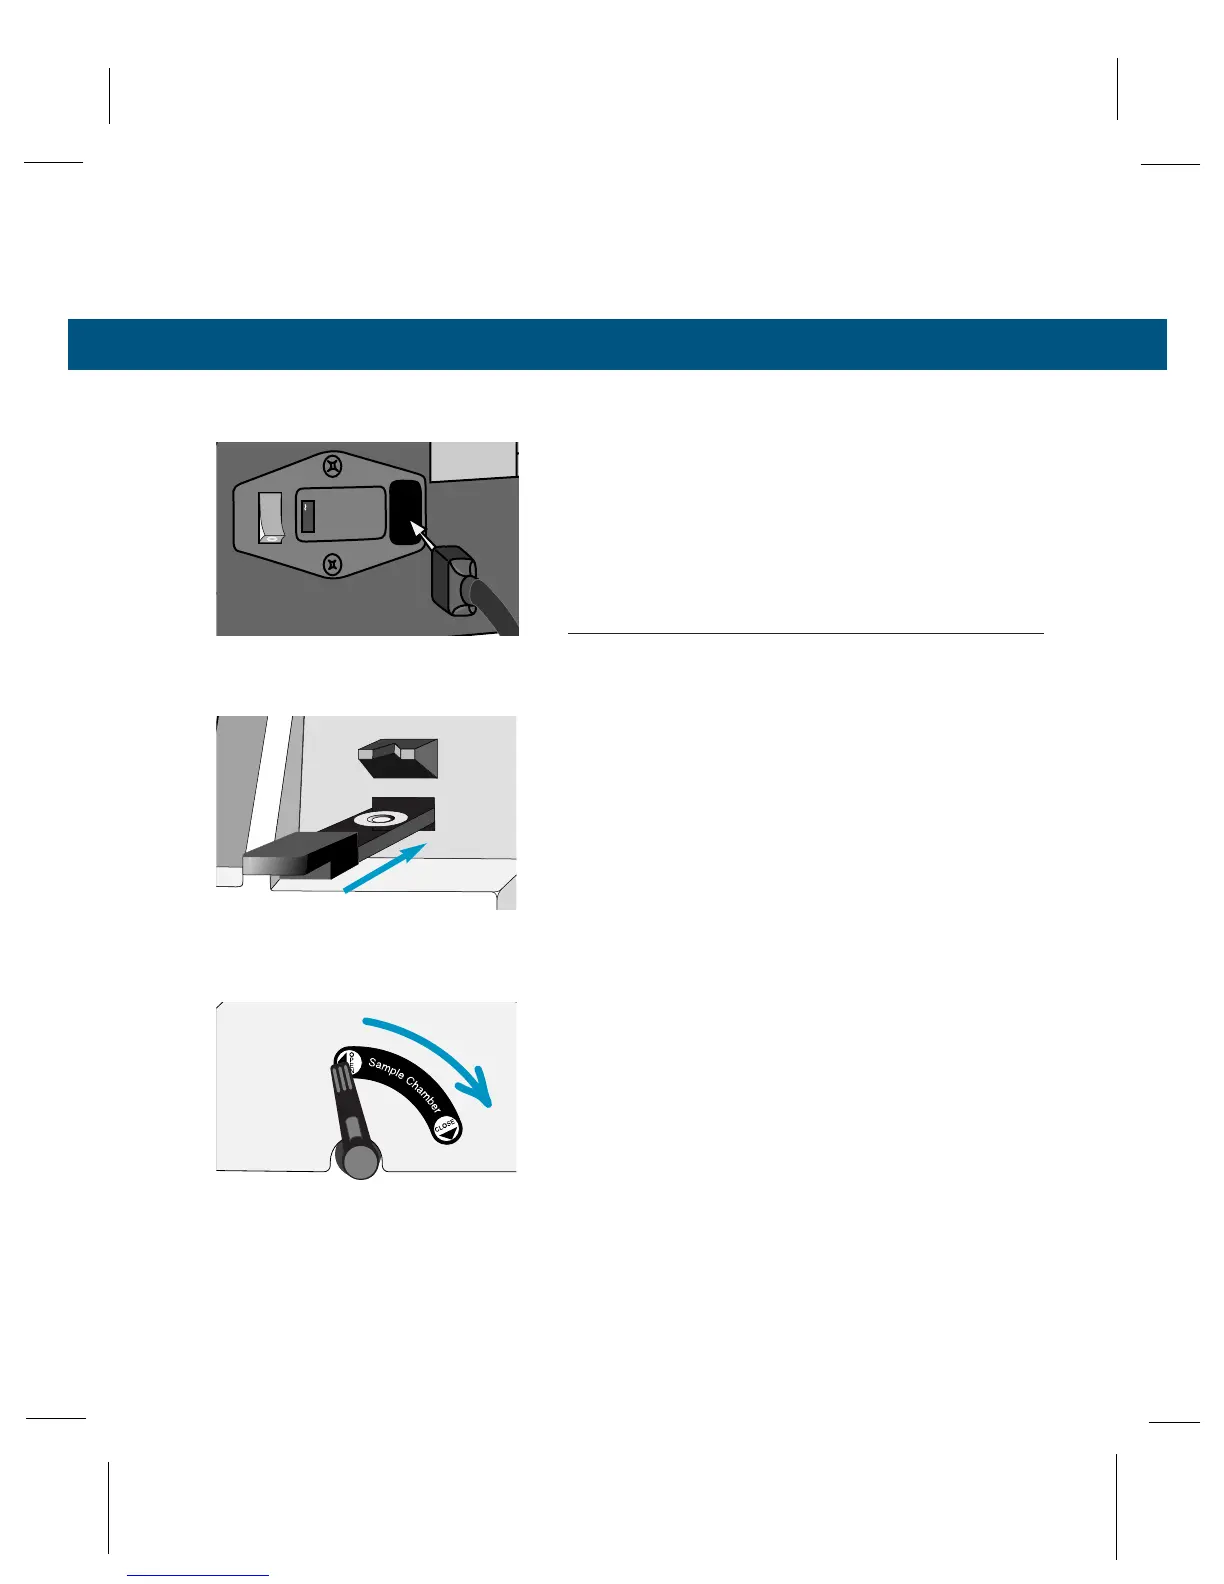
Connect the power cord to an electrical outlet
that matches the voltage selected on the rear
panel. Avoid power circuits that are shared by
centrifuges, air conditioners, or other power
equipment. We recommend that you use a
power line surge protector to isolate the
osmometer from spikes and surges.
3
Verify that the sample holder is in the measure-
ment position (sample slide is pushed com-
pletely into the instrument until it stops).
4
Verify that the sample chamber lever is in the
closed position.
TURN PAGE TO CONTINUE INSTRUCTIONS