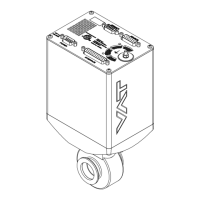
Installation, Operating & Maintenance Instructions
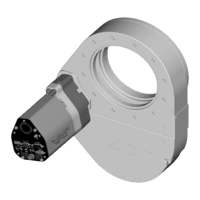
Series 651 DN 320-400 (I.D. 12“ - 16”), Logic
VAT Vakuumventile AG, CH-9469 Haag, Switzerland
Tel +41 81 771 61 61 Fax +41 81 771 48 30 CH@vatvalve.com www.vatvalve.com
267736ED
2008-02-26
39/53
Note: Electrical power and compressed air is required to perform steps 2 to 9 during disassembly respectively 9 to 2
during assembly.
D e s c r i p t i o n Required tool
1. Vent both valve chambers.
2. Open bonnet screws. Press snap in
fixation on one side and pull bonnet
a little bit on that side. Than press
snap in fixation on other side and
remove valve bonnet.
Caution:
Weight of valve bonnet is approx.
DN320 / 12”
(65150 - . . . . - . . . .)
13.0 kg
DN350 / 14”
(65151 - . . . . - . . . .)
15.0 kg
DN400 / 16”
(65152 - . . . . - . . . .)
18.0 kg
snap in fixation
Allen wrench
8mm
3. Open valve
Caution: Stand away from valve –
pendulum plate moves out of the
valve body.
4. Unfasten mounting screw for
pendulum plate.
5. Remove pendulum plate.
pendulum plate mounting screw
for pendulum plate
open end wrench
13mm
6. With one hand press the
MAINTENANCE BUTTON to lower
the sealing ring, with your second
hand unlock the sealing ring by
pressing the handle.
7. Release MAINTENANCE BUTTON.
8. Remove sealing ring.
9. To prevent the shaft and retaining
pins from moving during work, switch
the valve to safety mode. Refer to
«Safety mode» for details.
Note: Retaining pins will move up.
maintenance button

 Loading...