Do you have a question about the VendNet CB500-SA and is the answer not in the manual?
Locate and record the vendor's Model and Serial Number for future reference and inquiries.
Details on voltage, frequency, and current requirements for the vending machine.
Information on the unit size, refrigerant type, and charge for the cooling system.
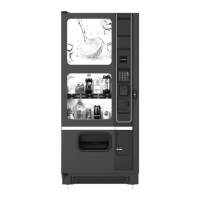
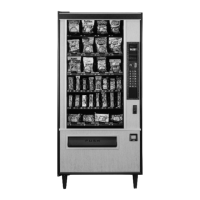
Specifies the number of selections, columns, and total product capacity.
Provides dimensions (height, width, depth) and weight of the vending machine.
Lists key features like LED display, MDB interface, and user-friendly service mode.
Instructions on inspecting for and reporting shipping damage promptly to the carrier.
Steps for safely removing the "Knock-Away" supports using a pallet jack.
A checklist of essential steps to ensure proper initial installation of the vendor.
Emphasizes careful planning for moving the heavy vending machine to avoid injury.
Steps for removing exterior packing material and the wooden shipping pallet.
Guidelines for placing the vendor, including power cord reach and door clearance.
Instructions for installing Model 3578G on a pedestal or concrete base.
Verifying polarity, voltage, ground, and circuit protection before connecting equipment.
Instructions for permanent electrical connection to the terminal block.
Detailed steps for removing and installing the bottom kick panel with wing nuts.
Suggests loading faster-selling products in the front and rear selections first.
Instructions on keeping funnel slides clean and product orientation for vending.
Using the loading chart on the door to track product types loaded into the CB500-SA.
Steps for loading products, including testing with real money for first-time loading.
Guidelines for product spacing within columns to prevent jams and ensure proper vending.
Adjusting the back spacer for correct product dimension in columns.
Adjusting latch striker and gate assembly for vertical alignment of product columns.
Ensures Live Display labels and product containers match loaded products.
Steps to remove and re-insert the Live Display Panel for loading.
Instructions for loading cans or bottles onto the shelves of the Live Display.
Explains the drop sensor's role in detecting product vending and its calibration.
Describes the display status when the machine is ready for a sale.
How customers establish credit by inserting money or using the bill validator.
The process of a customer making a valid selection and the signal path.
The steps involved in dispensing a product after a valid selection.
How the drop sensor confirms product delivery and signals the control board.
Information on preset temperature settings and allowing time for cooling.
General advice on troubleshooting refrigeration issues, noting most are electrical.
Identifies issues with sealed hermetic systems requiring factory service.
Lists common causes for the compressor failing to start.
Identifies reasons why the compressor might repeatedly trip due to overload.
Explains potential causes for a noisy or vibrating vending machine unit.
Discusses scenarios where the unit cycles on and off too frequently.
Reasons why the unit might run for extended or continuous periods.
Explains how blocked airflow can lead to icing or warm product.
Addresses issues when the internal temperature is set too low.
Common causes for the unit not cooling sufficiently.
Guidance on using a multi-meter to test electrical circuits and components.
Emphasizes disconnecting power before attempting any service on the unit.
Steps to remove screws securing the condenser assembly.
Instructions for removing the power panel and sealant cover.
Details on removing the hopper mounting screws to access internal parts.
Methods for cleaning the external surfaces of the vending machine.
Procedures for cleaning the inside of the cabinet and vend mechanisms.
How to clean dust from the condenser, screen, and condensation pan.
Details on necessary information like model, part number, and description.
How to order parts online, via email, or by mail.
A checklist of common issues to verify before contacting service.
Method to check if the evaporator fans are running using a sheet of paper.
Procedure to test if the condenser fan is operating correctly.
Verifying the vendor is plugged directly into the outlet and avoiding extension cords.
Inspecting evaporator and condenser coils, and the compressor for dust.
Information needed and phone numbers to contact for service assistance.
| Dimensions | 72" H x 39" W x 35" D |
|---|---|
| Weight | 780 lbs |
| Capacity | Up to 400 items |
| Payment Options | Cash, Credit/Debit Card, Mobile Payment |
| Power Supply | 115V, 60Hz |
| Features | LED lighting |
| Selections | 40 |
| Voltage | 115V |