4. UNIT INSTALLATION (CONT’D)
4.5 PLANNING OF THE DUCTWORK
•Keep it simple. Plan for a minimum of bends and joints. Keep the length of the
insulated ducts to a minimum.
• Do not use wall cavities as ducts. Do not use branch line smaller than 4” (102 mm)
diameter.
• Do not ventilate crawl spaces or cold room. Do not attempt to recover the exhaust
air from a dryer or a range hood; this will cause the clogging of the unit.
• Be sure to plan at least one exhaust register on the highest lived-in level of the
house, if it has 2 floors or more.
4.6 INSTALLING NON-INSULATED FLEXIBLE DUCTS AND REGISTERS
4.6.1 STALE AIR EXHAUST DUCTWORK
4.6.2 FRESH AIR DISTRIBUTION DUCTWORK
CAUTION
If ducts have to go through an unconditioned space, always use insulated
ducts (purchase separately).
WARNING
Never install a stale air exhaust register in a room where a combustion
device operates, such as a gas water heater, a gas furnace or a fireplace.
•Install the stale air exhaust register(s) in the main area where the contaminants
are produced: kitchen, living room, etc. Position the register(s) as far from the
stairway as possible and in such a way that the air circulates in all the lived-in
spaces in the house.
•If a register is installed in the kitchen, it must be located at least 4 feet (1.2 m)
from the range.
•Install the register(s) 6 to 12 inches (152 to 305 mm) from the ceiling on an
interior wall OR install it in the ceiling.
•Install the fresh air distribution register(s) in
a large, open area in the lowest
level to ensure the greatest possible air circulation. Keep in mind that the fresh
air register(s) must be located as far as possible from the stale air register(s).
•Install the register(s) in the ceiling OR 6 to 12 inches (152 to 305 mm) from the
ceiling on an interior wall. The duct length should be at least 15 feet (4.6 m).
(The cooler air will then cross the upper part of the room and mix with room air
before descending to occupant level.)
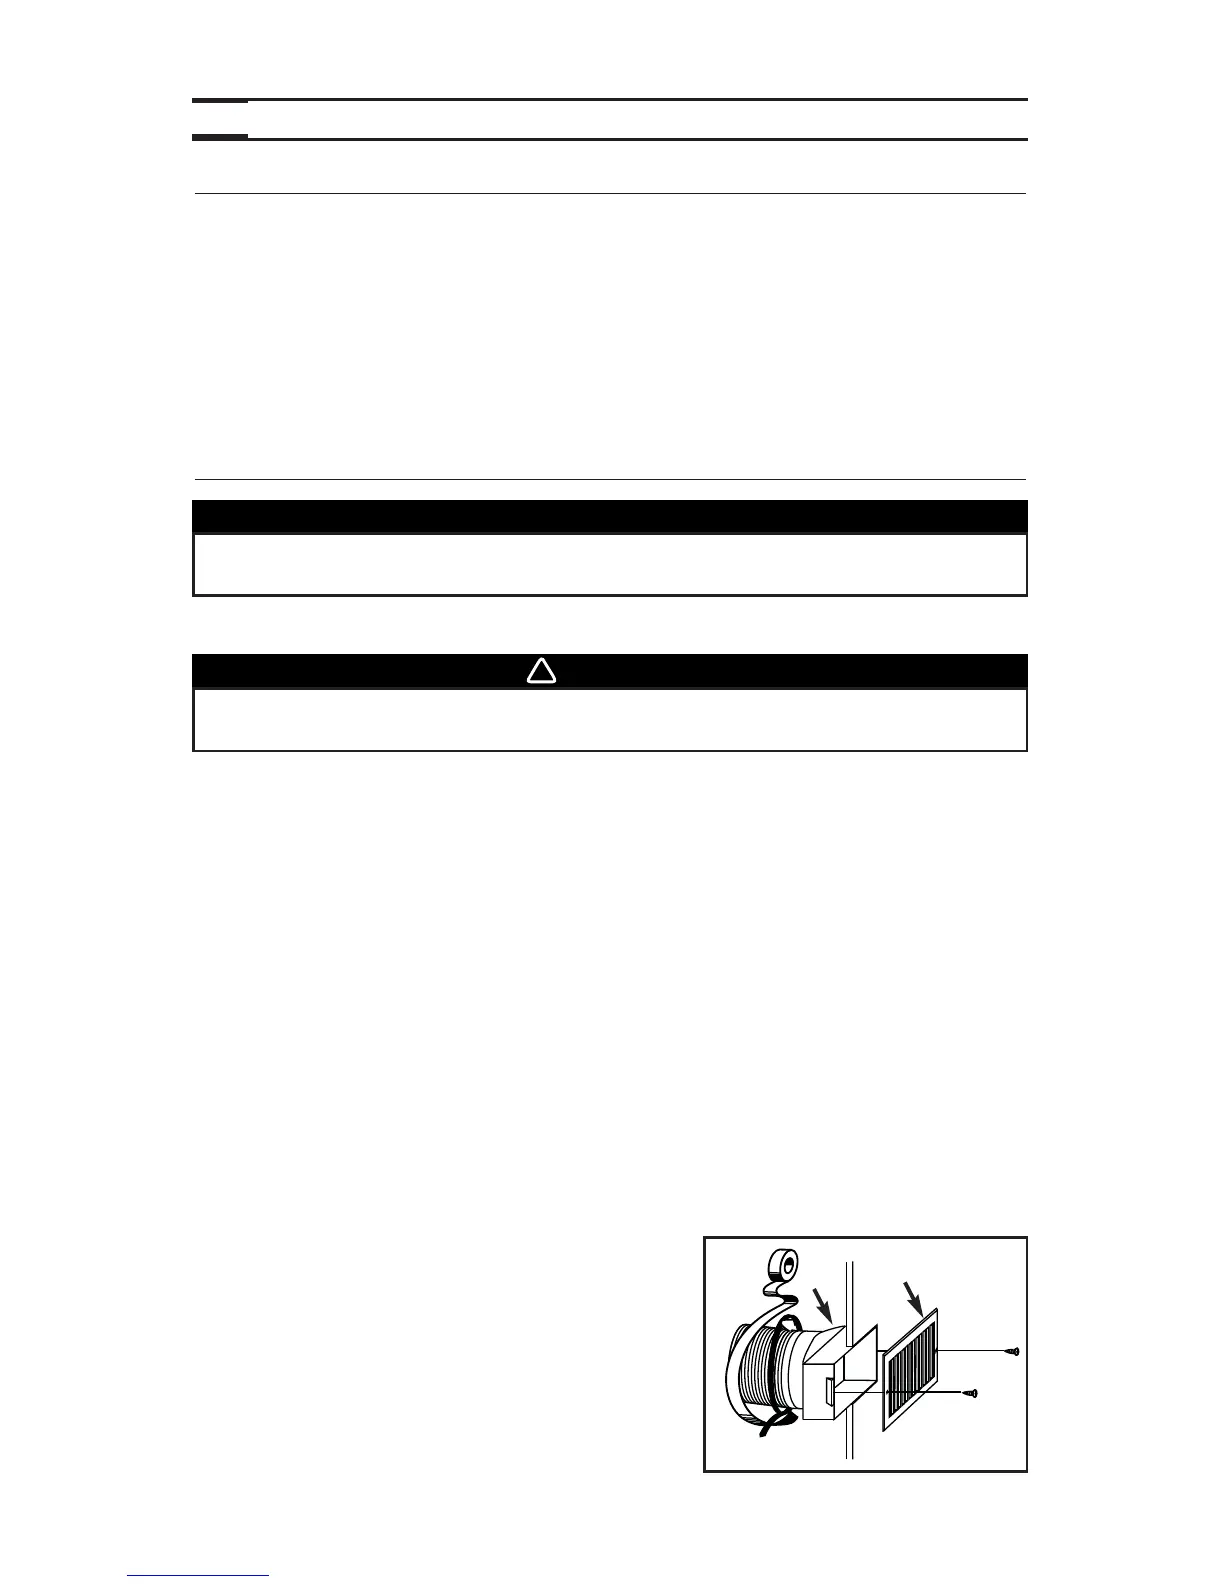
4.6.3 HOW TO CONNECT NON-INSULATED FLEXIBLE DUCTS TO THE REGISTERS
•Once the register location is determined,
cut out a 3¾” x 9¾” rectangular hole.
•Fix one end of the fle xible duct to the register
transition (1), using a tie wrap and duct tape .
•From inside the wall (or ceiling), place the
transition opening flush to the finished wall.
• Assemble the register (2) to its transition
using its 2 no. 8 x 1½” screws.
See illustration beside.
VD0202
1
2
9