2
English
Liebert HPM --- A/W/F/D/H
3) Remove the bag from the
unit when ready to re-
move the skid and install
the unit.
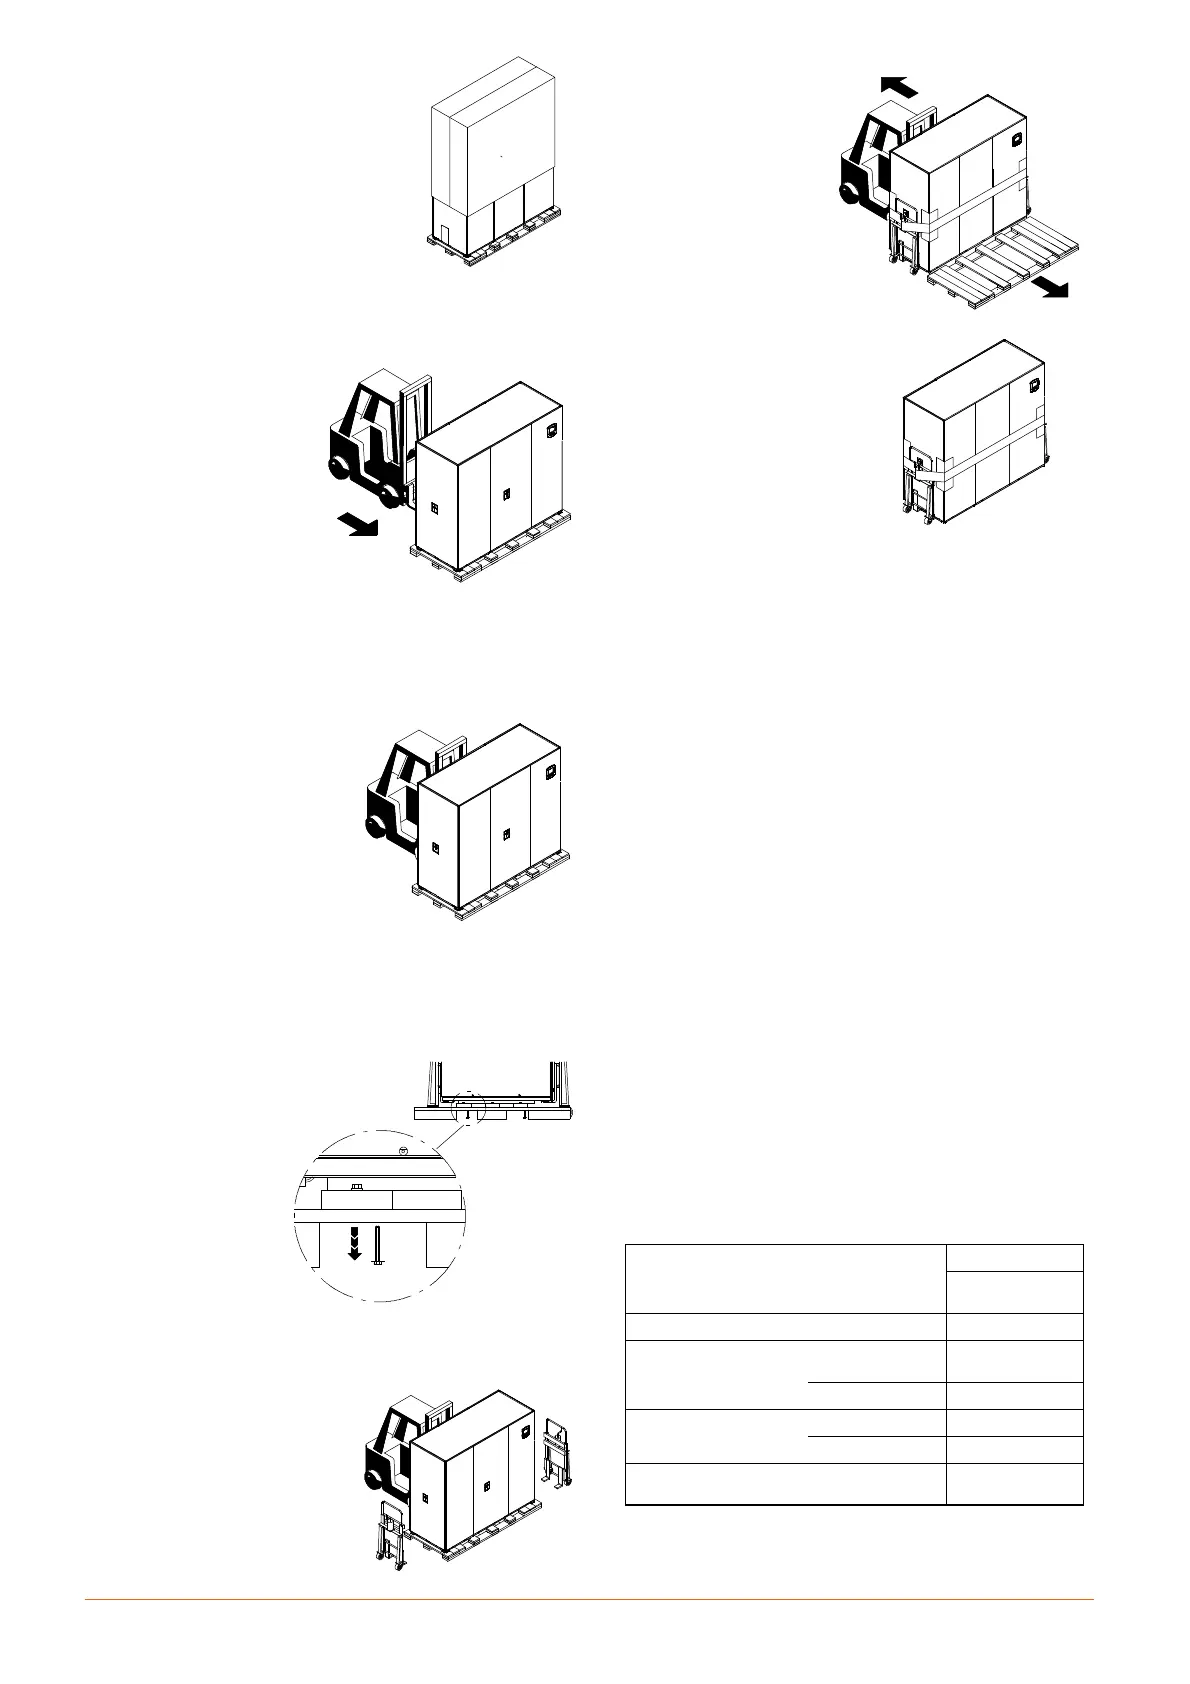
1.7 -- Removing the Unit from the Skid using a
1)
Fork Lift
S Align a fork lift with
either the front or
rear side of the
unit.
S Ensure the tinesof
the fork lift are
locked to the
widest location.
S Use the center of
gravity indicators
on the unit panels
when determining
the entry points for the tines.
S Center of gravity varies per unit size and select ed op-
tions.
S Tines shall be equally spaced on either side of the
center of gravity indicator.
2)
S Insert the tines of
the fork lift under
the base of the
unit.
S Ensure the tines
are level, not
angled in an up-
ward direction.
S Tines are to be at a
height that will al-
low proper clear-
ance under the unit.
S Ensure the tines extend beyond the opposite side of
the unit.
S If these steps are not followed , damage may occur
to the panels and/or base of the unit.
3)
S Remove four (4)
bolts, two (2) on
each side of the
pallet. Bolts can
be removed
using a 1/2”
socket
wrench,
open---end
wrench, or pli-
ers.
1.8 -- Moving the Unit to the Installation Loca-
tion using Piano Jacks
1) Acquire piano jacks,
and with the unit elev-
ated, place the piano
jacks into position
where one is at each
end of the unit.
2)
S Lower the unit to a
height suitable for
the piano jacks.
S Place protective
material between
the unit and the pi-
ano jacks and
straps.
S With the unit se-
cured to the piano
jacks, move the
fork lift and pallet
away from the
unit.
3) Using the piano jacks,
at least two trained
personell can move
the unit to the site for
installation.
1.9 -- Removal of
Piano Jacks
S Lower the unit as far the piano jacks will allow.
S Undo all str apping holding the piano jacks to the unit.
S Use a pry bar or similar device and on one end of the unit
with a piano jack, lift the unit just enough to allow for the
removal of the piano jack.
S Repeat the previous step to remove the piano jack on the
opposite end.
S Remove all material that might have been used to protect
the unit from the piano jacks and strapping.
1.10 -- Base module
If there is no raised floor below the unit it must be placed on a
base module to allow acc ess t o t he external connections.
The conditioner is connected to the base module by 4
screws.
1.11 -- Operating limits
The units are designed to operate within working ranges
(see Tab. a).
These limits are ref erred to new machines or to those that
have been correctly installed and serviced.
The warranty clauses are no longer valid for any possible
damage or malfunctio n that may occur during or due to op-
eration o ut si de t he application values.
Tab. a --- Operating limits
For all units
Room air conditions from:
18°C, 45% R.H.
for L8FUx, L9HUx:
21°C, 40% R.H.
Room air conditions to: 27°C, 55% R.H
Hot water circuit
inlet water
temperature
max. 85°C
water pressure max. 8.5 bar
Storage conditions
from: --- 2 0 °C
to: 50°C
Power supply tolerances
V ± 10%
Hz ± 2