Vertiv™ NetSure™ V200E50 DC Power Retrofit Installation and User Manual
Proprietary and Confidential © 2022 Vertiv Group Corp.
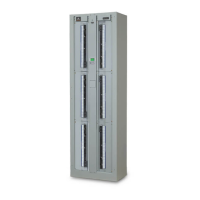
Net Weight: 67 Lbs. (Mounting Frame with Two Rectifiers)
3 Installation
3.1 Safety Statement
DANGER! INSTALLERS MUST FOLLOW APPROVED SAFETY PROCEDURES. Hazardous AC and DC power sources are
connected to, and are present within, the Power System. Following this installation procedure will minimize the possibility of
personal injury or equipment damage. Refer to the documentation provided with your Power System for any installation or
maintenance procedures beyond the scope of this upgrade procedure.
The Vertiv™ NetSure™ Model V200E50 DC Power Retrofit is designed to mount in a Model 1231V1, Spec. No. 582121300 Power Bay.
Installation in any other Power System should not be attempted.
Installation consists of removing one existing V200E50 Power Conversion Unit (PCU) or blank cover panel from the Power Bay,
installing the V200 Retrofit Mounting Frame in the Power Bay, and installing the two furnished NetSure™ R48-5800e Rectifiers in the
Mounting Frame.
The Vertiv™ NetSure™ Model V200E50 DC Power Retrofit can be installed while the Power System is in service. Before starting,
ensure that all AC input and DC output connections to the Power Bay are intact. No changes or adjustments are required for these
connections when installing the Vertiv™ NetSure™ Model V200E50 DC Power Retrofit. All wiring and grounding should follow the
current edition of the National Electrical Code and applicable local codes.
Performing this upgrade procedure may activate external alarms. Do one of the following. If possible, disable these alarms. If these
alarms cannot be easily disabled, notify the appropriate personnel to disregard any future alarms associated with this system while
this procedure is being performed.
Follow the procedures below to replace one or more existing V200E50 Power Conversion Units (Rectifiers) with the Vertiv™ NetSure™
Model V200E50 DC Power Retrofit.
3.2 Checking System Compatibility
Check your system compatibility before starting this procedure as follows.
Procedure
1. With “SYSTEM OK” being displayed on the MCA Interface Pad, check your MCA software version by pressing and releasing
the FUNCTION SET ENTER pushbutton.
2. Repeatedly press and release the FUNCTION SELECT DOWN arrow pushbutton until "CONFIGURE MENU" is displayed.
3. Press and release the FUNCTION SET ENTER pushbutton.
4. "VERIFY INVENTORY" is displayed. Press and release the FUNCTION SET ENTER pushbutton.
5. Repeatedly press and release the FUNCTION SELECT DOWN arrow pushbutton until "MCA SWV ########" is displayed.
6. Record the MCA software version number displayed.
7. Refer to Table 1.1. If the MCA software version is 5.2, 5.1, or 5.0; proceed with this procedure.
If the MCA software version is 4.9 or less and 4.4.3 or better; return your existing MCA and exchange it for a new version
MCA.
If the MCA software version is 4.4.2 or less; purchase a new version MCA.