Vertiv™ NetSure™ V200E50 DC Power Retrofit Installation and User Manual
Proprietary and Confidential © 2022 Vertiv Group Corp.
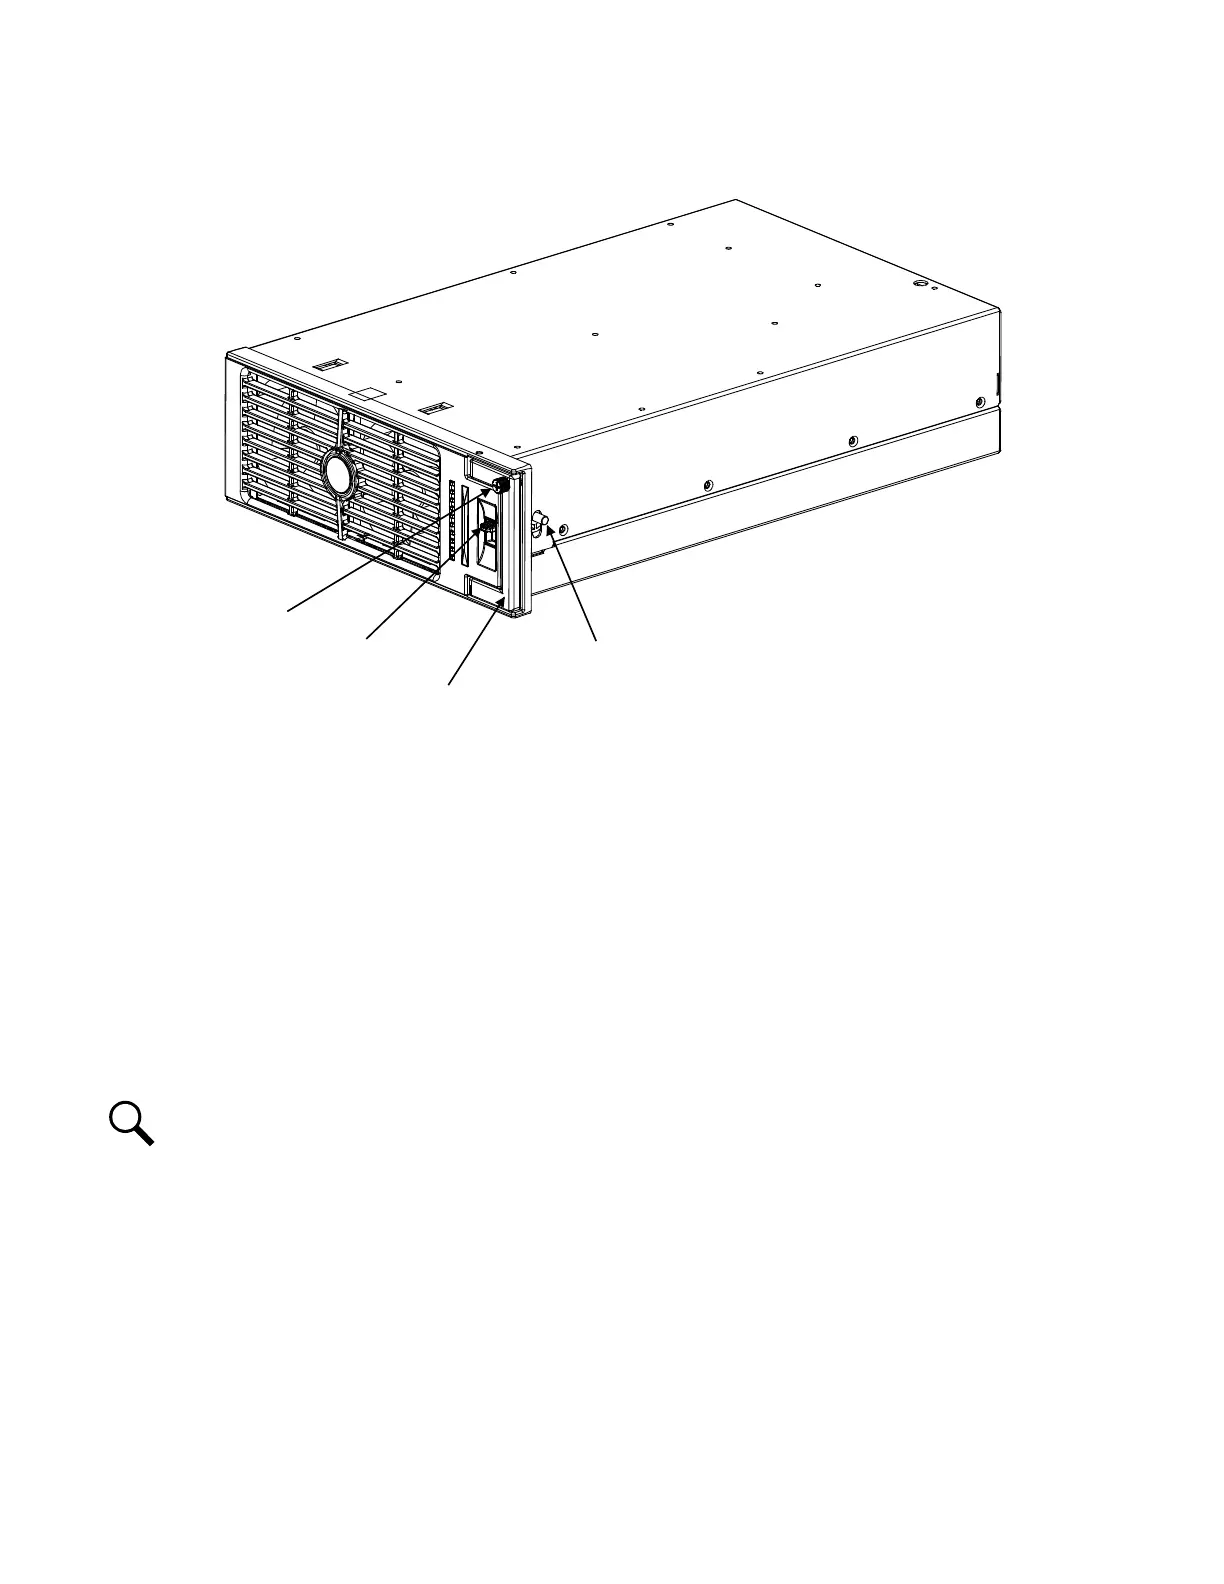
Figure 3.8 Rectifier Handle and Safety Latch
3. Gently push the Rectifier into the Mounting Frame until it stops. Note that the Rectifier will NOT be completely seated in the
Mounting Frame until the next step is performed.
4. Push the “Safety Latch Release” located on the front of the Rectifier DOWN. Gently push the Rectifier into the Mounting
Frame until it is completely seated.
5. Push the Rectifier handle in and secure the Rectifier to the bay by tightening the captive fastener located on the handle.
6. Repeat Step 1 through 5 for each of the remaining Rectifiers.
7. After the Rectifiers are physically installed in the Mounting Frame, they are ready for operation immediately after power is
supplied to them.
8. On the Power System controller (MCA), update the system inventory as necessary. Refer to the Power System
documentation for a procedure.
NOTE!
The MCA identifies the entire Retrofit Assembly as one PCU.
9. Ensure that there are no local or remote alarms active on the system.
10. Install the front cover on the Mounting Frame. Secure by tightening the two captive fasteners. Refer to Figure 3.9.
Handle
Captive
Fastener
Safety
Latch
Pin
Safety
Latch
Release
Handle