EasyManuals Logo

Vertiv VRC1 Series User Manual

Vertiv VRC1 Series
70 pages
To Next Page IconTo Next Page
To Previous Page IconTo Previous Page
Page #30 background imageLoading...
Page #30 background image
18
Vertiv I VRC Self-Contained System I User Manual
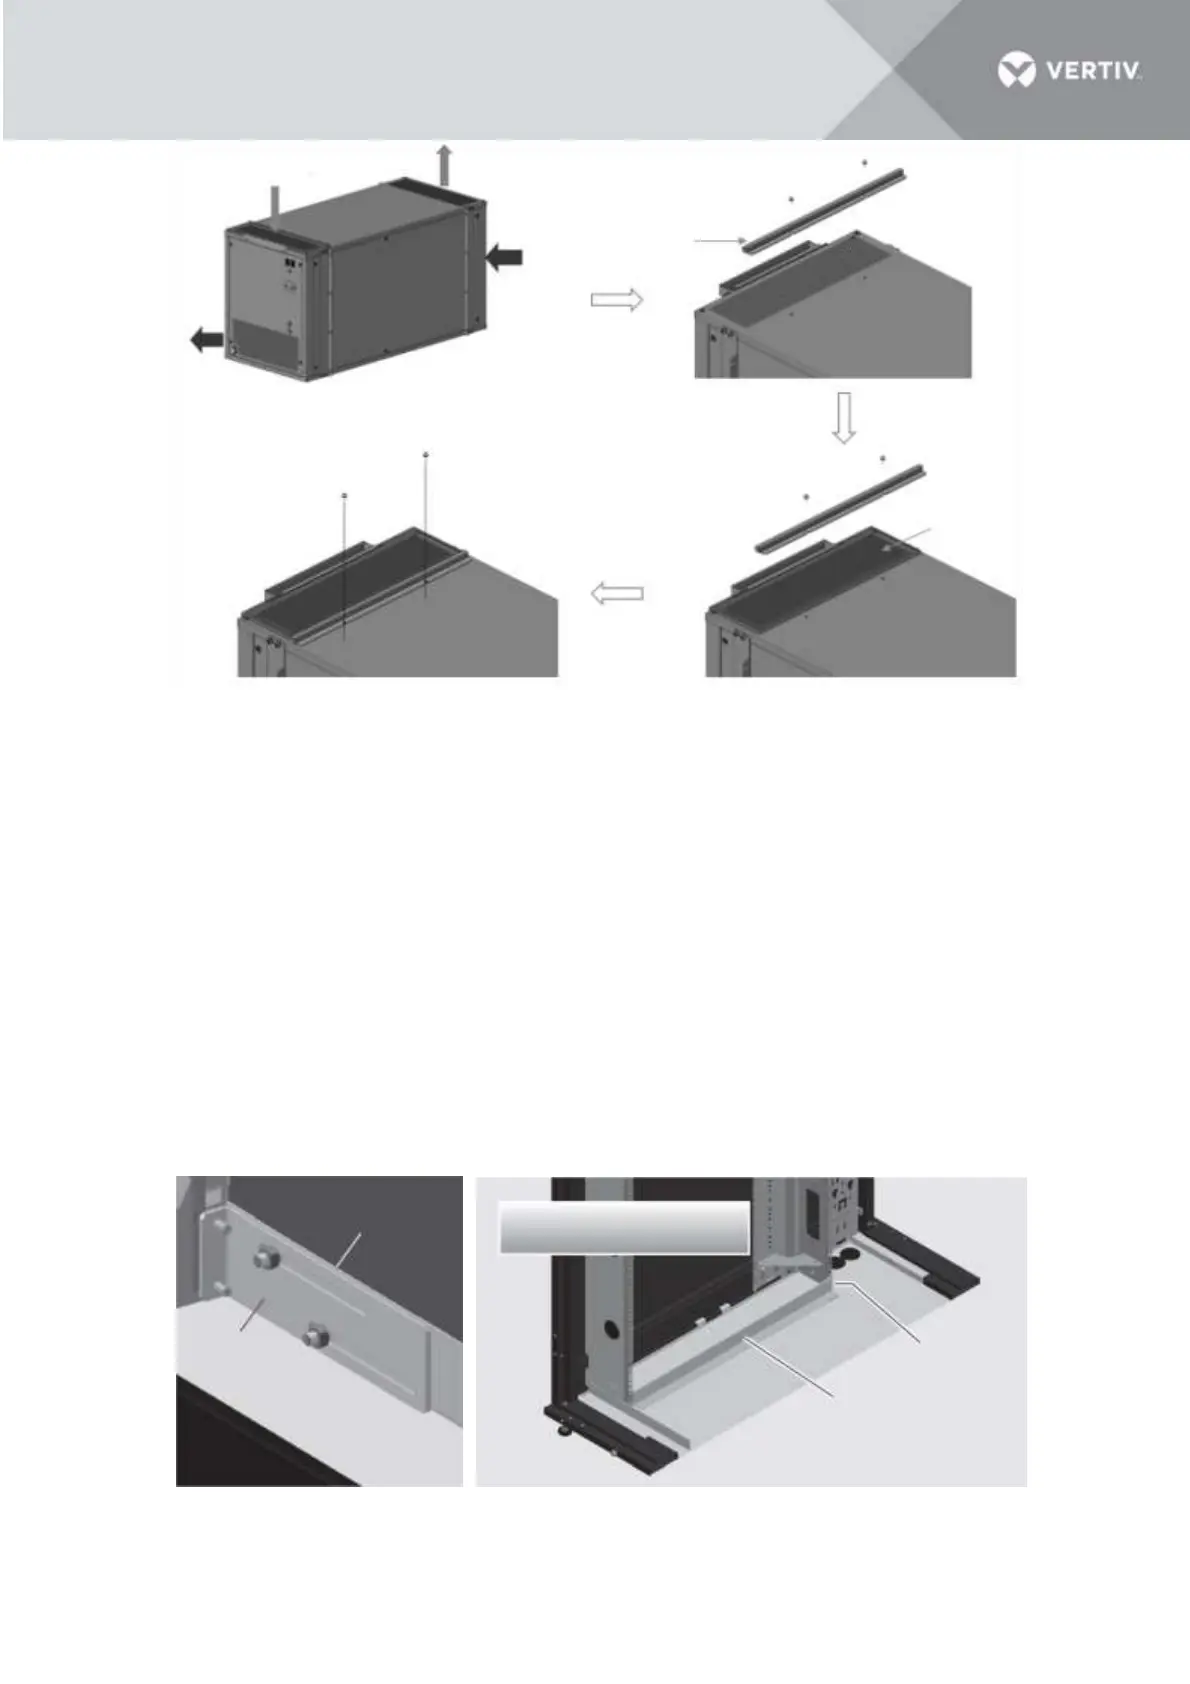
Figure 3-4 Install the evaporator filter
3.3.2 Installing the unit inside the 4-post rack
For installation in a 4-post rack, please refer to the procedure below.
NOTES:
For installation in a 2-post rack, please purchase accessory 2POSTRMKITVRC. Installation
instructions are included with this rail kit.
1. Mount the L-shaped rails in the rack.
Each of the two L-shape rails are comprised of two parts, a long front rail and a slotted rear bracket. There
are left and right VRC rails. The flanges of each of the front rails should be on the bottom and pointing
toward the center of the rack. Slip the slots in the rear rail bracket over the pressed studs in the front rail
part. Loosely fasten with nuts. Fasten the ends of the front rails and rear brackets to the uprights using
center screws M5x12 T20. Torque=4.0 Nm (2.95 lb-ft). Once in place, tighten the nuts on the front rail part
studs. Torque = 5.6 Nm (4.13 lb-ft).
Figure 3-5 L-shape rails installation
1. Loosen the
screws and
remove this
bracket.
2. Place the filter
on the air return
position
3. Tighten the
screws to secure
the filter
Filter
Supply air
Return air
Condenser in
Evaporator Side
Condenser out
Front rail part
Slotted rear
bracket
Cross section of vRack shown for
illustrative purposes.
VRC rear left
bracket
VRC front left rail

Table of Contents

Other manuals for Vertiv VRC1 Series

Questions and Answers:

Question and Answer IconNeed help?

Do you have a question about the Vertiv VRC1 Series and is the answer not in the manual?

Vertiv VRC1 Series Specifications

General IconGeneral
BrandVertiv
ModelVRC1 Series
CategoryFreezer
LanguageEnglish

Related product manuals