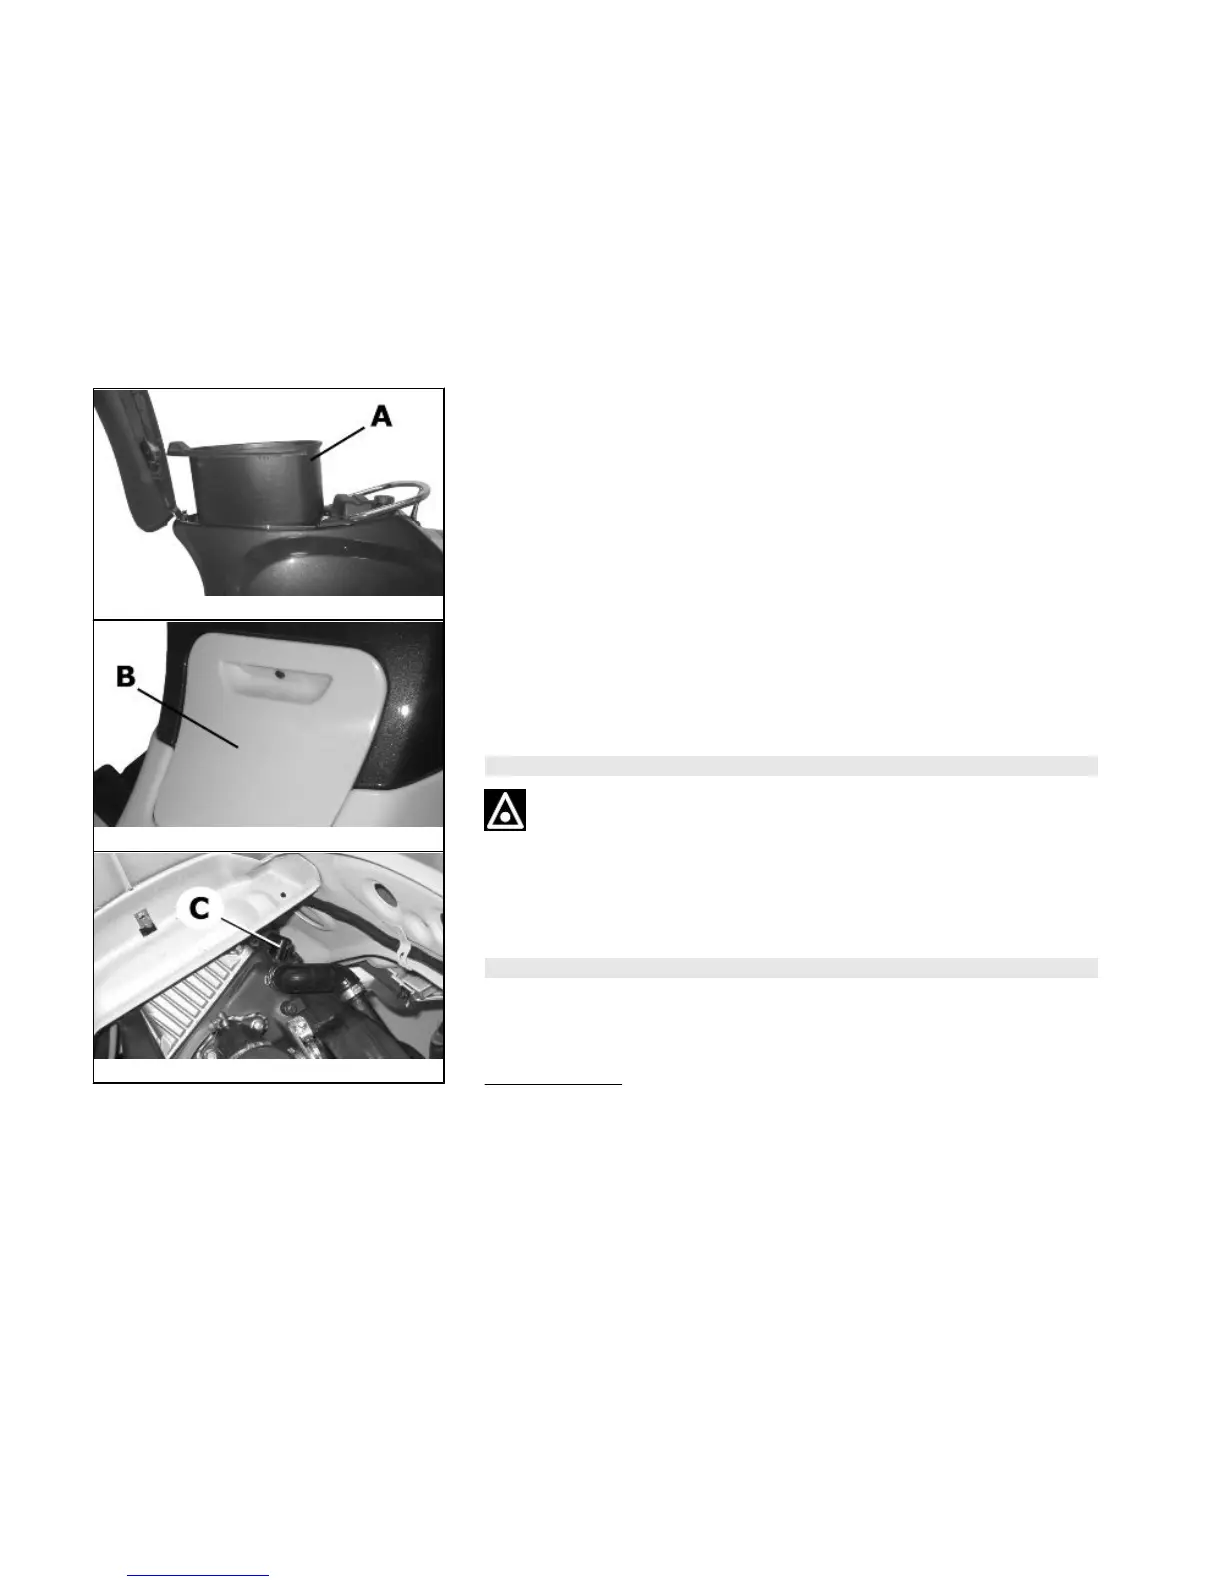
03_08
03_09
03_10
Spark plug dismantlement (03_08, 03_09, 03_10, 03_11)
The engine must be cold to inspect the sparkplug, proceed as follows:
1. Lift the saddle and remove the helmet compartment "A";
2. Remove the sparkplug inspection door "B";
3. Remove plug cap "C";
4. Use the equipped spanner "D"(with rubber stop) and a 13 mm spanner to remove
the sparkplug.
To reassemble repeat the procedure in the opposite order using the spanner to insert
the sparkplug and to tighten it in its seat, making sure to install it and screw it down at
the correct angle.
The above operations need to be carried out very carefully by inserting the left hand
from the sparkplug inspection door and the right hand from the helmet compartment.
To reassemble the door carry out the operations in the opposite order, making sure
to insert the tab in the part of the central covering.
WARNING
THE SPARK PLUG MUST BE REMOVED WHEN THE ENGINE IS COLD. THE USE
OF A SPARK PLUG WITH THERMAL GRADE OR THREAD OTHER THAN THE
INDICATED TYPE (SEE «DATA» SECTION) CAN SERIOUSLY DAMAGE THE EN-
GINE. REPLACE SPARK PLUGS AT THE INTERVALS INDICATED IN THE
SCHEDULED MAINTENANCE TABLE.
N.B.
THE USE OF SPARK PLUGS OTHER THAN THE INDICATED TYPE OR OF
SHIELDLESS SPARK PLUG CAPS CAN CAUSE ELECTRICAL SYSTEM FAIL-
URES.
Characteristic
Spark plug
30

 Loading...