17
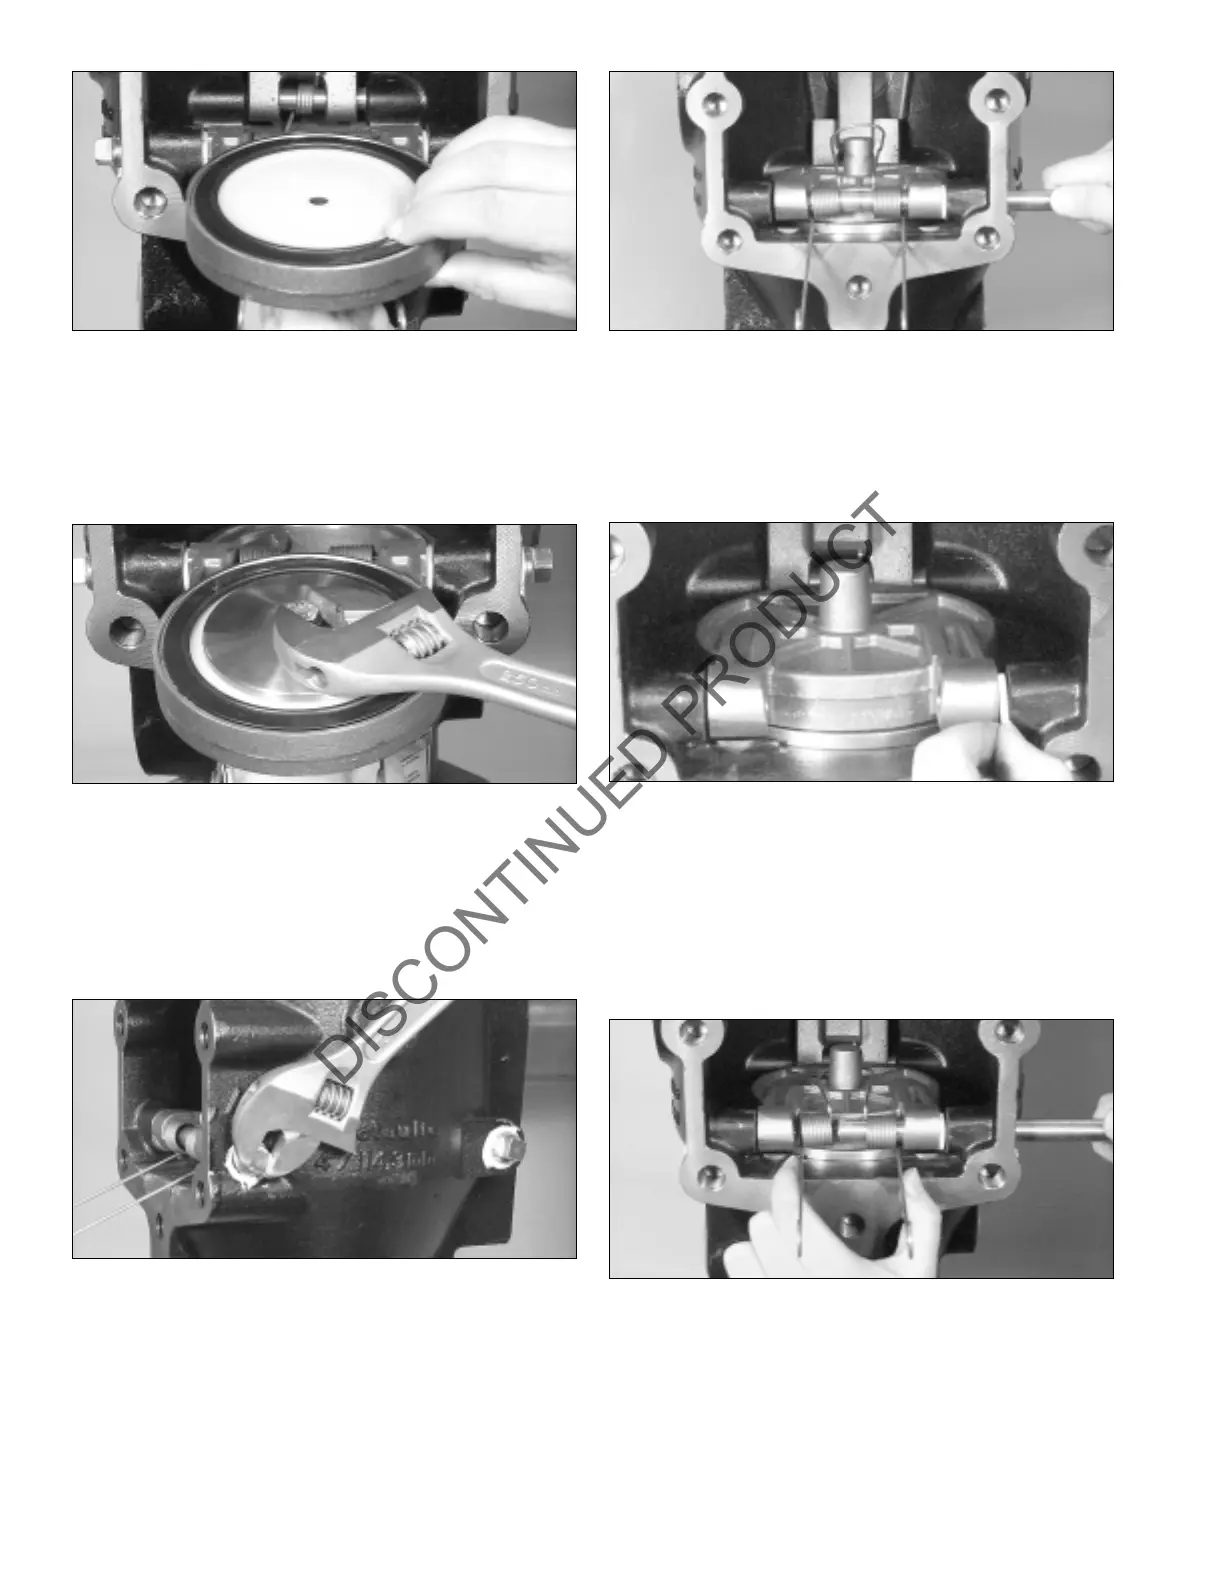
3. Ensure that the clapper is free of contaminants, dirt, and
mineral deposits.
3a. Carefully put the rubber seal into the clapper so that
the clapper retains the outer edge of the seal. Make sure
that the seal is pushed all the way down in the clapper and
that the outer seal-retaining ring snaps into position.
4. Place the brass retaining ring onto the seal and bolt the
retaining ring to the clapper with the bolt/washer pro-
vided. Tighten the bolt/washer sufficiently, and apply an
additional ¹⁄₂ turn to ensure a proper seal.
REMOVING THE
CLAPPER ASSEMBLY
1. Remove the shaft retaining plugs from the valve body.
2. Slide the clapper’s shaft through the body and the clap-
per.
3. Remove the clapper.
INSTALLING THE CLAPPER
1. Place the clapper on the seat ring so that the clapper
shaft can pass through both the body and the clapper.
Make sure one spacer/washer is placed on the outside of
each clapper arm.
2. Position the clapper spring so that the loop is on the
clapper and the spring coils are inside the clapper arms.
Proper positioning will allow the clapper’s shaft to pass
through the spring coils.
3. Slide the shaft through the body into the first clapper
arm, then through the clapper spring coils then out the
other clapper arm and into the body.v
 Loading...