67009600-EN - Edition 2015 - Rev. 1.0
22
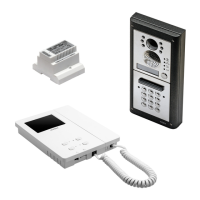
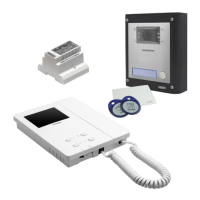
VX2300 Digital System - “2 Wire” Audio/Video Door Entry System
VX2300 Digital System - Installation handbook
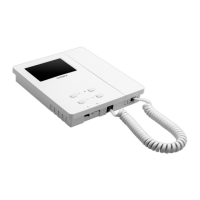
5000 Series Hands free intercom wall mounting instructions
A
B
Fig. 1
C
Fig. 2
135cm
Fig. 3
D
E
Fig. 4
A
B
Fig. 5
A
B
H
G
Fig. 6
1. As shown in Fig. 1, looking at the rear of the intercom, insert the tip of a at blade screwdriver into one of the two openings
(Fig. 1A) then slightly move the screwdriver in an upward direction to release the front from the back plate and opening the
intercom unit (Fig. 1B). Take care! The back plate of the intercom houses the pcb connection board which is normally connected
to the pcb in the front of the intercom by the ribbon cable, the ribbon cable should not be connected when rst opened.
2. Place the back plate of the intercom against the wall at approximately 135cm (Fig. 2) above nished oor level, then mark the
xing holes taking into account that the cable group
A
must feed into the opening
B
(Fig. 3).
3. As shown in Fig. 3, x the back plate of the intercom to the wall feeding the cable group
A
through opening
B
.
4. Using a at blade screwdriver connect the wires to the pcb connection board
C
as shown in Fig. 4, according to the installation
diagram provided.
5. Connect ribbon cable plug
D
from the front plate into plug
E
on the pcb connection board as shown in Fig. 5.
6. Close the intercom by hooking the front plate
G
to the back plate
H
as described below:
• Hook the top of the front plate
G
to the top of the back plate as shown by pointer A in Fig. 6.
• Move the lower side of the front plate
G
towards the back plate
H
and press until the unit locks into the back plate of the intercom.
To open the intercom once installed, rmly grasp the bottom sides of the front plate cover, pull forward in an upward direction to
separate the front cover from the back plate as in Fig. 6.
NB. Please take care when opening to avoid damage, remember that the ribbon cable connects the front plate to the
back plate connector pcb.
 Loading...