67009600-EN - Edition 2015 - Rev. 1.0
50
VX2300 Digital System - “2 Wire” Audio/Video Door Entry System
VX2300 Digital System - Installation handbook
PROGRAMMING
The programming consists of a number of settings that in
part are carried out by a specic OSD menu and the rest
is carried out by the two dip-switch banks on the rear side
of the videophone:
• Date & Time (OSD);
• Privacy duration from 0 to 20 hours (OSD);
• Melody selection among 9 available (OSD);
• Number of rings from 1 to 9 (OSD);
• Unit address (1..127, switches 1 to 7 of SW1);
• Intercommunication mode (between apartments or
within apartment switch 1 of SW3);
• Extension address (1..4, switches 2,3 of SW3);
• Slave mode (switch 4 of SW3);
• Bus Termination (switch to the right of the connection
terminals).
Except OSD settings, it is necessary to remove tem-
porary the power supply after making any other pro-
gramming changes.
PROGRAMMING OSD MENU
When the system is in stand-by, keep pressed the button
until the monitor switches on showing the screen to the left.
The rst programming option is the date & time (Fig. 3):
• change the values by the and buttons;
• use buttons and to move between the elds to
set (day, month, year, hours and minutes);
• conrm the setting by the button or the but-
ton when the eld minutes is selected. The system goes
to next programming step.
The second programming option is the privacy duration
(Fig. 4) (from 0 to 20 hours):
• adjust the value by the buttons and (0 = privacy duration unlimited, the service is disabled by pressing again the button );
• conrm the value by the or . The system jump to next programming option.
Proceed in the same way for the other programming options: call tone volume (3 level, Fig. 5), melody (9 options, Fig. 6) and number
of rings (for 1 to 9, Fig. 7).
Once selected “EXIT” press to exit or button to return to edit programming options.
Note: from any of the two OSD menu’s, if the videophone switches o because of the timeout, the controls and the pro-
grammings are not stored.
VIDEOPHONE ADDRESS SW1.1..7
The table below shows how to set the address of the videophone. Considering that ON = 1 and OFF = 0, multiply
each digit for the relevant decimal weight then sum values obtained to get the address: E.g. as highlighted in the
table OFF,ON,OFF,OFF,ON, OFF,ON in binary is equal to 0100101 then multiplying each digit for the relevant dec-
imal weight you obtain the address that is 37.
SWITCHES STATUS BINARY CODE DECIMAL WEIGHT ADDRESS
7 6 5 4 3 2 1 64 32 16 8 4 2 1
OFF OFF OFF OFF OFF OFF ON 0 0 0 0 0 0 1 1
OFF OFF OFF OFF OFF ON OFF 0 0 0 0 0 1 0 2
OFF OFF OFF OFF OFF ON ON 0 0 0 0 0 1 1 3
OFF OFF OFF OFF ON OFF OFF 0 0 0 0 1 0 0 4
OFF ON OFF OFF ON OFF ON 0 1 0 0 1 0 1 37
ON ON ON ON ON ON ON 1 1 1 1 1 1 1 127
Note: The maximum number of units allowed is 100 but the address of each unit can be a value between 1 and 127.
EXIT
09:2315/12/11
Fig. 3
EXIT
0 1 . 5 h
Fig. 4
EXIT
Fig. 5
EXIT
MEL ODY 1
Fig. 6
EXIT
RING S 6
Fig. 7
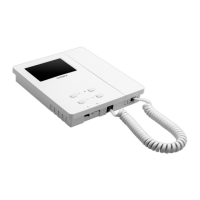
Art.KRV88-KRV86 3.5” Hands free videomonitor for VX2300 digital system