29
Contents
Previous
Page
First
Page
Next
Page
Previous
View
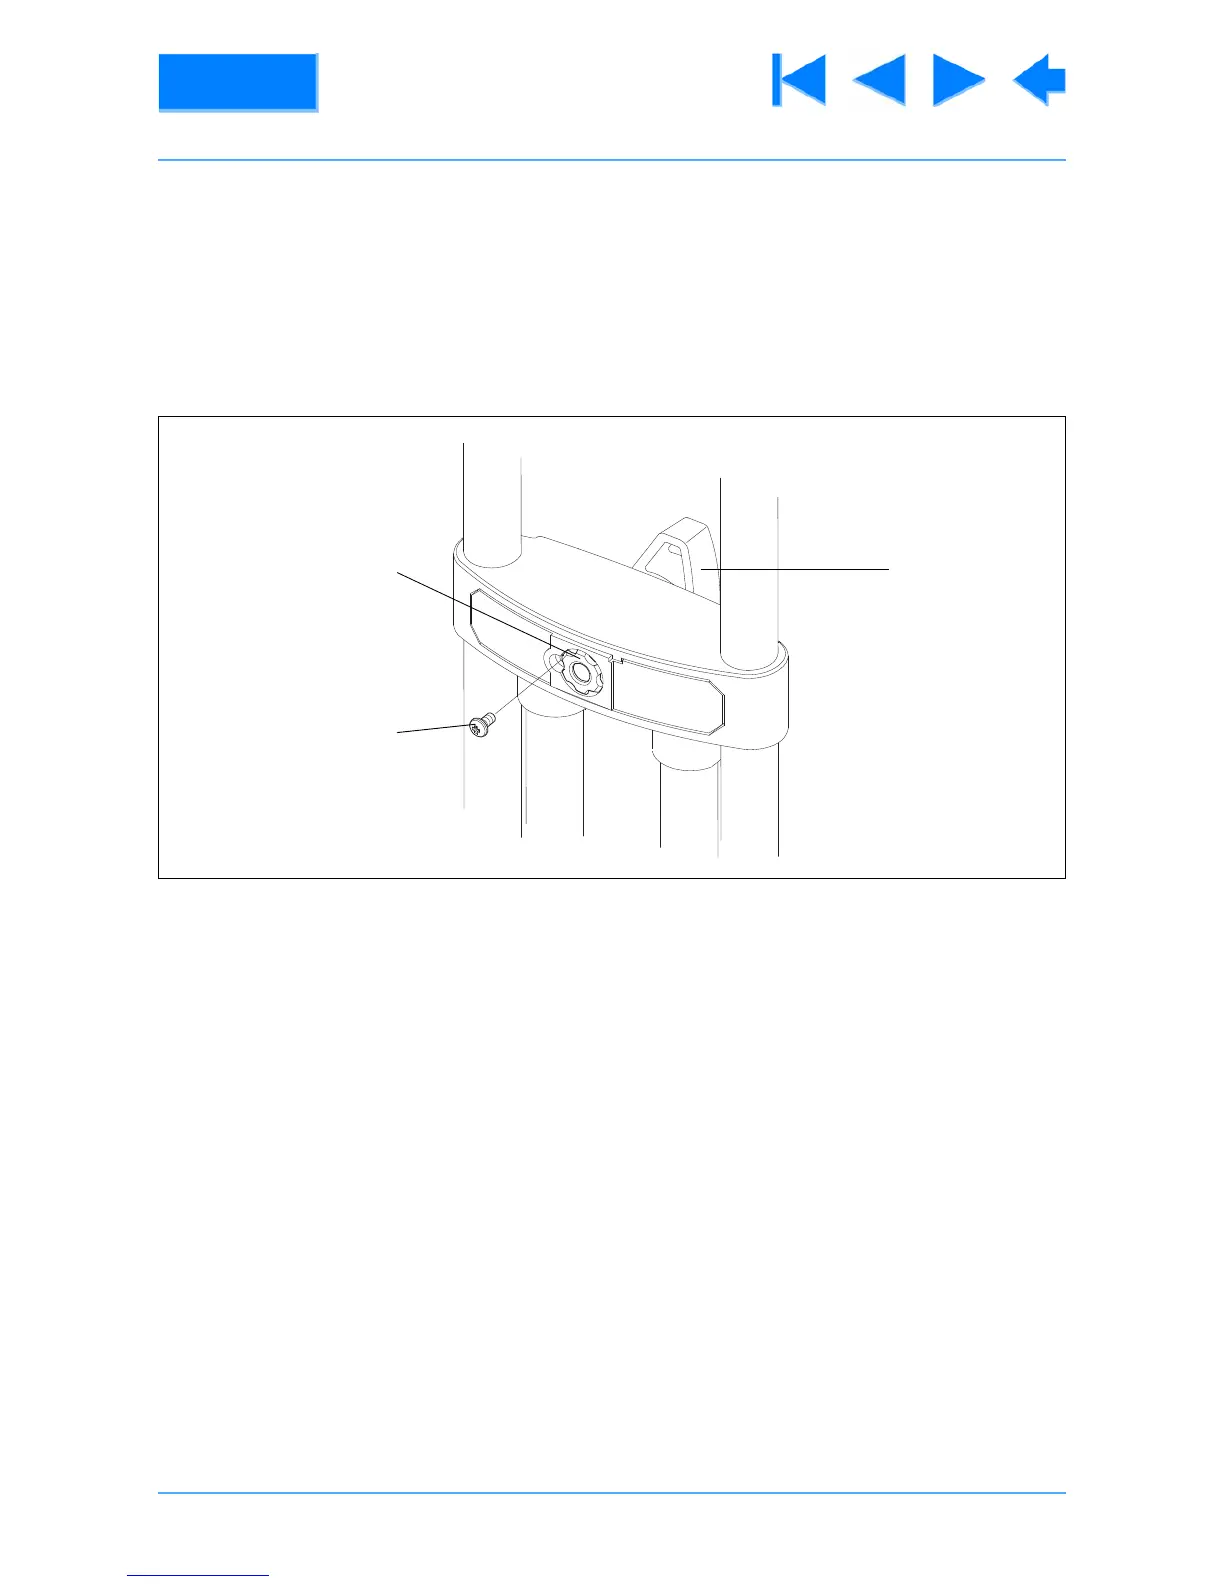
14.3 While sliding the leg in and out, gradually tighten the threaded insert (21.2) until the clamp begins
to grip.
14.4 If not aligned, back off the threaded insert (21.2) until a slot aligns with the hole for screw (21.1).
14.5 Back off the threaded insert (21.2) a further three slots
14.6 Install screw (21.1) to secure the threaded insert (21.2).
Bottom clamp
15 Using a flat-bladed screwdriver, carefully remove the hole plug (21.6) (Fig 4.4).
16 Remove the retaining screw (21.5) and washer (21.4), but do not remove the clamp knob (21).
17 Rotate the clamp knob (21) to ‘position 2’ shown in (Fig 4.4), with the edge of the clamp knob (21)
vertical. In this position the clamp is NOT fully rotated counterclockwise in the ‘off’ position.
18 Using a 2.5 mm hexagonal wrench, loosen the adjusting grubscrew (21.3) until the leg is free to move
under its own weight.
19 While sliding the leg in and out, gradually tighten the adjusting grubscrew (21.3) until the clamp begins
to grip.
20 Rotate the clamp knob (21) fully counterclockwise to the ‘off’ position and ensure that the leg is free to
move under its own weight.
21 Secure the clamp knob (21) with the washer (21.4) and retaining screw (21.5). Refit the hole plug
(21.6).
Fig 4.3 Top clamp adjustment