40
Contents
Previous
Page
First
Page
Next
Page
Previous
View
Installation
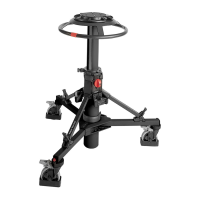
26 Install the tripod leg as follows (Fig 6.7):
26.1 Install two leg pivot friction rings (7) and two leg pivot washers (8) on the tripod leg, oriented as
noted in removal
26.2 Position the leg in the bowl assembly (1), ensuring that the leg pivot friction rings (7) are correctly
seated.
26.3 Install the leg pivot clamps (2) and secure with screws (4) and leg pivot washers (3), using Loctite
221. Tighten screws to a torque of 4.5 Nm (40 lbf in.).
26.4 If required, install the hook (6), using Loctite 221.
Replacing the components of the top clamp assembly
Dismantling
27 Dismantle the top clamp as follows (Fig 6.7):
27.1 Turn the clamp (28) counterclockwise to the ‘OFF’ position.
27.2 Remove screw (14). Using a suitable peg spanner, unscrew and remove the threaded insert (13).
27.3 Remove the clamp assembly (12) from the top clamp moulding.
27.4 Remove the clamp knob (28) and the clamp insert (27). Pull the clamp insert off the shaft of the
clamp knob.
Assembly
28 Assemble the top clamp as follows (Fig 6.7):
28.1 Apply Chesterton 622 grease to the cam surface of the clamp insert (27) and the thread of the
clamp knob (28).
28.2 Install the clamp insert (27) on the clamp knob (28) and position in the top clamp moulding. Turn
the clamp knob (28) to the vertical, ‘off’ position
28.3 Install the clamp assembly (12) in the top clamp moulding.
28.4 Screw the threaded insert (13) onto the shaft of the clamp knob (28).
28.5 While sliding the leg in and out, gradually tighten the threaded insert (13) until the clamp begins
to grip.
28.6 If not aligned, back off the threaded insert (13) until a slot aligns with the hole for screw (14).
28.7 Back off the threaded insert (13) a further three slots and install screw (14) to secure the
threaded insert.
NOTE: Do not apply any lubricant to the bowl, the leg trunnions, leg pivot friction rings or
washers.