17
Contents
Previous
Page
First
Page
Next
Page
Previous
View
Section 2
Operation
Contents Para
General. . . . . . . . . . . . . . . . . . . . . . . . . . . . . . . . . . . . . . . . . . . . . . . . . . . . . . . . . . . . . . . . . . . . . . . . . . . . . . 1
Assembly
Tripod and floor spreader . . . . . . . . . . . . . . . . . . . . . . . . . . . . . . . . . . . . . . . . . . . . . . . . . . . . . . . . . . . . . . 3
Tripod and mid-level spreader . . . . . . . . . . . . . . . . . . . . . . . . . . . . . . . . . . . . . . . . . . . . . . . . . . . . . . . . . . 5
Pan and tilt head . . . . . . . . . . . . . . . . . . . . . . . . . . . . . . . . . . . . . . . . . . . . . . . . . . . . . . . . . . . . . . . . . . . . 8
Mounting the camera . . . . . . . . . . . . . . . . . . . . . . . . . . . . . . . . . . . . . . . . . . . . . . . . . . . . . . . . . . . . . . . . . 10
Checking camera balance . . . . . . . . . . . . . . . . . . . . . . . . . . . . . . . . . . . . . . . . . . . . . . . . . . . . . . . . . . . . . 16
Pan and tilt brakes . . . . . . . . . . . . . . . . . . . . . . . . . . . . . . . . . . . . . . . . . . . . . . . . . . . . . . . . . . . . . . . . . . . 23
Pan and tilt drag . . . . . . . . . . . . . . . . . . . . . . . . . . . . . . . . . . . . . . . . . . . . . . . . . . . . . . . . . . . . . . . . . . . . . 26
General
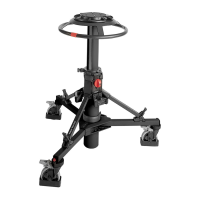
1 To identify components, please refer to Fig 1.1 and Fig 1.2 and Fig 1.3
Assembly
2 If not already done, assemble the system as follows:
Tripod and floor spreader
3 To install the floor spreader Fig 1.2:
3.0.1 Lift the tripod out of the case using the finger holes just below the top clamps.
3.0.2 Release the leg tie strap (25) and spread the legs.
3.0.3 Secure the spreader to the tripod feet with the rubber straps(24).
4 To adjust the tripod:
4.1 Adjust the operating height by undoing the leg clamps (21) and pulling the tripod up to the
desired height. Adjust the spreader (23) if necessary.
4.2 Tighten the clamps (21) until an audible click is heard and the knob is in the horizontal, locked
position.
4.3 In adverse conditions secure the tripod using the tie-down hook (27), or suspend a weight from
the hook.
NOTE: Once assembled, keep the spreader attached to the tripod